# Auth0 integration guide (with OIDC)
Page contents
Signicat’s electronic identity methods (ID methods) can be integrated with an Auth0 tenant to authenticate end-users through the Auth0 platform.
- Auth0 provides an Identity Access Management (IAM) platform that helps companies manage and secure user authentication into applications.
- Signicat provides an identity hub with many ID methods, suitable for onboarding new users and authenticating recurring users. A list of supported providers is available in the ID methods section.
Auth0 customers can easily add Signicat services with simple configuration steps, rather than spending time and effort on development capacity. Using Auth0's Custom Social Connections, you can integrate your tenant with any OAuth 2.0 provider. For example, you can connect to the ID methods offered by Signicat, such as Norwegian BankID.
Follow the instructions on this page to learn how to integrate Signicat's identity hub into your Auth0 tenant using a Custom Social Connection (opens new window) supported by OpenID Connect (OIDC) (opens new window).
# Supported features
Signicat supports an identity hub that is able to provide many different eIDs through a single OIDC integration. This allows you to easily add any ID method to your application in the Auth0 tenant.
Since many different eIDs require specific configurations, the generic eID hub allows for the usage of scopes during the authorisation flow. You can find more information about these scopes in the documentation specific for each identity method.
# Requirements
The first step is to make sure you have both accounts set up correctly.
Here is what you need:
- Access to the Auth0 Dashboard (opens new window).
- Access to the Signicat Dashboard (opens new window).
If you already have access to both Dashboards, skip to the configuration steps section below.
# Auth0 registration
To connect Signicat’s eIDs with Auth0, you need access to the Auth0 Dashboard (opens new window). If you don’t have an Auth0 account, sign up at Auth0.com (opens new window). After registration, Auth0 will provide you with an admin dashboard where you can manage your Auth0 tenant.
# Signicat registration
This section explains how to get started with the Signicat Dashboard (opens new window). If you already have an account with Signicat, you can skip to the configuration steps section below.
To integrate with Signicat services through Auth0, you need to sign up to Signicat. The Signicat Dashboard is where you manage all aspects of your Signicat subscription and configuration. You can sign up for free by following the steps in our sign-up guide.
After you've signed up to Signicat, you have to configure some options to be able to use Signicat's products. Follow the initial setup instructions to set up:
- an organisation.
- an account.
- a domain.
Sandbox account
We recommend you create a sandbox account to test our services before implementing them in production.
# Configuration steps
This section provides an overview of all the configuration steps required to connect Signicat eIDs, as Identity Providers, through your Auth0 tenant.
# Step 1. Create an OIDC client
To establish a connection between the Auth0 tenant and Signicat eIDs you need to use an authentication protocol, like OpenID Connect (OIDC). When adding Signicat as an OAuth 2.0 provider in the Auth0 tenant, you need to register a pair of OIDC client credentials (i.e. a Client ID and a Client Secret).
To create a new OIDC client, navigate to Signicat Dashboard > eID Hub > OIDC clients (opens new window) and click Create Client.
Below a summary and definitions of the values to fill in the form:
Client name: the name of the client, shown to end-users on consent screens.
Primary Grant Type: the grant type you want to use with this client. We strongly recommend AuthorizationCode. For further information about the different grant types, refer to the OIDC specification (opens new window) and the OAuth 2.0 specification (opens new window).
Redirect URI: the redirection URI to which the response will be sent at the end of an OIDC flow. It must be HTTPS and an absolute URI.
Redirect URI
When configuring the OIDC client, enter the redirect URI with format
https://{yourDomain}/login/callback, whereyourDomainis the domain of your Auth0 tenant.Scope: The scopes will determine which attributes are returned as output of the OIDC flow, and the full set depends on the chosen eID method. Different eID methods require different scopes and return different values.
openidis mandatory andprofileis necessary in most cases. Depending on the desired eID, you might need to include other scopes (such asnin, which gives access to national identity number for some eIDs). You can find the details for each eID in the Identity Methods page. For example, see the list of scopes and claims for Norwegian BankID.You can see the definition of
profileand other predefined scopes in the OIDC specification (opens new window). As fornin, this scope requests access to the end-user's national identification number.
# Create a client secret
After you create a client, you can add a secret associated to that client. Click Add secret and enter a name to generate a secret. You can view and add more secrets in the "Secrets" tab of your OIDC client.
Important
Make sure you save your client secret. You will only be able to view your client secret once, right after you create it. If you ever forget it or lose it, you have to create a new one.
Once you have set up the Signicat client credentials for the OIDC connection, you’re ready to proceed with Step 2. Add an eID method and add Signicat’s eIDs to your account.
# Step 2. Add an eID method
This guide shows you how to set up BankID (Norway) in your Signicat account. You can always add more eID methods. Note that certain eID methods require additional configuration and sign agreements with either Signicat or the identity providers to obtain the needed access, in production.
The eID methods associated to your account will be accessible via the Auth0 tenant, once you register your Signicat OIDC client on the Auth0 Dashboard. You can find a list of supported ID methods per country here.
# Add BankID (Norway)
BankID is an electronic identity scheme in Norway that can be used for identity verification, authentication and electronic signing of documents.
To set up BankID:
- Navigate to Signicat Dashboard > eID Hub > ID Methods (opens new window).
- Click Add new.
- Choose "Norwegian BankID" from the list of supported ID methods.
- Click Save.
Norwegian BankID should now appear in the list of available ID methods with the status set to "Active". Learn more about BankID features and advanced configuration options in the dedicated section here.
# Step 3. Create a custom social connection
On the Auth0 Dashboard you can add any OAuth 2.0 provider using a Custom Social Connection. The purpose of this step is to configure the Signicat OIDC client in the Auth0 tenant. The information in this section is specific to configuring a connection with Signicat. You can learn more about general configuration of Custom Social Connections in the Auth0 documentation (opens new window).
# Create a connection
To create a new Custom Social Connection, navigate to Auth0 Dashboard > Authentication > Social (opens new window), click Create Connection, scroll to the bottom of the list and click Create Custom.
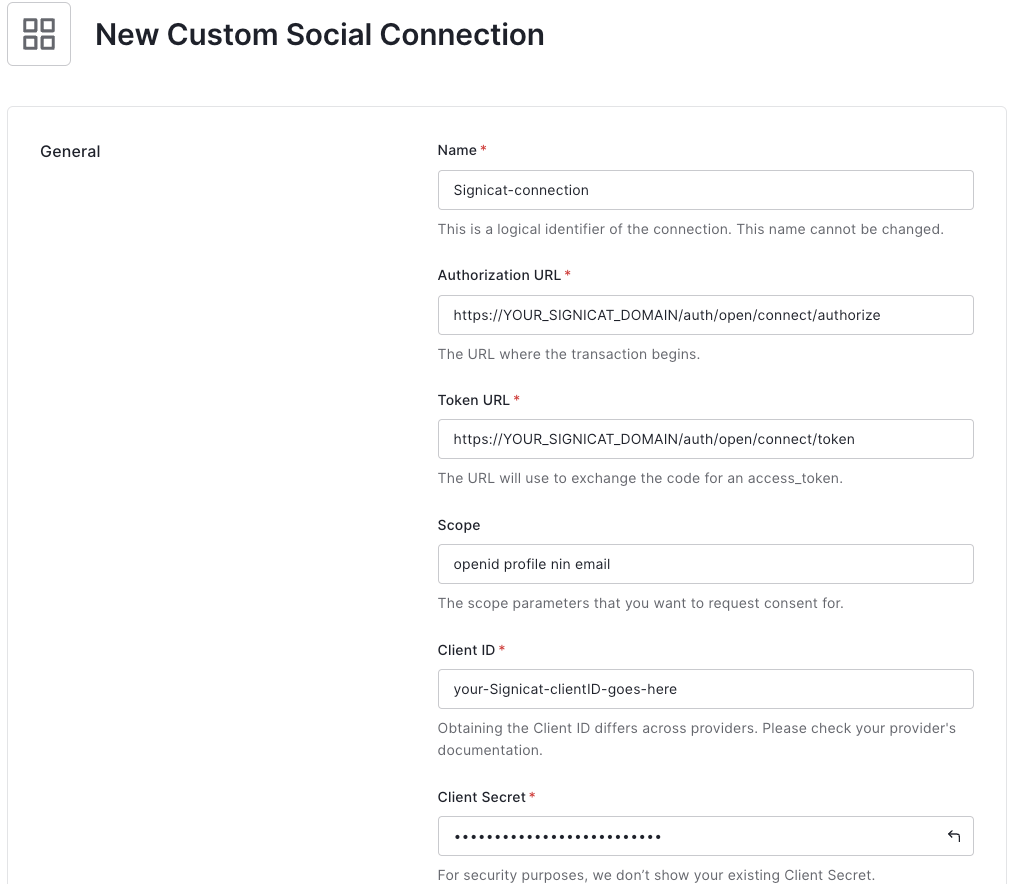
To configure a connection, fill in the form with the following information:
- Name: the name of the connection. The name cannot be changed, must start and end with an alphanumeric character, and can only contain alphanumeric characters and dashes.
- Authorization URL:
https://<YOUR_SIGNICAT_DOMAIN>/auth/open/connect/authorize, where the<YOUR_SIGNICAT_DOMAIN>is the domain defined in the Signicat Dashboard > Domains (opens new window). - Token URL: URL used to exchange the received authorization code for access tokens and, if requested, ID tokens. Enter
https://<YOUR_SIGNICAT_DOMAIN>/auth/open/connect/token. - Scope: the OIDC scopes to send with the authorisation request. Separate multiple scopes with spaces. You can explore more scopes for BankID in the Scopes and claims mapping for OIDC.
Important
The scopes you enter here must match the scopes you defined for the OIDC client in the Signicat Dashboard.
- Client ID: the Client ID associated to your OIDC client.
- Client Secret: the client secret associated to your OIDC client.
- Fetch User Profile Script: Node.js script used to call a UserInfo URL with the provided access token and retrieve claims data. Learn how to write a script in the Fetch User Profile Script section below.
# Fetch User Profile Script
The UserInfo endpoint is part of the OpenID Connect standard (OIDC) specification (opens new window) and is designed to return claims about the authenticated user.
To obtain the data of the requested claims from the UserInfo endpoint, you can define a custom code snippet in Node.js.
Here is an example script:
Show me (click the arrow)
function(accessToken, ctx, callback) {
    const profile = {};
    request.get(
    {
      url: 'https://<YOUR_SIGNICAT_DOMAIN>/auth/open/connect/userinfo',
      headers: {
        'Authorization': 'Bearer ' + accessToken,
      }
    },
    (err, resp, body) => {
      if (err) {
        return callback(err);
      }
      if (resp.statusCode !== 200) {
        return callback(new Error(body));
      }
      let bodyParsed;
      try {
        bodyParsed = JSON.parse(body);
      } catch (jsonError) {
        return callback(new Error(body));
      }
      const profile = {
        user_id: bodyParsed.sub,
        name: bodyParsed.name,
        given_name: bodyParsed.given_name,
        family_name: bodyParsed.family_name
      };
      callback(null, profile);
    }
  );
}
Here are a few details:
url: is the UserInfo URL of your Signicat domain. Substitute<YOUR_SIGNICAT_DOMAIN>with the domain (opens new window) associated to your account.const profiledetermines the attributes returned from the information the end-user consents to (if necessary) during authentication.bodyParsedis the parsed JSON of the response body sent from the ID method (broker). You can access attributes from the UserInfo response with the values in the formatbodyParsed.<claim>, such asbodyParsed.given_name.
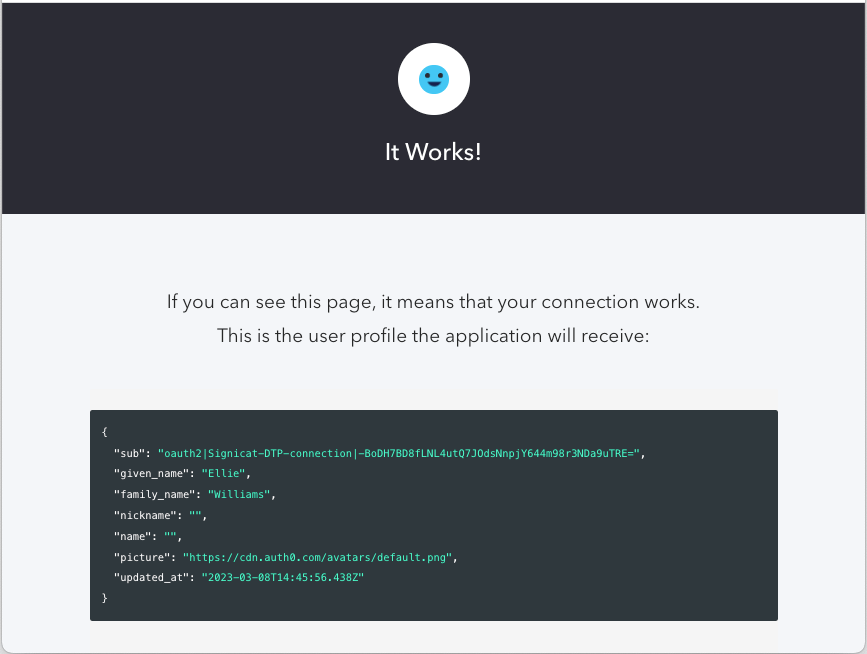
Using the above script in a test connection would return the following data:
Show me (click the arrow)
{
  ...
  "sub": "oauth2|Signicat-connection|-BoDH7BDacLNL4ut********44m98r3NDa9uTRE=",
  "family_name": "Williams",
  "given_name": "Ellie",
  "nickname": "",
  "name": "",
  "picture": "https://cdn.auth0.com/avatars/default.png",
  ...
}
You can manage your users from Auth0 Dashboard > User Management > Users (opens new window). This is where you can view the Raw JSON data returned by the end-user login flow.
# Advanced Fetch User Profile Script
You can expand the profile to include more attributes. For example, you can retrieve birthdate and nin (national identity number) information by adding more fields like:
Show me (click the arrow)
    // omitted for brevity
    const profile = {
      user_id: bodyParsed.sub,
      name: bodyParsed.given_name + ' ' + bodyParsed.family_name,
      given_name: bodyParsed.given_name,
      family_name: bodyParsed.family_name,
      birthdate: bodyParsed.birthdate,
      nin: bodyParsed.nin
    };
    // omitted for brevity
In this case, the user profile data received is:
Show me (click the arrow)
{
  ...
  "sub": "oauth2|Signicat-connection|-BoDH7BD8fLNL4ut******44m98r3NDa9uTRE=",
  "birthdate": "1908-09-29",
  "family_name": "Williams",
  "given_name": "Ellie",
  "name": "Ellie Williams",
  "nickname": "Ellie Williams",
  "nin": "29090816894",
  "picture": "https://cdn.auth0.com/avatars/default.png",
  ...
}
You can customise the attributes of the profile returned by the identity provider. The number of attributes you can retrieve depends on a few factors, such as the identity provider, the user consent, the configuration of your Auth0 tenant, and (importantly) the scopes you configure with your OIDC client. You can explore the Signicat scopes (and corresponding claims) for Norwegian BankID in the Scopes and claims mapping for OIDC.
# Add the Application
Once you create a custom connection, you will see the Applications view. Here, you can enable and disable applications for which you would like the connection to appear. If you don't have any applications in your account, please create an Application (opens new window).
Click on the toggle button to enable at least one Application. For example, you can link the connection to a Single Page Application, or any other application of your choice.
You are all set! You can now test the connection and authenticate with a test user for Norwegian BankID before going live in production.
# Step 4. Test the connection
To test the configured flow, you can either add the OIDC flow to an frontend application or try the connection directly from the Auth0 tenant.
To test the OIDC flow from the Auth0 tenant, navigate to the Auth0 Dashboard > Authentication > Social (opens new window), click the Social Connection you created and click Try connection to start the user authentication flow.
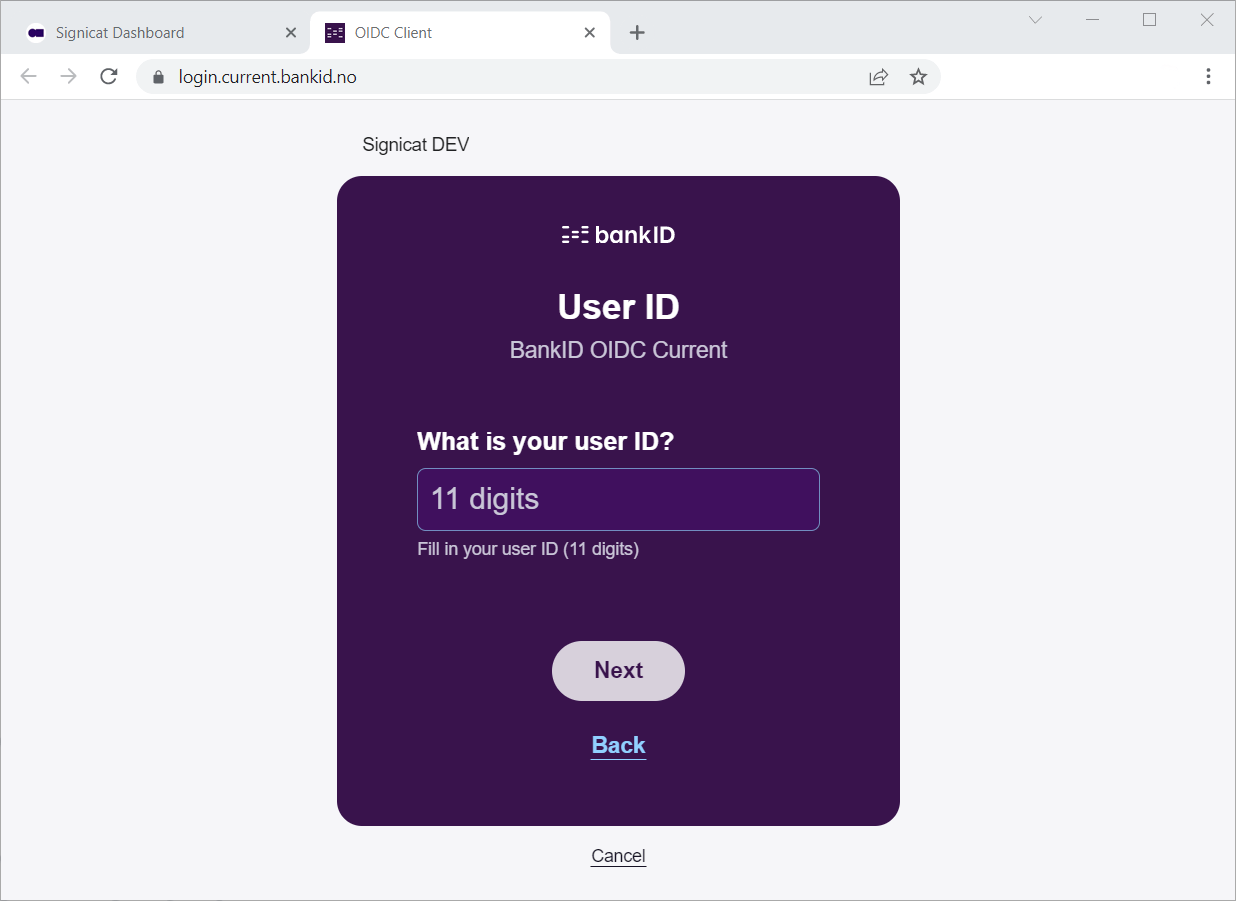
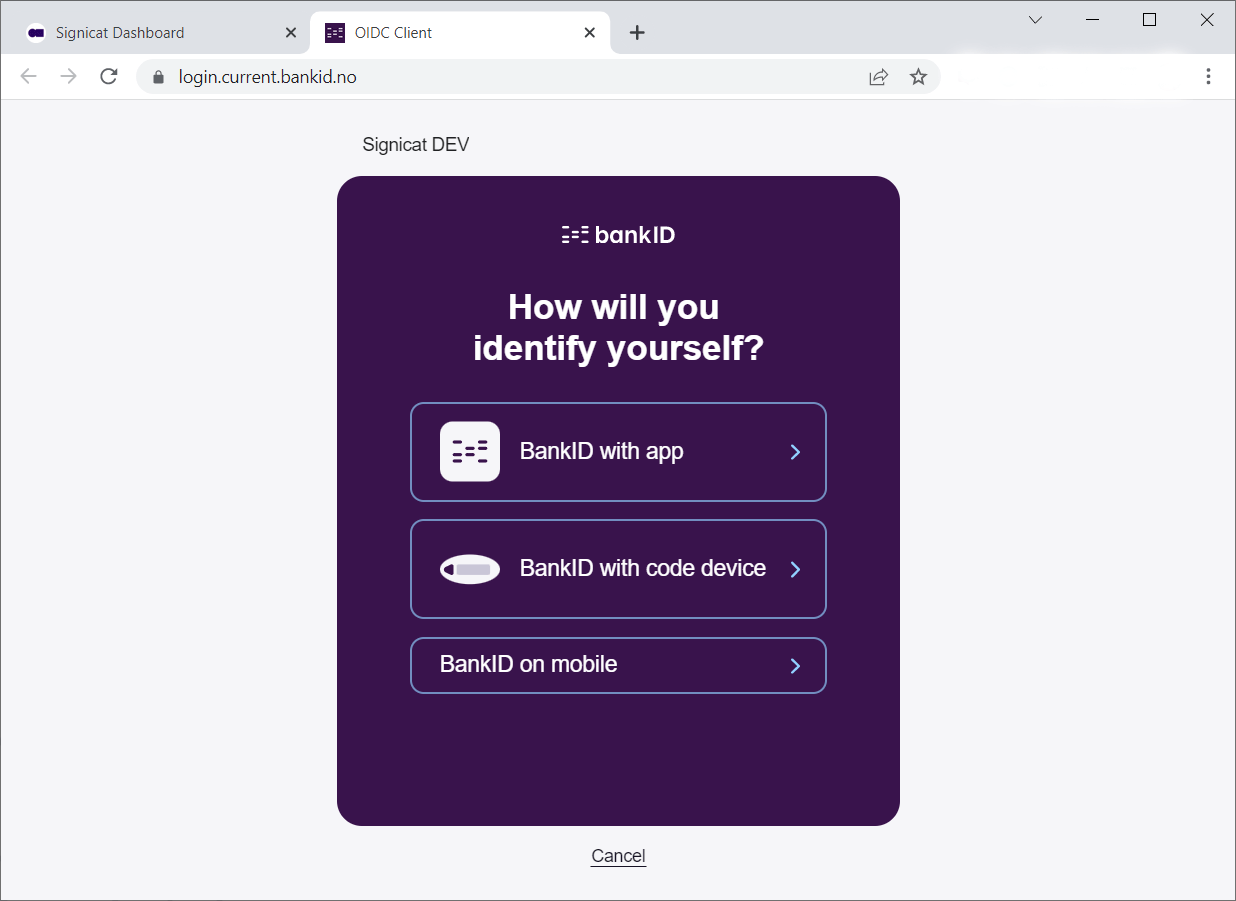
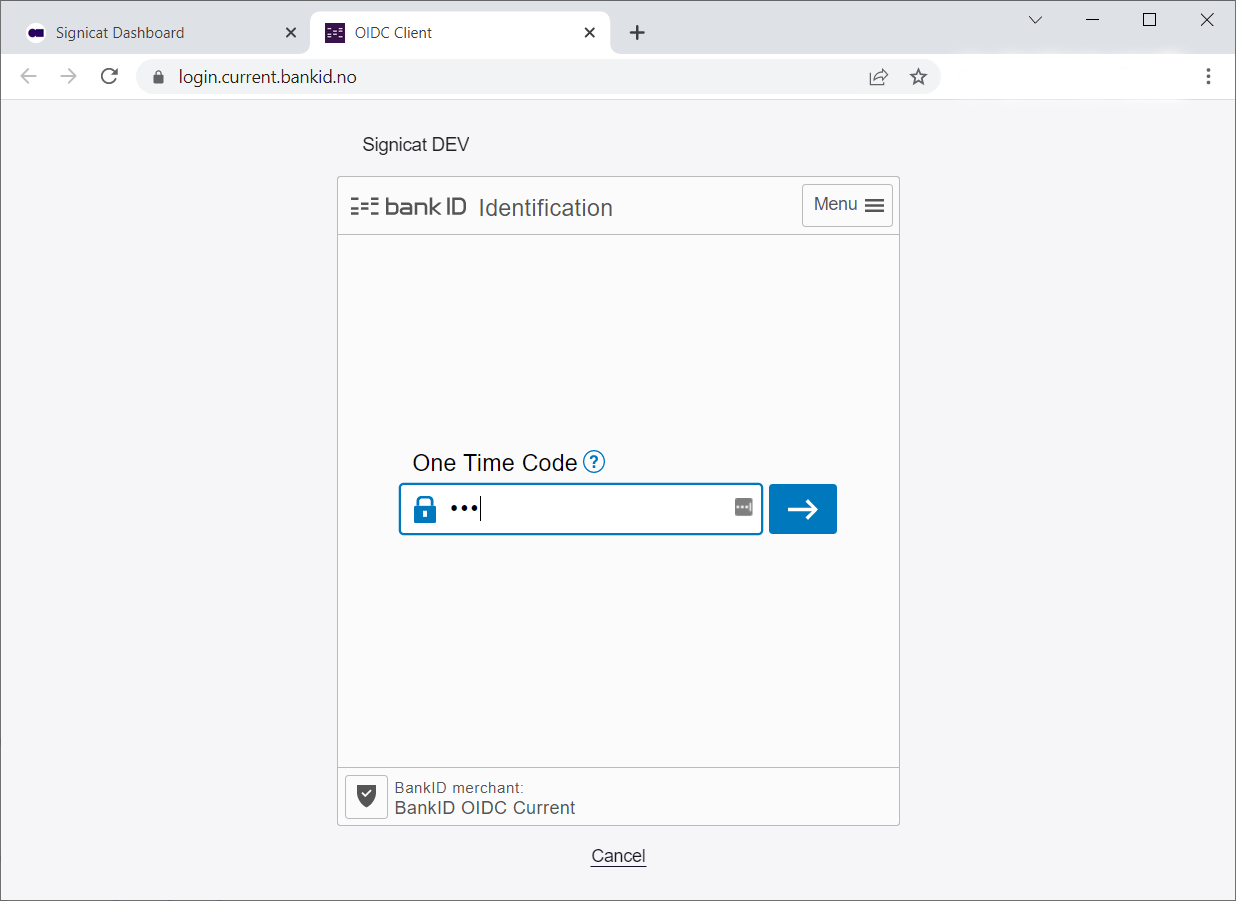
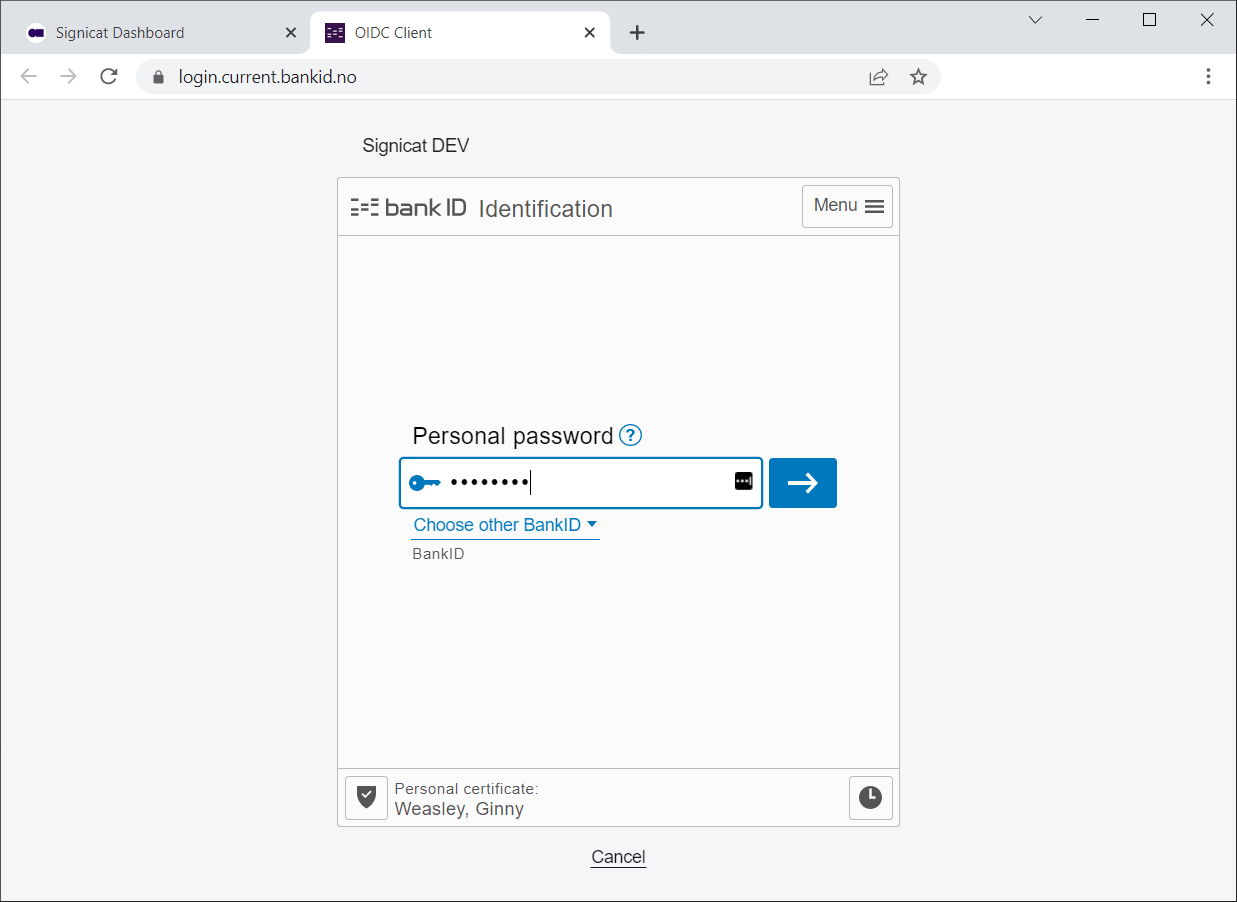
Choose Norwegian BankID and sign in with a test user as follows:
| National identity number | One time password | Password |
|---|---|---|
29090816894 | otp | qwer1234 |
Here is how a user flow looks like (with BankID app):
# Step 5. Go live
To implement the flow in production, set up the Signicat OIDC client from a production account in the Signicat Dashboard. Choose a production account in the Signicat Dashboard > Organisation management (opens new window) and repeat the steps in this guide.
Agreements required
Note that while the technical implementation steps stay the same, you must sign an agreement with Signicat to start accepting authentication from real legal persons.
To sign an agreement, log into the Signicat Dashboard (opens new window) and click 'Talk to sales' in the banner at the top of the page.
Also, take a look at the Auth0 pre-deployment checks (opens new window) to make sure the entire setup is ready to be launched in a production environment!
If you have any questions about the integration, please contact us at support@signicat.com.
← Error codes Overview →