# Initial setup instructions
By now, it is assumed you have already signed up to Signicat. When you first log in to the Signicat Dashboard, it is empty. You have to configure some options to be able to use Signicat's products. At the very least, you have to create an organisation and an account.
Depending on the Signicat product you wish to add in the Dashboard, you may need to add a domain and set up an API client before you can start using the product. You can find more information about any requirements in the documentation of the product you intend to use.
The order of steps we advise is as follows:
- Create an organisation
- Create an account
- Add a domain to your account
- Set up an API client (optional)
Glossary
Some of the terms we use may be unfamiliar to you. If there's anything you don't understand, refer to our glossary for more information.
# Create an organisation
# What is an organisation?
An organisation is the higher level of hierarchy in the Dashboard. An organisation represents a legal entity with a VAT number so, in most cases, you only need to create one, which represents your company.
An organisation can have several accounts under it, since each account has its own domain, permissions and branding. The information in each account is stored separately, which may be an important consideration depending on your needs. Having separate accounts can also be helpful for billing purposes (e.g. if two departments within your company are using Signicat products). Finally, it allows you to thoroughly control how each account is used.
# How to create an organisation
- Log in to the Dashboard (opens new window).
- Click Get started.
- Using the dropdown at the top left click Create organisation. If you have already created an organisation previously, click the name of your organisation in the top left and then select Manage.
- Enter the name of your organisation and click Create.
Done! You can always add more organisations by repeating steps 3 and 4 above. The next step is to create an account.
# Create an account
# Account types
When creating an account, you can choose between a sandbox account or a production account.
Sandbox accounts
Opt for a sandbox account if you wish to test your integration with any Signicat product using dummy data. A sandbox account is a trial environment where you can play around with and test your integration.
Production accounts
Production accounts contain real data and allow you to purchase products in the Marketplace. You must use a production account to integrate your application with Signicat in a live environment.
Note
It is not possible to edit the account type after creation. You can create multiple accounts under the same organisation.
# How to create an account
- Log in to the Dashboard (opens new window).
- Click the name of your organisation at the top left of the screen and then select Manage.
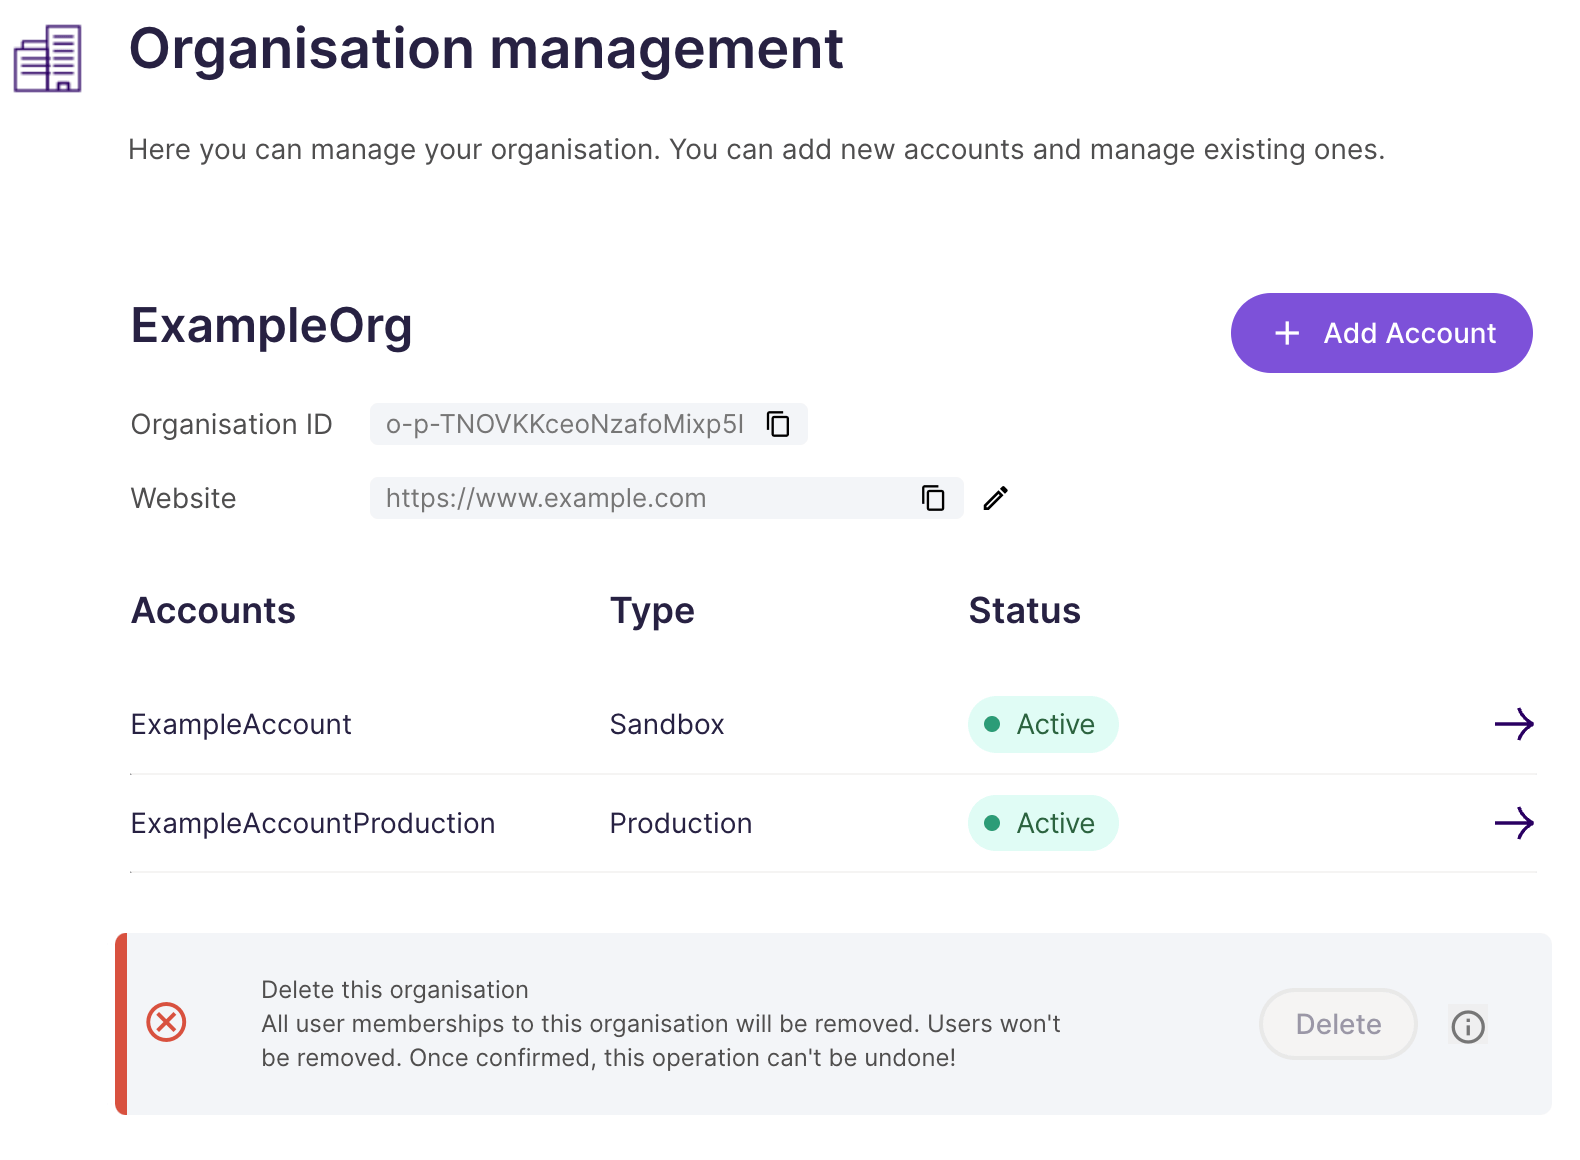
- Under Organisation management, click Add Account.
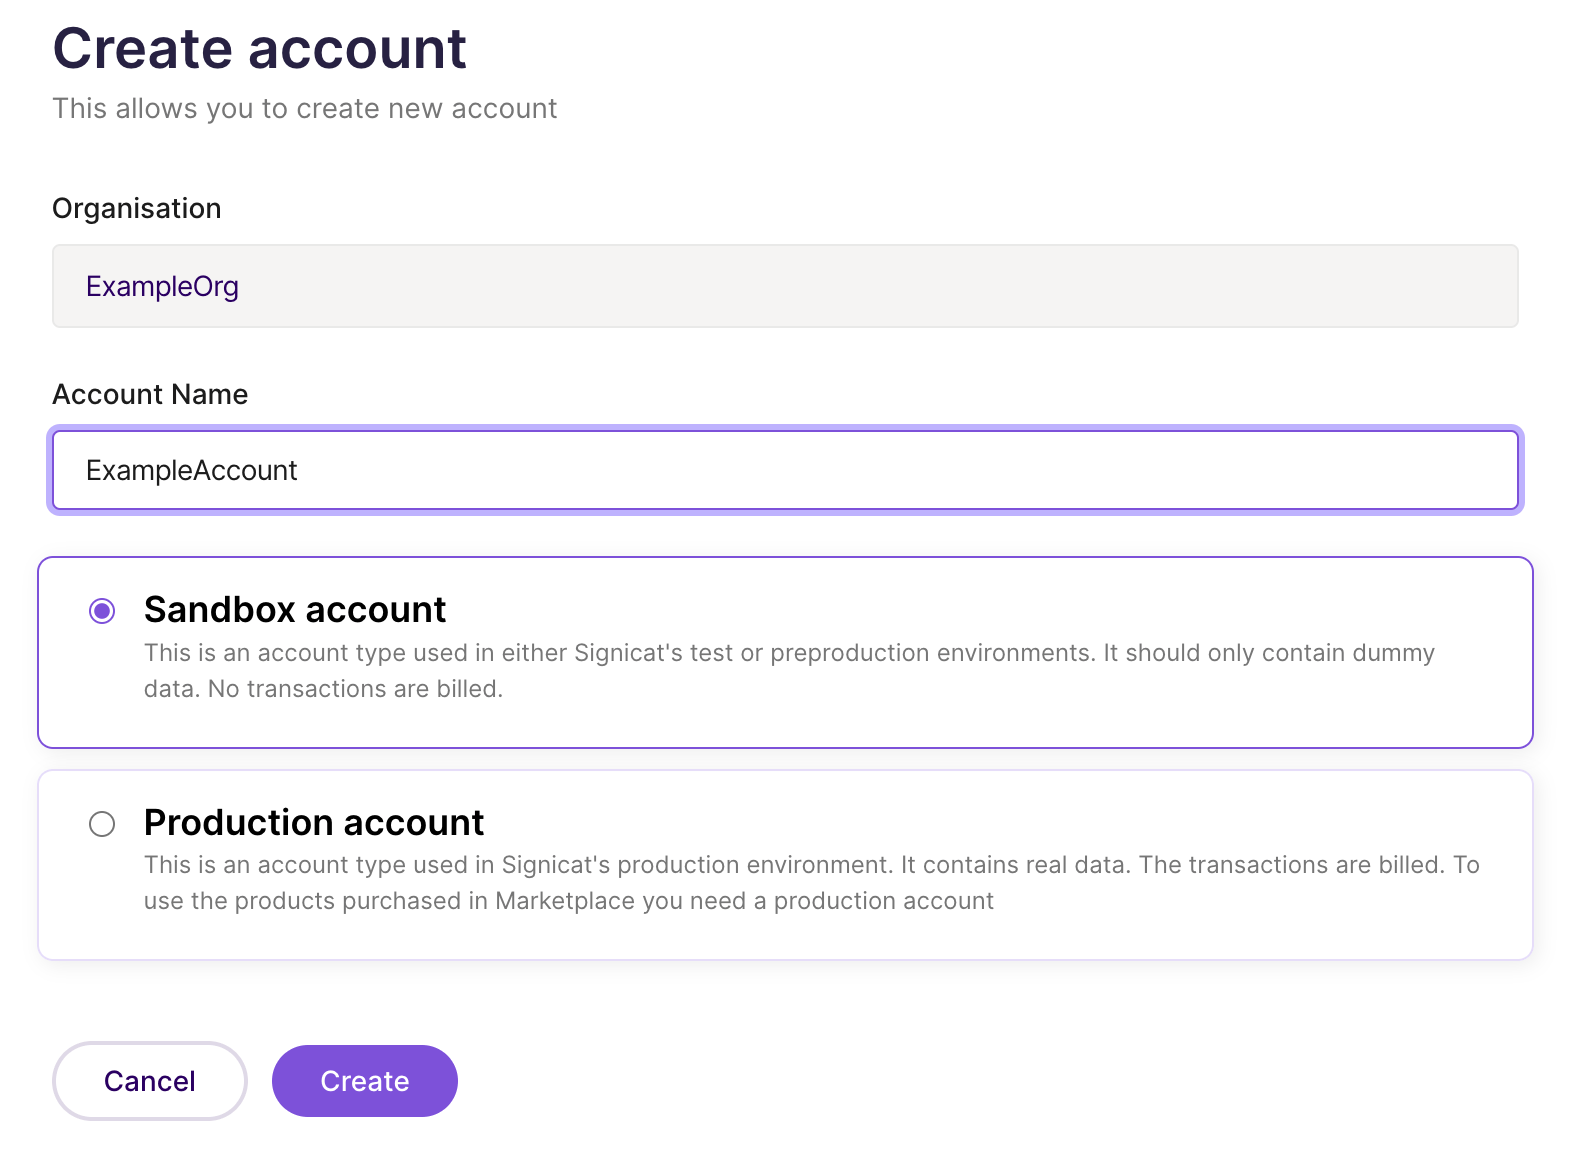
- Enter the name of your account under Account Name.
- Tick the box of the account type you wish to create, either Sandbox account or Production account.
- Click Create to create the new account.
# Add a domain
Domains are pointers to Signicat operational environment and determine the URL where Signicat products and metadata are available.
When you add a domain to your account, you can choose between a standard Signicat domain and your own custom domain.
- Standard Signicat domain: Get set up without any changes to your DNS configuration, using a Signicat subdomain address such as
YOUR_DOMAIN.app.signicat.com. - Custom domain: The URL visible to your end-users displays your brand only, using for example
login.YOUR_DOMAIN.cominstead of a Signicat subdomain. When logging in or signing documents, the user won't notice redirects to an external website during these processes.
Note
Certain products require a custom domain for integration purposes. Refer to the product documentation to check whether a custom domain is necessary.
Learn how to configure each option below.
# Standard Signicat domain
A standard Signicat domain lets you customise your own label/subdomain under a Signicat domain, for example mycompany.app.signicat.com. Note that standard Signicat domains use Let's Encrypt (opens new window) certificates.
To add a standard Signicat domain, go to the Dashboard (opens new window) and:
- Click the name of your organisation at the top left of the screen and then select Manage.
- Under Organisation management, select an account, then click Domains.
- Click Add domain.
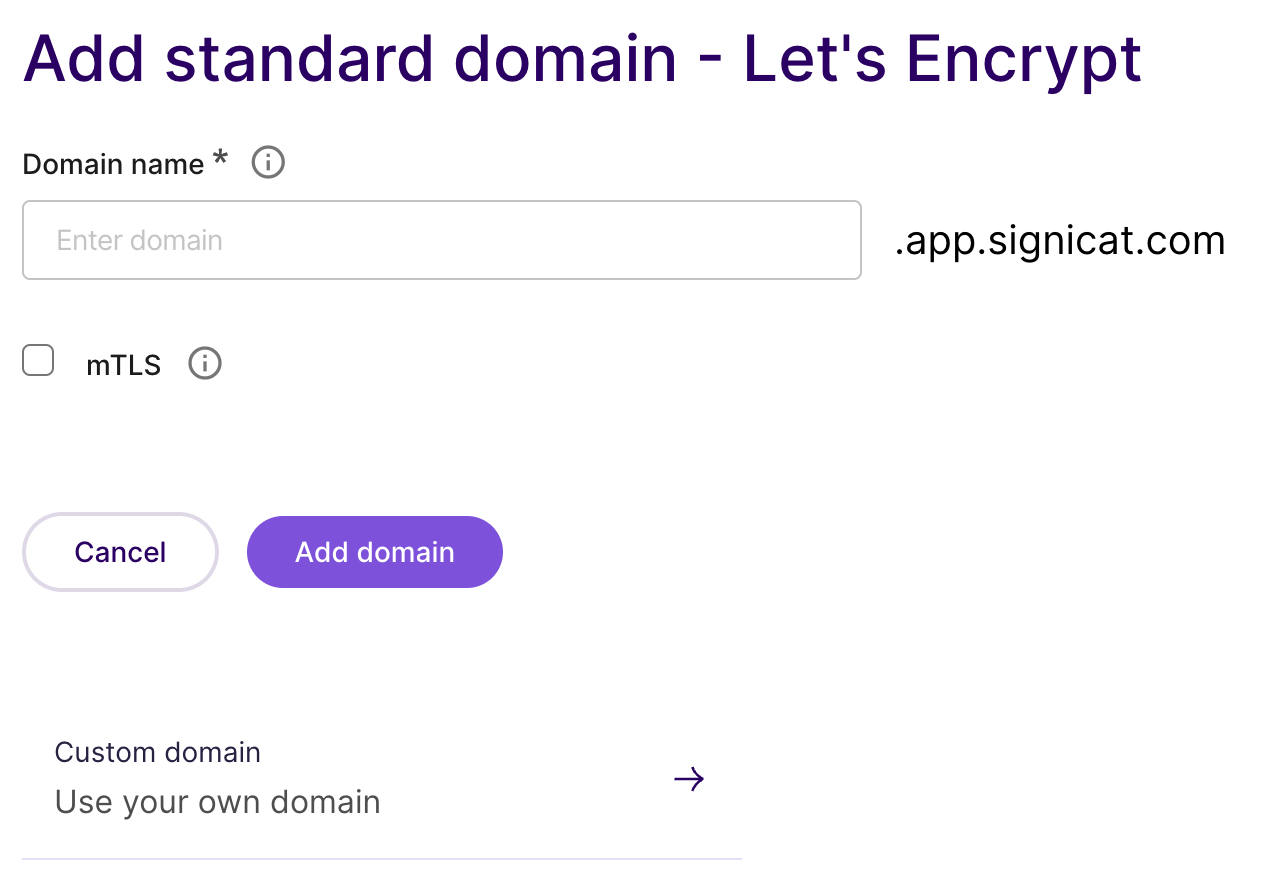
- To add a standard Signicat domain, enter the name of your label/subdomain in the Domain name field.
- Click Add domain to create the new domain.
Remember to update your application's code and configuration to point to the standard domain address.
Note that the address of a Signicat domain varies depending on the type of account:
| Account type | Subdomain |
|---|---|
| Sandbox account | mycompany.sandbox.signicat.com |
| Production account | mycompany.app.signicat.com |
# Custom domains
When you opt for a custom domain, you can choose between the following options:
- Signicat-managed certificate with Let's Encrypt (opens new window). You only need to configure your DNS settings to point to the custom domain. Signicat handles certificate management and renewal.
- Self-managed certificate. Opt for this option when you want to manage your own SSL/TLS certificates or use Organisation Validated (OV) and Extended Validation (EV) certificates.
# Custom domain with Signicat-managed certificate
When you choose a Signicat-managed custom domain, Signicat handles certificate management, including creation with Let's Encrypt, installation and renewal thus saving you time and effort.
You only need to configure an additional CNAME DNS record on your domain prefixed with _acme-challenge. This allows Signicat to perform ACME DNS challenges for your custom domain. The generated certificates are stored on Signicat servers and are renewed automatically.
To set up your custom domain with Signicat-managed certificates, you must add your domain name in the Signicat Dashboard and then configure the shown CNAME record with your DNS provider. This forwards traffic targeting your custom domain to our servers.
# Add your domain name
Log in to the Dashboard (opens new window).
Click the name of your organisation at the top left of the screen and then select Manage. Under Organisation management, select an account, then click Domains.
Click Add domain.
Click Custom domain at the bottom of the page to proceed.
In the Domain name field, enter the URL of the domain that you want to use for this account.
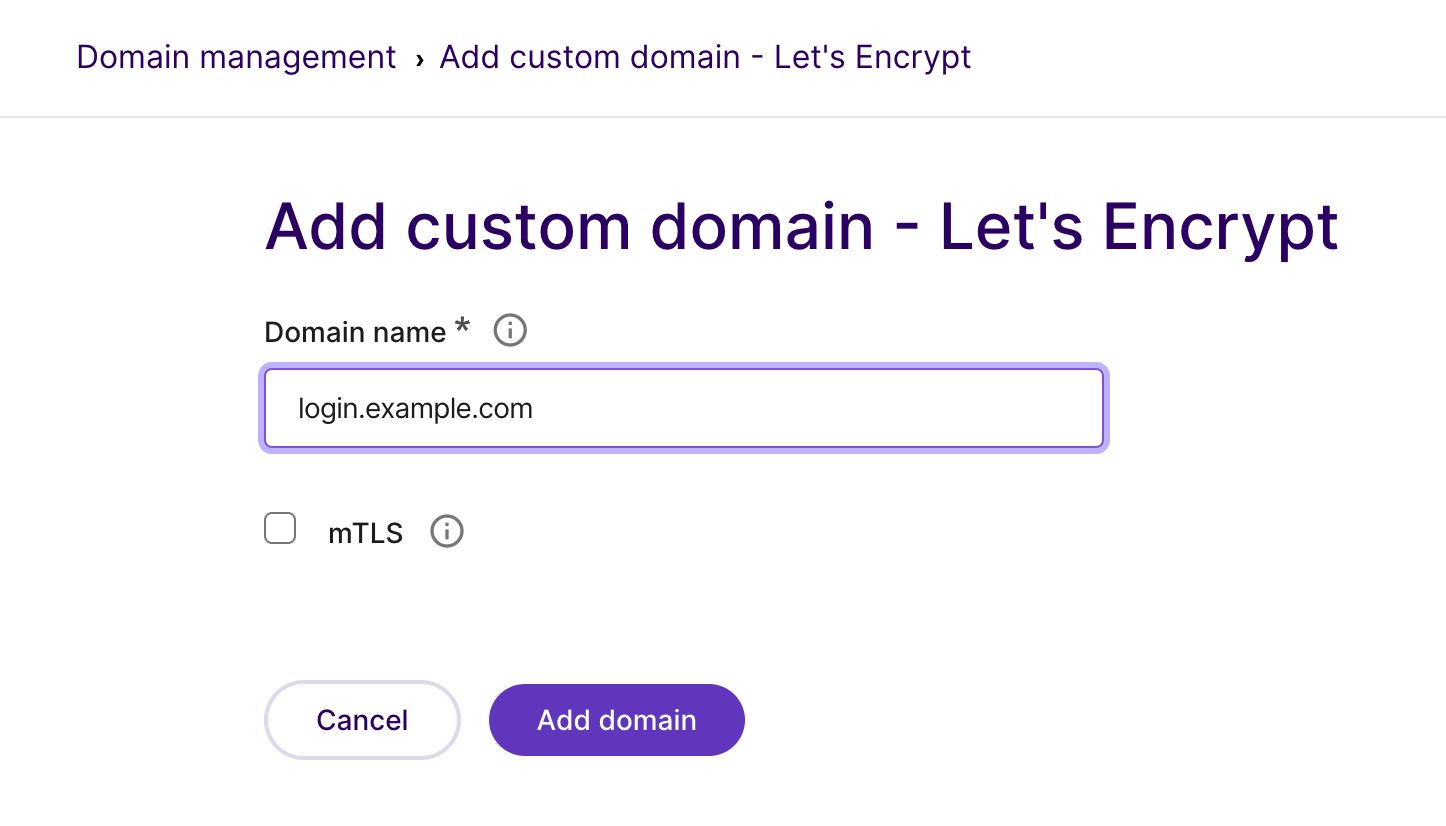
Click Add domain to create your custom domain.
Before you can use the domain, you must configure the CNAME record with your DNS provider.
# Configure the CNAME record with your DNS provider
Copy the value of the CNAME record displayed in the View domain page of the Dashboard.
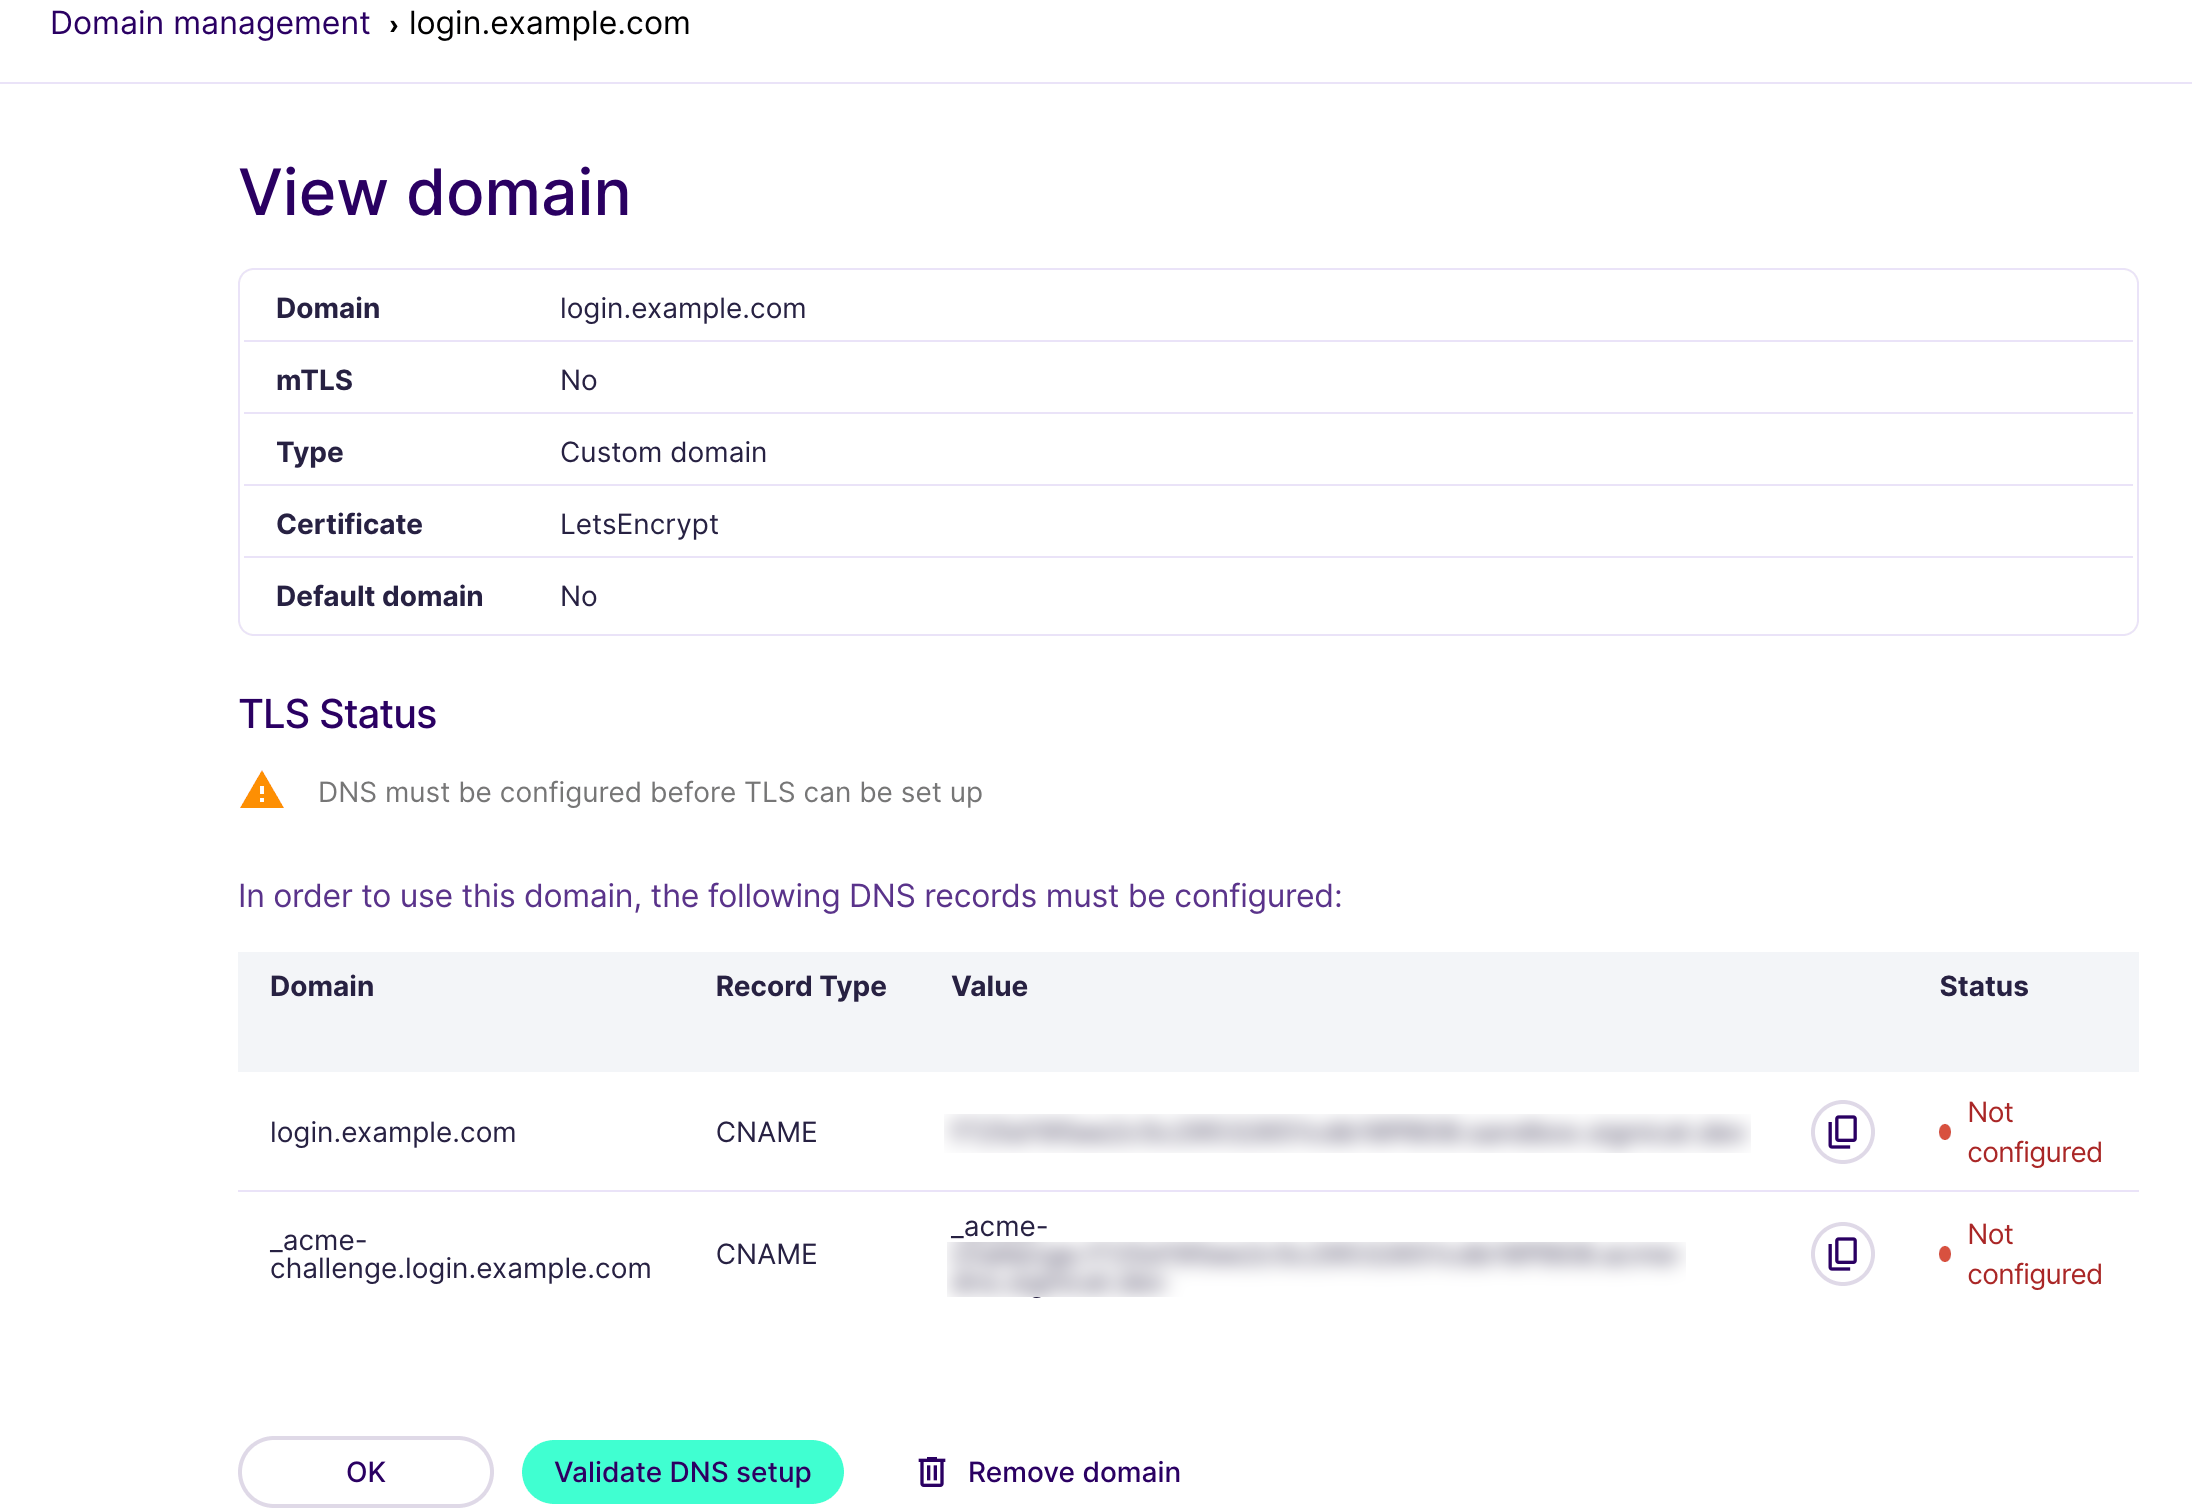
Add the value of the CNAME record to your domain's DNS record. You need to add the record in the portal of your DNS provider.
Back in the View domain page, click Validate DNS setup to verify your domain.
Now, Let's Encrypt reviews your DNS record using “challenges” as defined by the ACME standard. If it matches your configuration, Signicat gets approval to request a certificate for your custom domain. Then, Signicat requests and installs a certificate for your custom domain. If you encounter any issues in the process, you can contact us at support@signicat.com.
Remember to update your application's code and configuration to use the custom domain you have created.
# Custom domain with self-managed certificate
Using self-managed certificates, lets you have more control over your certificates, such as choosing a Certificate Authority (CA), the type of certificate and renewal times.
If you choose to manage the certificates for your custom domains, you have to purchase and provide the certificates to Signicat. Note that with self-manage certificates you need to:
- Manually update the certificates before they expire. Signicat notifies you when your certificate is about to expire.
- Manage intermediate certificates.
- Know how to configure your server, proxy and security settings to ensure secure communication.
- Monitor and address any SSL/TLS errors or performance issues related to your custom domain.
To set up your custom domain using self-managed certificates, you need to provide your domain name to Signicat, create a certificate signing request, obtain a certificate and upload your certificate in the Dashboard. Learn more about each step below.
# Add your domain name
To add a custom domain with your custom SSL/TLS certificate:
Log in to the Dashboard (opens new window).
Click the name of your organisation at the top left of the screen and then select Manage. Under Organisation management, select an account, then click Domains.
Click Add domain > Custom domain > Custom certificate.
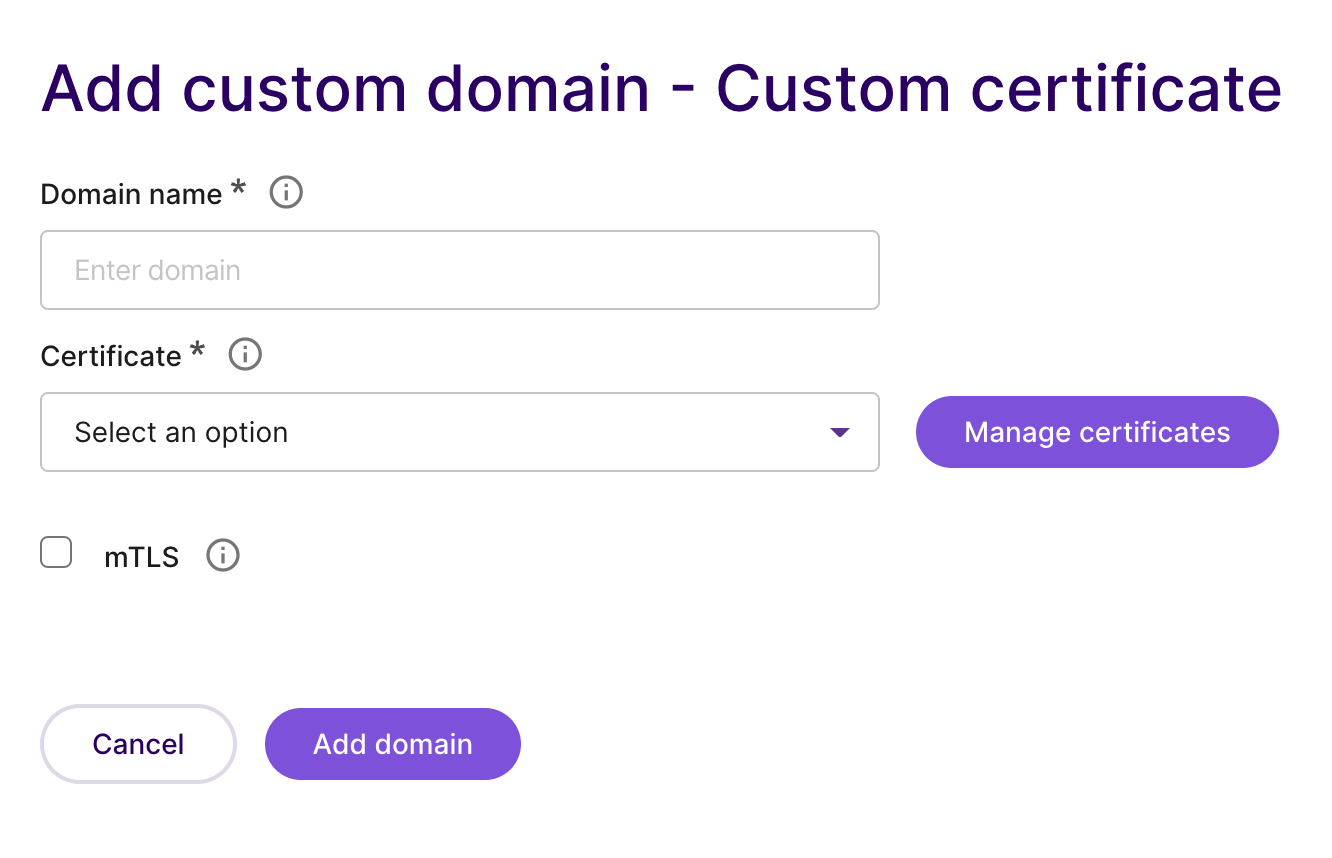
In the Domain name field, enter the URL of the domain that you want to use for this account.
In the Certificate field, select the SSL/TLS certificate you want to use for your custom domain. If you don't have any certificates yet, you must first create a Certificate Signing Request (CSR) and then upload your SSL/TLS certificate as explained below.
# Create a Certificate Signing Request (CSR)
A CSR contains information about your business so the Certificate Authority (CA) can verify your business identity.
Before you can purchase an SSL/TLS certificate, generate a CSR in the Dashboard. To do this:
Click Manage certificates.
Under "Pending certificate signing requests", click Add CSR.
Fill in the fields in the form:
Information Distinguished Names Description Example Common name CNThe fully qualified domain name (FQDN) (opens new window) to secure for your integration. *.example.com Organisation name ORegistered legal name of your organisation. Signicat AS Organisation unit OUInternal organisation department/division name IT State or province STProvince, region, county or state. Noord-Holland Serial number - A number that uniquely identifies the certificate and is issued by the certification authority. Subject alternative names - Optional. Comma-separated list of additional domains. Locality LTown, city, village name. Amsterdam Country CThe two-letter ISO country code (opens new window) where your organisation is registered. NL 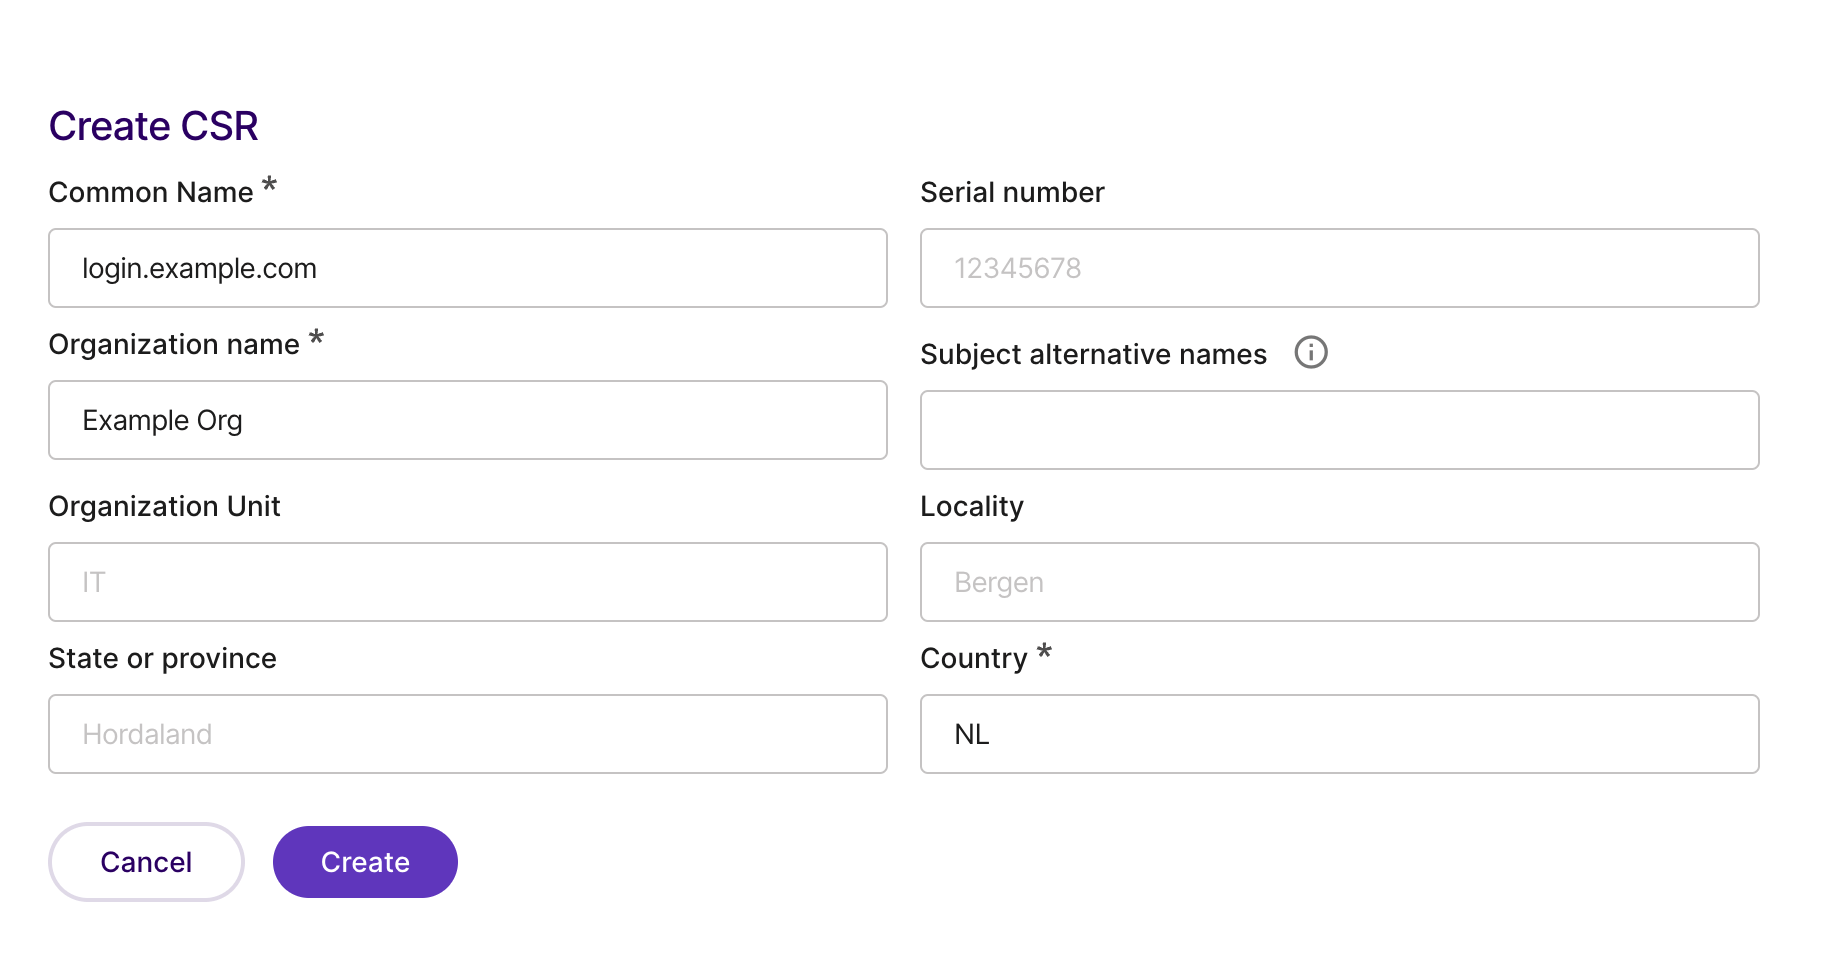
Click Create to create the CSR.
After you create the CSR, you can view and download the CSR under "Pending certificate signing requests".
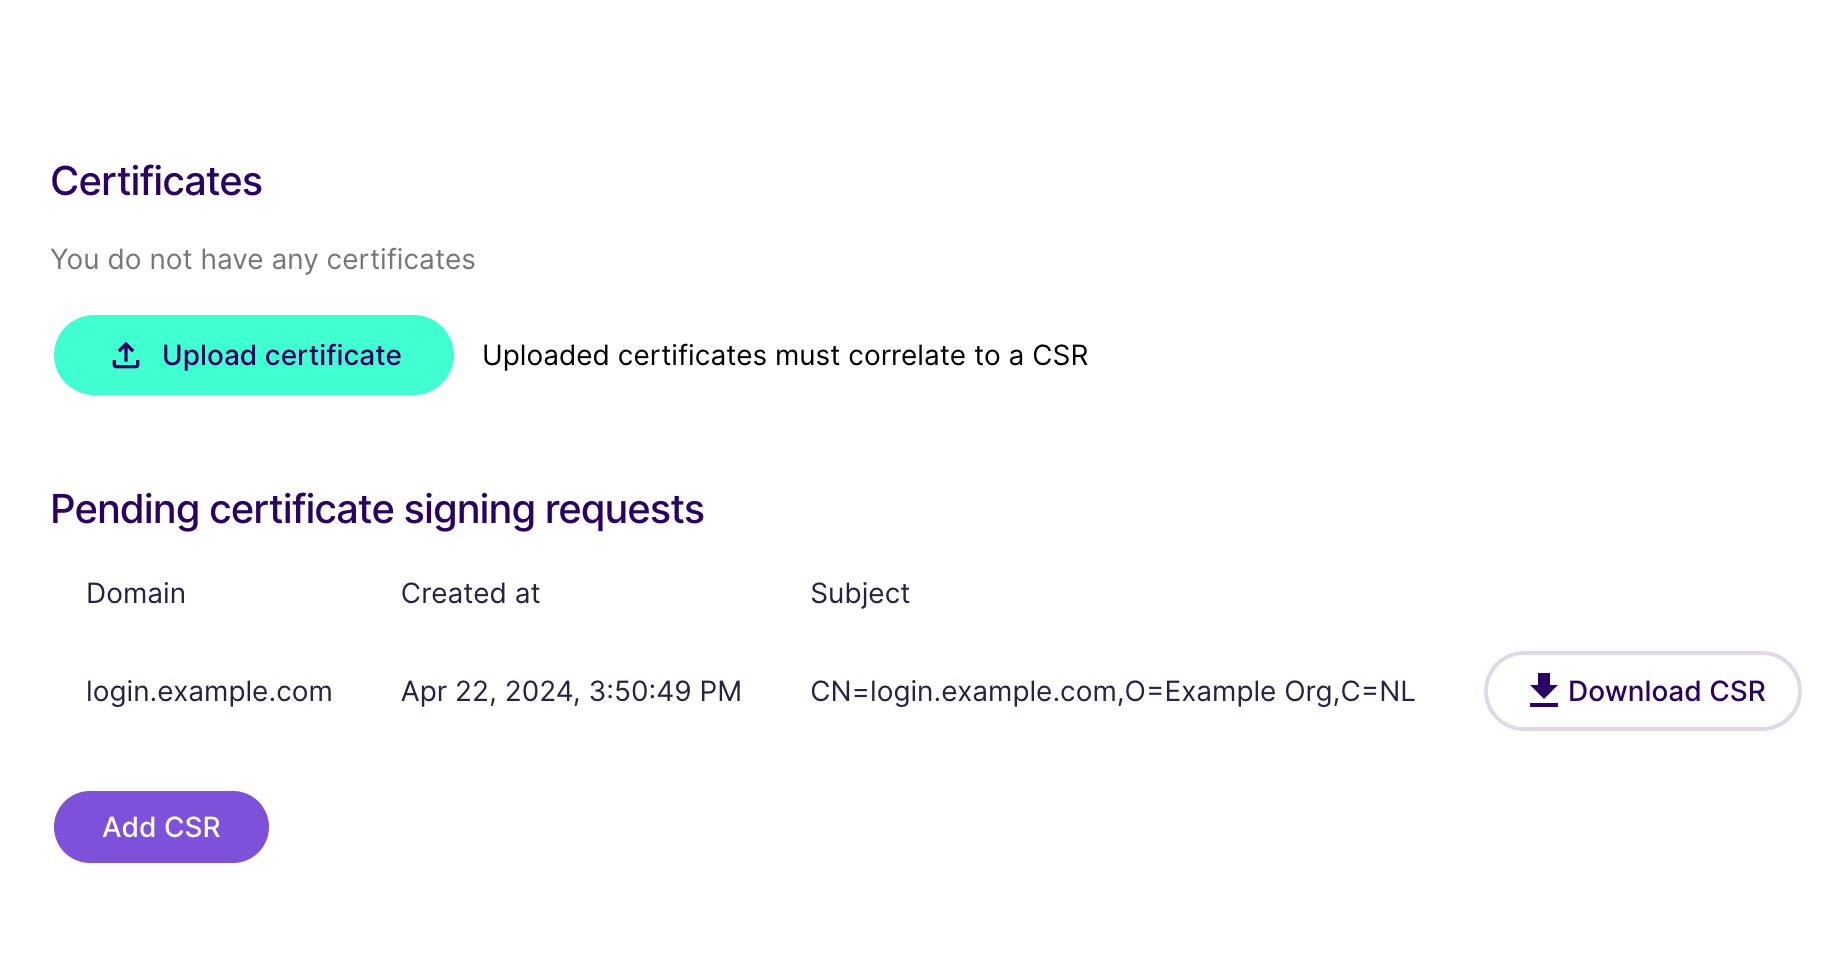
You need the CSR when applying for an SSL/TLS certificate with a Certificate Authority.
Below is an example of what CSR certificates look like:
-----BEGIN CERTIFICATE REQUEST-----
...Base64-encoded string...
-----END CERTIFICATE REQUEST-----
# Upload your certificate
Obtain a certificate
When purchasing a certificate from a CA, you should explicitly use the CSR provided by Signicat.
After you have purchased an SSL/TLS certificate:
- Log in to the Dashboard (opens new window).
- Return to the Custom certificate page in the Dashboard.
- Click Upload certificate.
If you encounter any issues in the process, you can contact us at support@signicat.com.
Remember to update your application's code and configuration to use the custom domain you have created.
# Continue with configuration
Depending on your use case, the next step will be to either set up an API client to connect to Signicat API products or to add an authentication protocol to connect to the Signicat eID Hub.
# All Signicat products
Not exactly sure what you need?