# Communication
# Overview
We use SMS messages and emails to communicate important information from Signicat services to your end-users. For example, when you want a document to be signed, an email or SMS message can be sent to your end-user with a signing link.
The Signicat Communication service lets you manage your configurations for SMS messages and email. These custom settings override the default Signicat settings. With this service, you can:
- Customise the email and SMS sender name.
- Specify the preferred primary and secondary SMS provider.
- Add your own custom domain for sending emails.
- Customise your own email sender address prefix.
- Directly connect to your own SMTP server for emails.
- Look at delivery logs and the corresponding status.
# Example use case
When you want a document to be signed, the account’s email configuration is retrieved, and if not overridden, a Signicat default email is used. You may override these settings to customise the email domain, sender and sender address being sent from provided services such as Signature.
# Get started with the communication service
You can manage your configurations for SMS and email in the Signicat Dashboard. To do this:
- Log in to the Signicat Dashboard (opens new window).
- In the top navigation bar, use the dropdown menu next to your organisation name to select the account that you want to make changes to.
- On the Topics page select Communication.
- You are now in the communication section of the Signicat Dashboard.
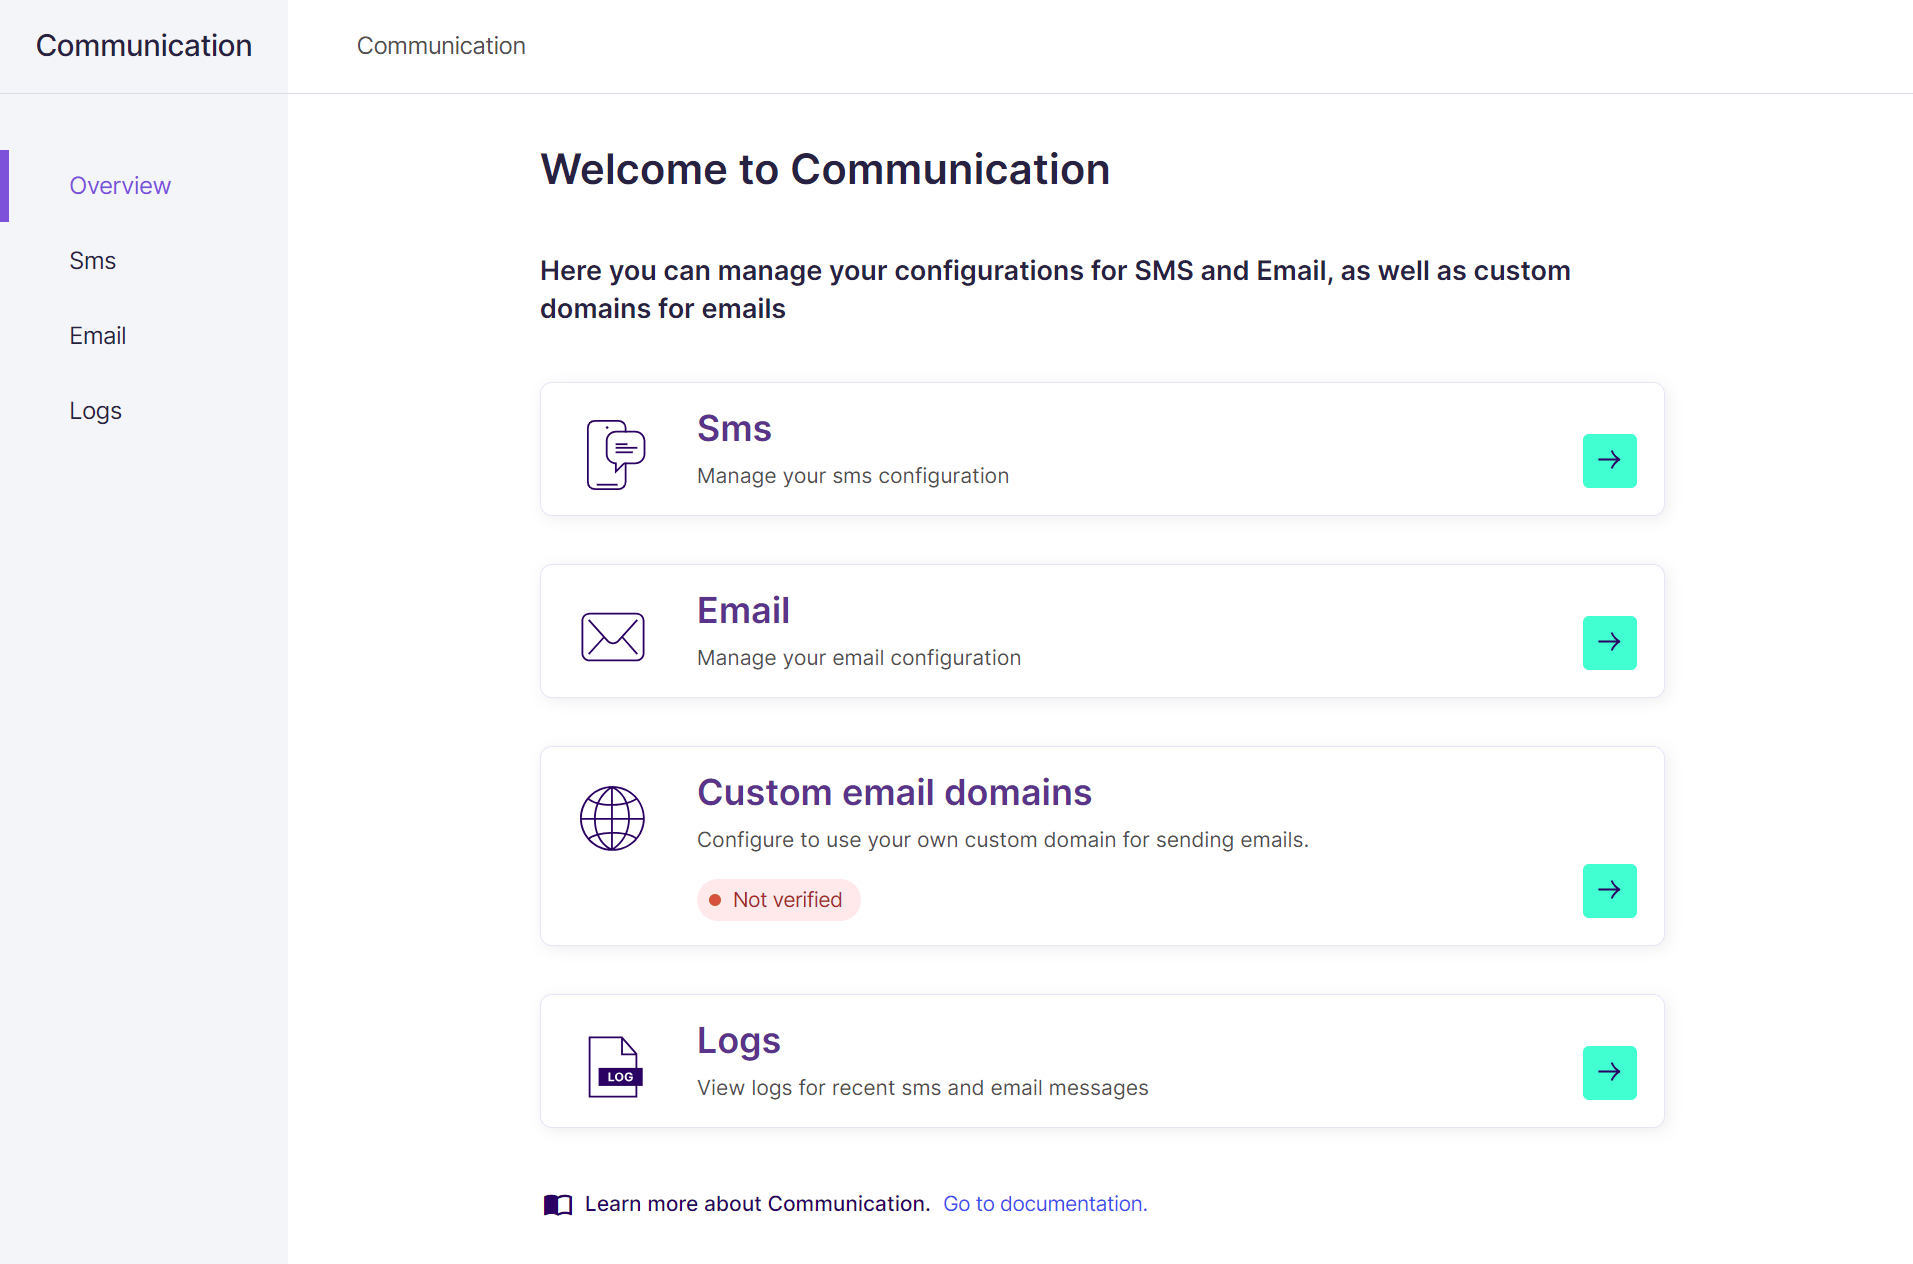
The communication section of the Signicat Dashboard is comprised of four main pages, Overview, SMS, Email and Logs. You can navigate between these sections using the left-side menu or the buttons on the Overview page as shown in the screenshot above.
# SMS
On the SMS (opens new window) page, you can manage the SMS settings for your account.
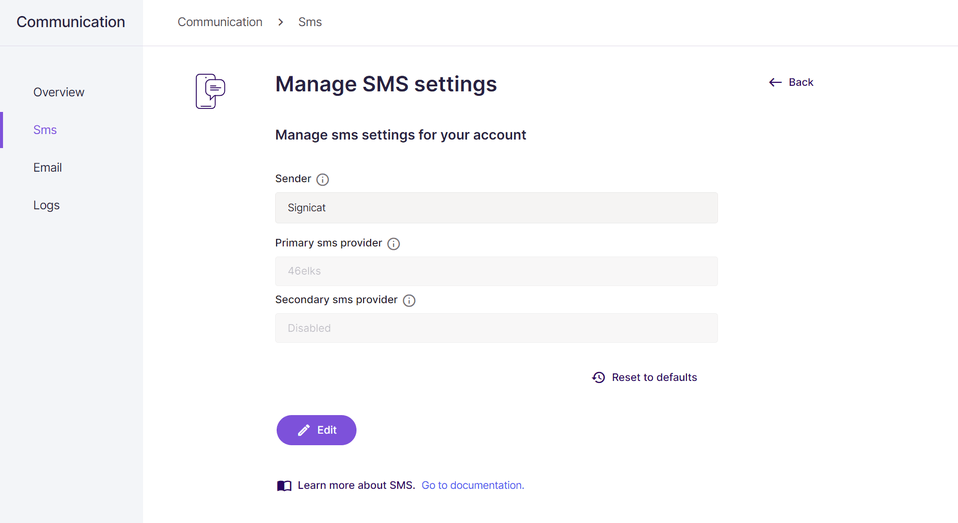
# Customise the SMS sender name
This is the name of the sender that is displayed to the recipient of the SMS when receiving the text.
- Click the Edit button.
- In the Sender field, replace ‘Signicat’ with the name of your choice. The name must consist of 3 to 11 alphanumeric characters (
A-Za-z0-9). It can also contain dots (.) and spaces. - Click the Save button.
# Customise the primary SMS provider
This is the primary SMS provider to use when sending SMS messages.
- Click the Edit button.
- Click the Primary SMS provider field. A dropdown menu will appear.
- Select the provider of your choice from the dropdown menu.
- Click the Save button.
# Add a secondary SMS provider
This is the secondary SMS provider to use as a fallback if there is a temporary failure with the primary SMS provider.
The primary SMS provider will always be used first. If there is a failure, then the SMS message will be attempted to be sent automatically by the secondary provider.
Note
The secondary SMS provider is disabled by default.
- Click the Edit button.
- Click the Secondary SMS provider field. A dropdown menu will appear.
- Select the provider of your choice from the dropdown menu.
- Click the Save button.
# Reset to defaults
It is always possible to reset to the default settings if you wish to start again.
- Click the Reset to defaults button to the bottom right of the last field.
- In the dialogue box, confirm your selection by clicking the Reset to defaults button.
- You have now reset all SMS settings to the default settings.
On the Email (opens new window) page, you can manage the email settings for your account, including adding your own custom domain.
You can use the tabs to switch between Email Settings and My Domains:
# Email settings
On the Email Settings tab, you can manage the email settings for your account.
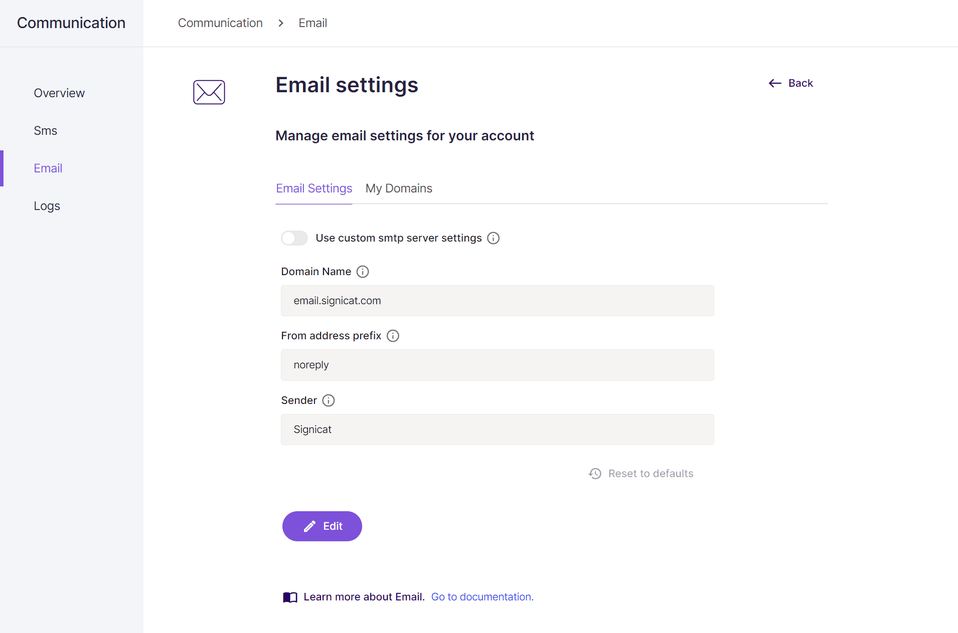
# Customise the 'from address prefix'
The full email address uses the form {from_address_prefix}@{domain_name}, hence the default email address is noreply@email.signicat.com.
Note
The Signicat domain is the default setting.
To customise the ‘from address prefix’:
- Click the Edit button.
- In the From address prefix field, replace ‘noreply’ with the prefix of your choice.
- Click the Save button.
# Customise the email sender name
This is the name of the sender that is displayed to the recipient when they are viewing the email.
- Click the Edit button.
- In the Sender field, replace ‘Signicat’ with the name of your choice.
- Click the Save button.
# Use custom SMTP server settings
You specify whether or not you connect to a custom SMTP server, and use a sending API key.
- Click the Edit button.
- Click the toggle button beside Use custom SMTP server settings. A new set of fields will appear.
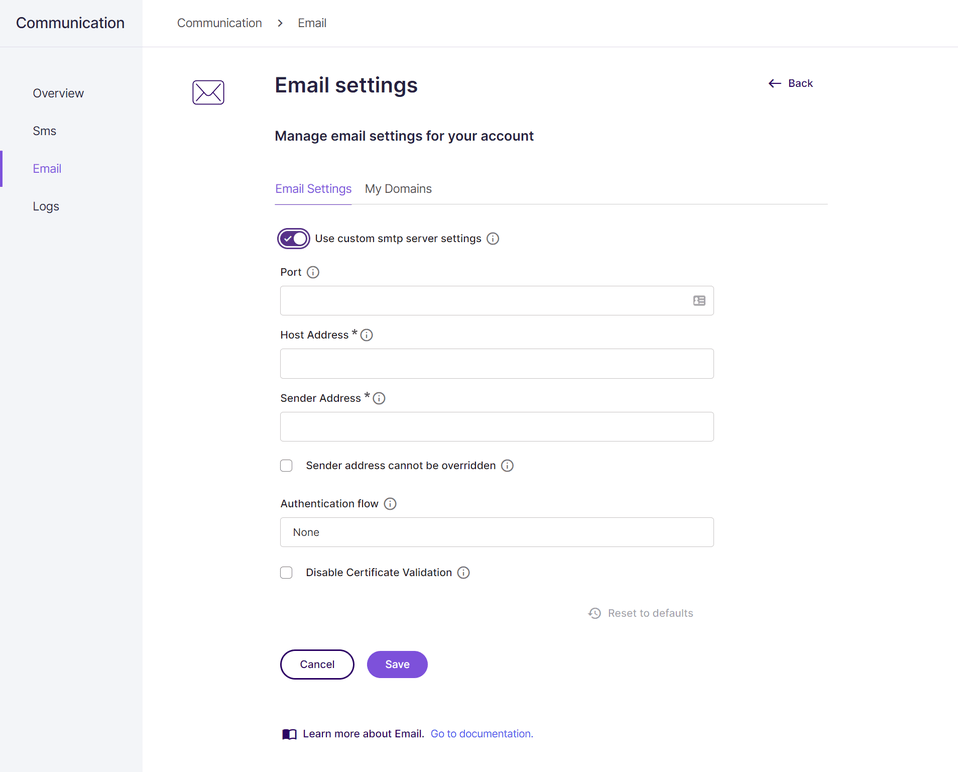
Complete the fields as required:
Port chooses which SMTP port to use when connecting to the SMTP server. The default is 25, and available options are 25, 587 and 465.
Host Address is the SMTP host to connect to, and is a required field. For example
smtp.mydomain.com.Sender Address determines the default sender address to use when sending emails, and is a required field. For example
noreply@email.mydomain.com.If the Sender address cannot be overridden box is ticked, then the Sender Address cannot be overridden via any API calls, and will always be used.
There are multiple ways to authenticate to the SMTP server. You can make a selection by clicking the dropdown menu:
None requires no authentication.
Username and password requires a valid username and password for the SMTP server.
XOauth2 requires a client ID, client secret, necessary scopes and endpoint for retrieving an access token on your behalf.
The Disable Certificate Validation button is unticked by default. This means that certificates from the SMTP server being connected to are required to be signed by globally trusted certificate authorities. This can be ignored by ticking this box.
Click the Save button.
# Reset to defaults
It is always possible to reset to the default settings if you wish to start again.
- Click the Reset to defaults button to the bottom right of the last field.
- In the dialogue box, confirm your selection by clicking the Reset to defaults button.
- You have now reset all email settings to the default settings.
# My domains
On the My Domains tab, you can add your own custom email domain for use in sending emails.
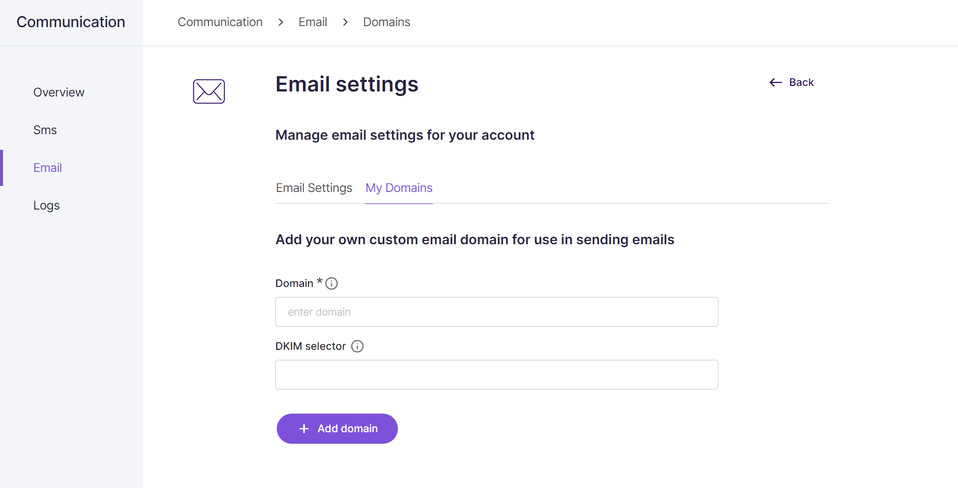
# Add your own custom domain
You can add your own custom domain for use in sending emails.
Note
If you set up your own domain, then you will be using SMTP settings.
- Click the Edit button.
- In the Domain field, add the domain of your choice. For example
my.domain.com. - Optionally, you can define a custom DKIM selector instead of using a generated one. All characters must be lowercase, with an allowed length of between 2 and 11 characters.
- If you wish to specify your own, update the DKIM selector field.
- If you do not wish to specify your own, leave the DKIM selector field empty.
- Click the Add domain button.
- Your DNS records are generated and will be visible on the next page. You can now add these to your own hosting provider.
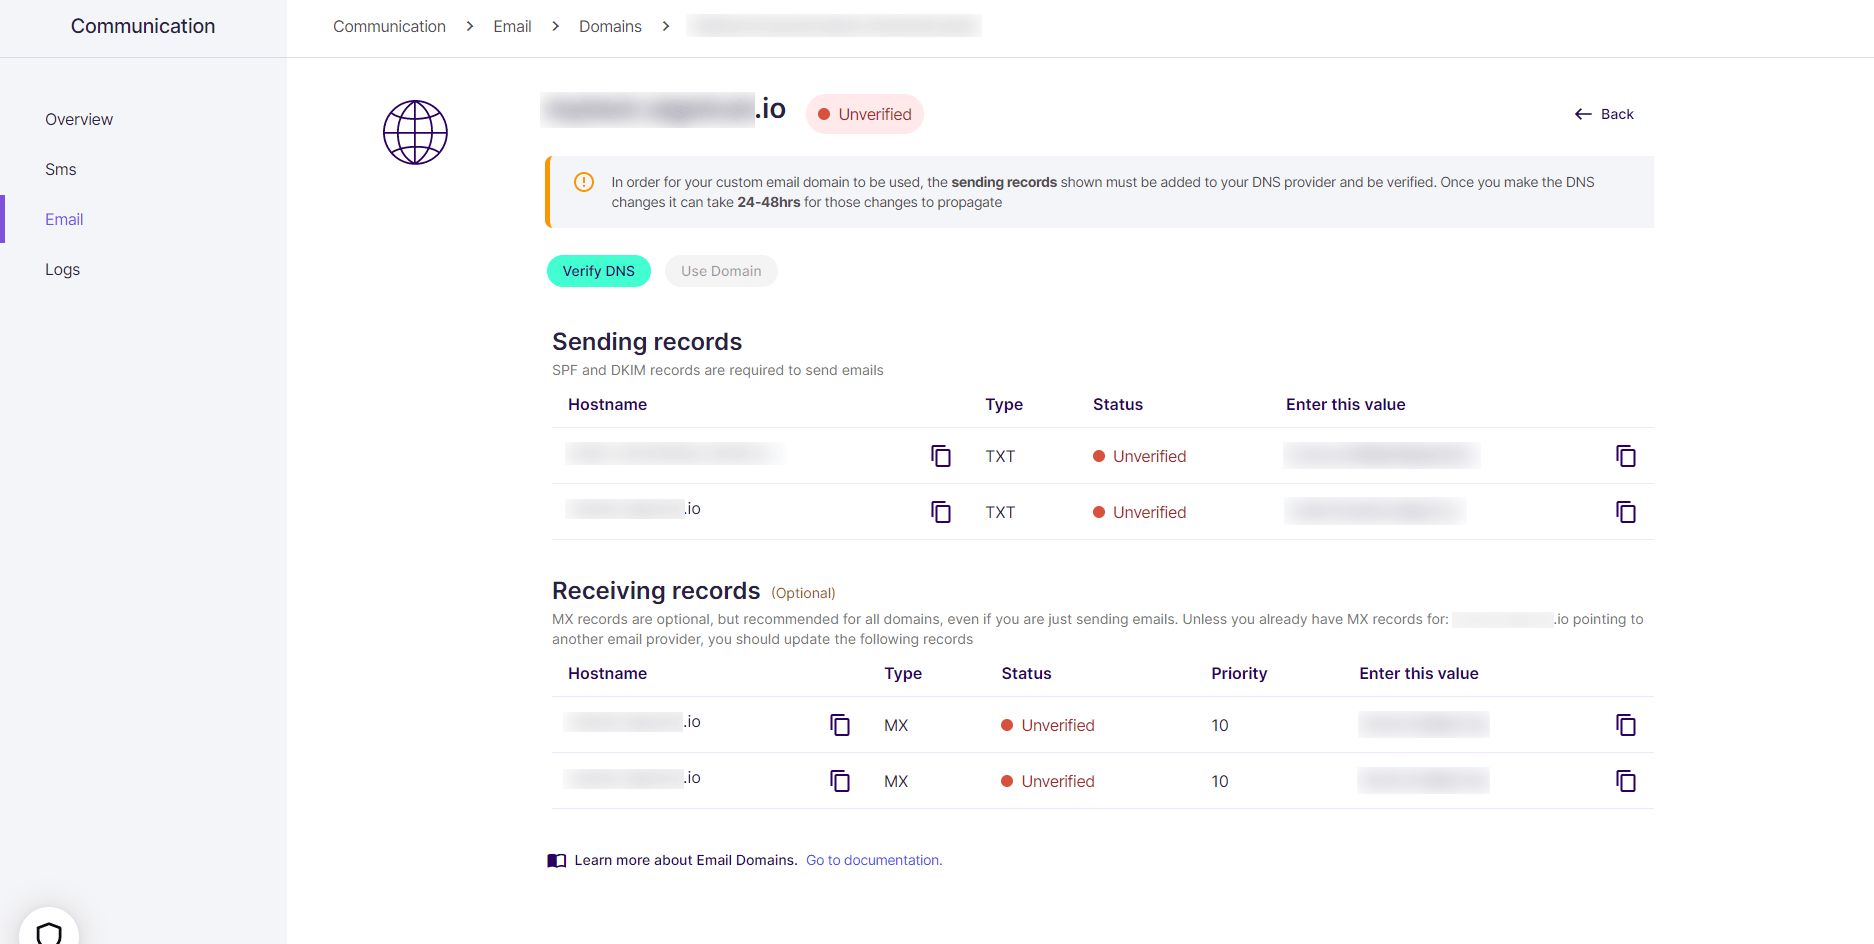
- After adding these DNS records to your hosting provider, periodic checks occur which check if the domain has been verified and is ready for use. You can also click the Verify DNS button to manually attempt to verify the domain.
- When verified, the Use Domain button will no longer be greyed out and can now be clicked.
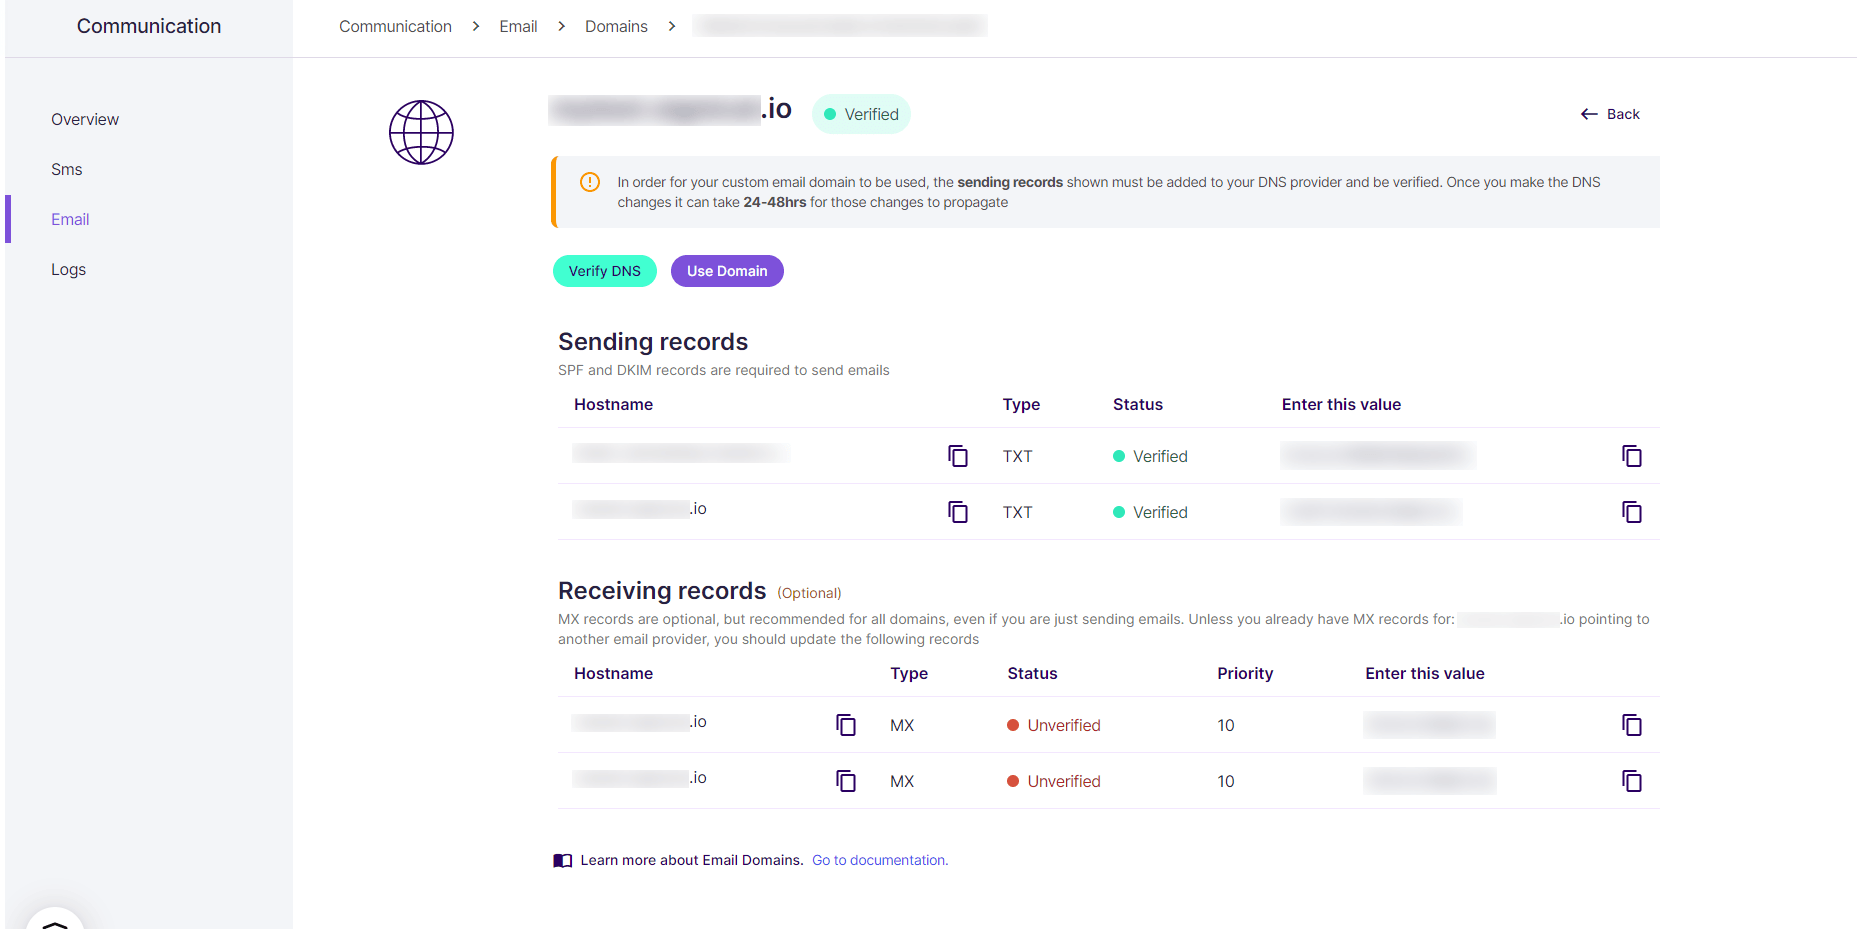
- Once clicked, a pop-up will appear where you can add the desired prefix for the default sender address. For example
mycompany. The domain is appended, separated by@; resulting in a default sender address ofmycompany@my.domain.com.
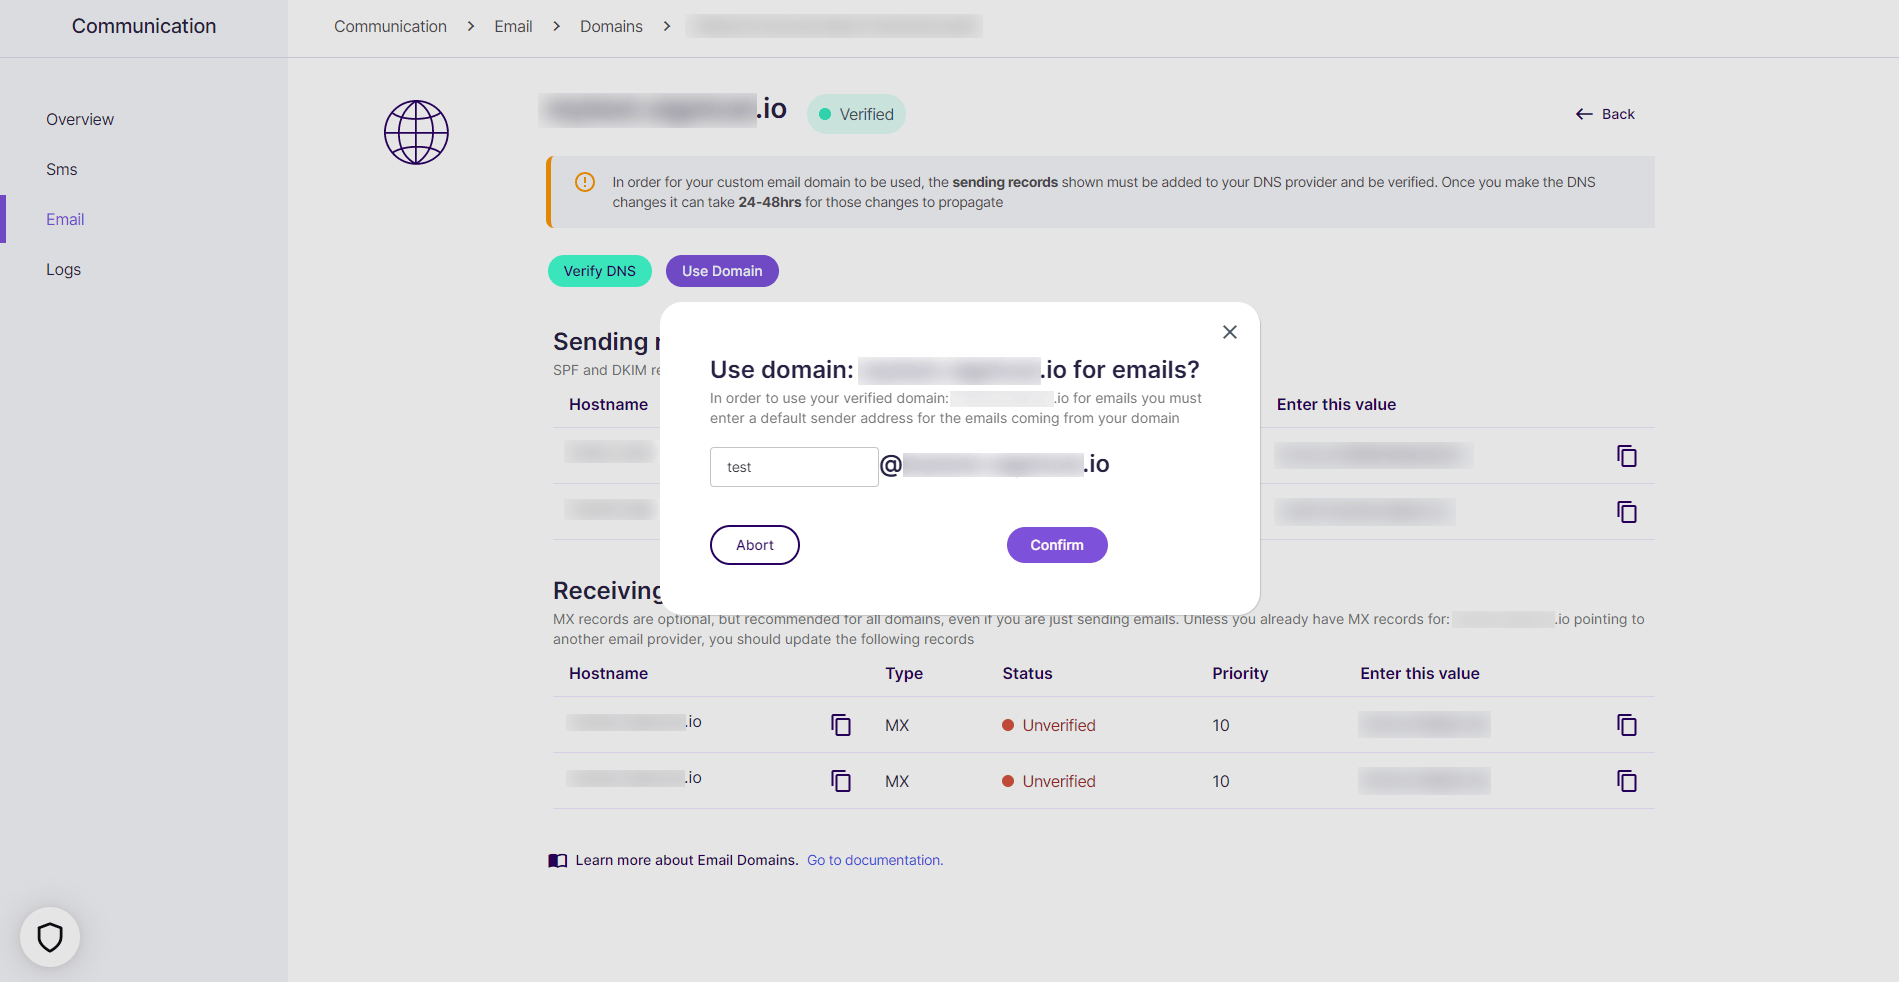
Click the Confirm button.
Your custom domain is now active for future emails.
# Edit, delete and use your domains
You can edit, delete and use your domains from the My Domains tab.
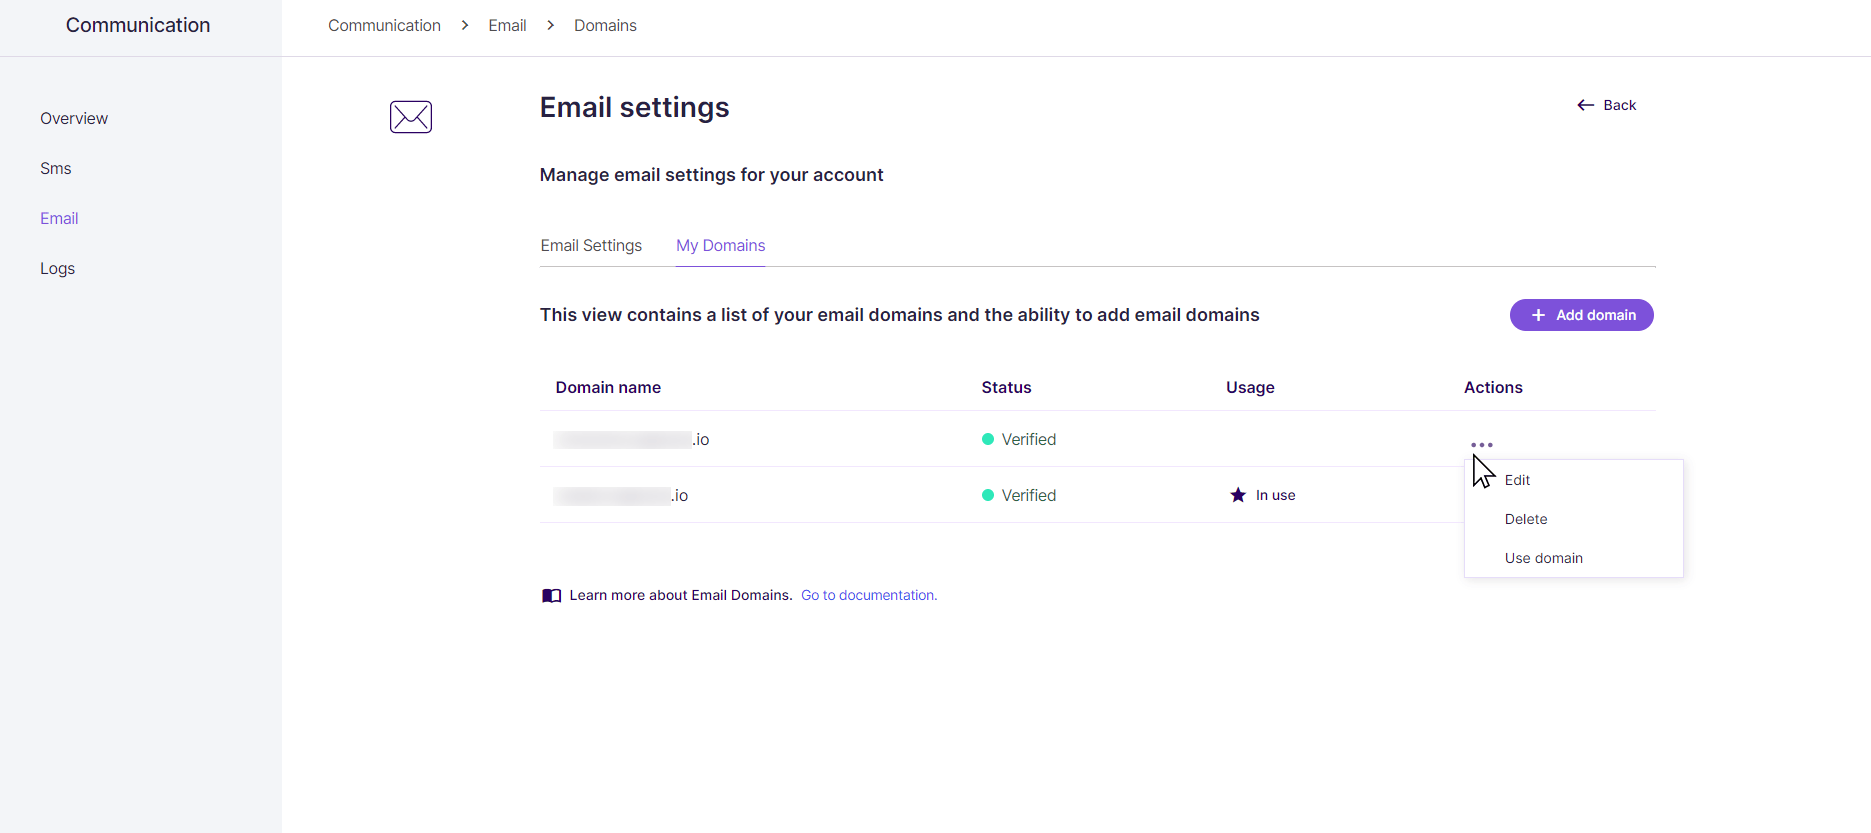
# Edit one of your domains
- Click the three dots under the Actions header, to the right of the event.
- Click Edit from the dropdown menu.
- You are taken to the individual domain view where the DNS records are.
# Delete one of your domains
Note
You can only delete a domain if it is not currently in use.
- Click the three dots under the Actions header, to the right of the event.
- Click Delete from the dropdown menu.
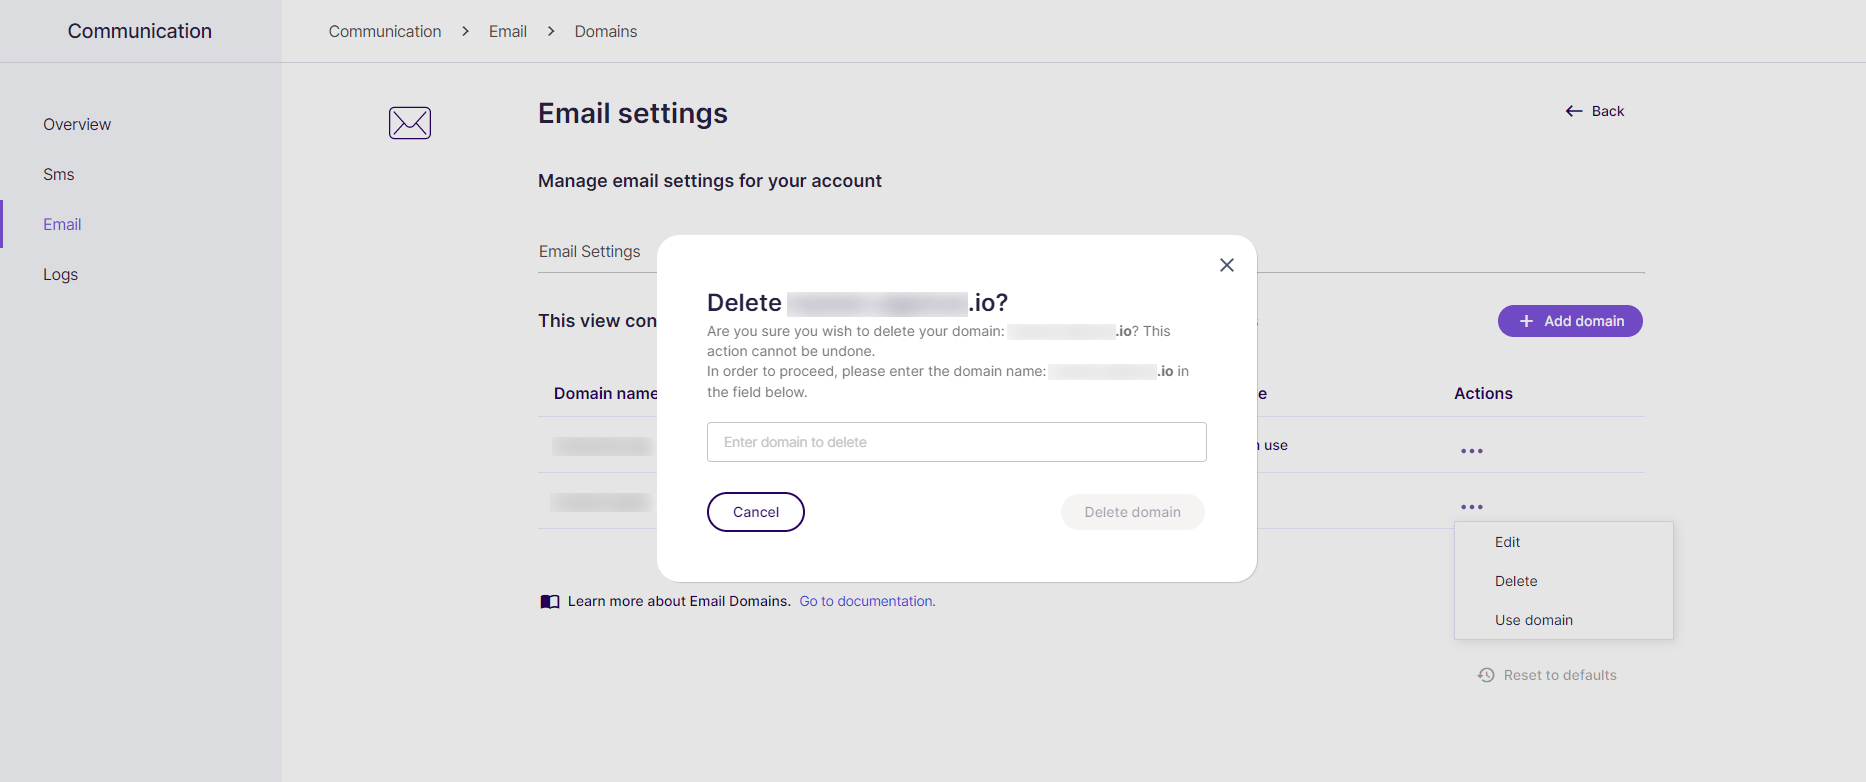
- As a preventative measure against accidental deletion, you must type the domain which you want to delete in the provided field in the dialogue box.
- Press the Delete domain button in the dialogue box.
# Use one of your domains
Note
You can only use a domain if it is not already in use and it is verified. If not, then the Use domain option will not be visible in the dropdown menu.
- Click the three dots under the Actions header, to the right of the event.
- Click Use domain from the dropdown menu.
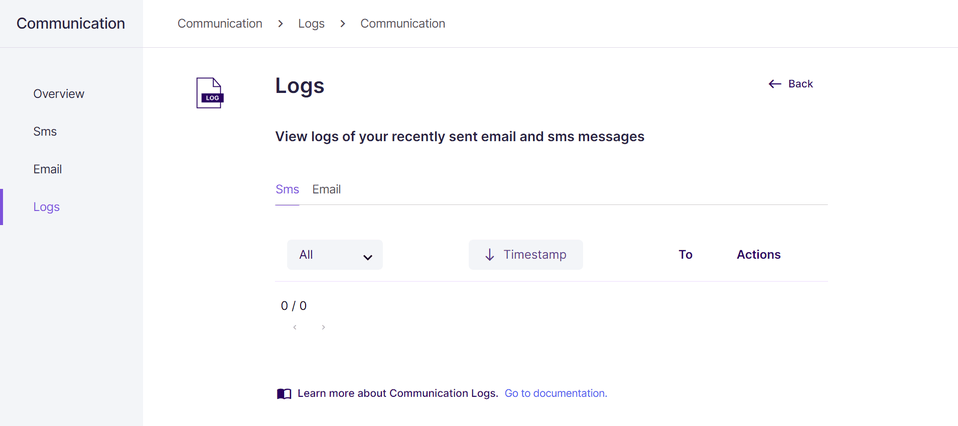
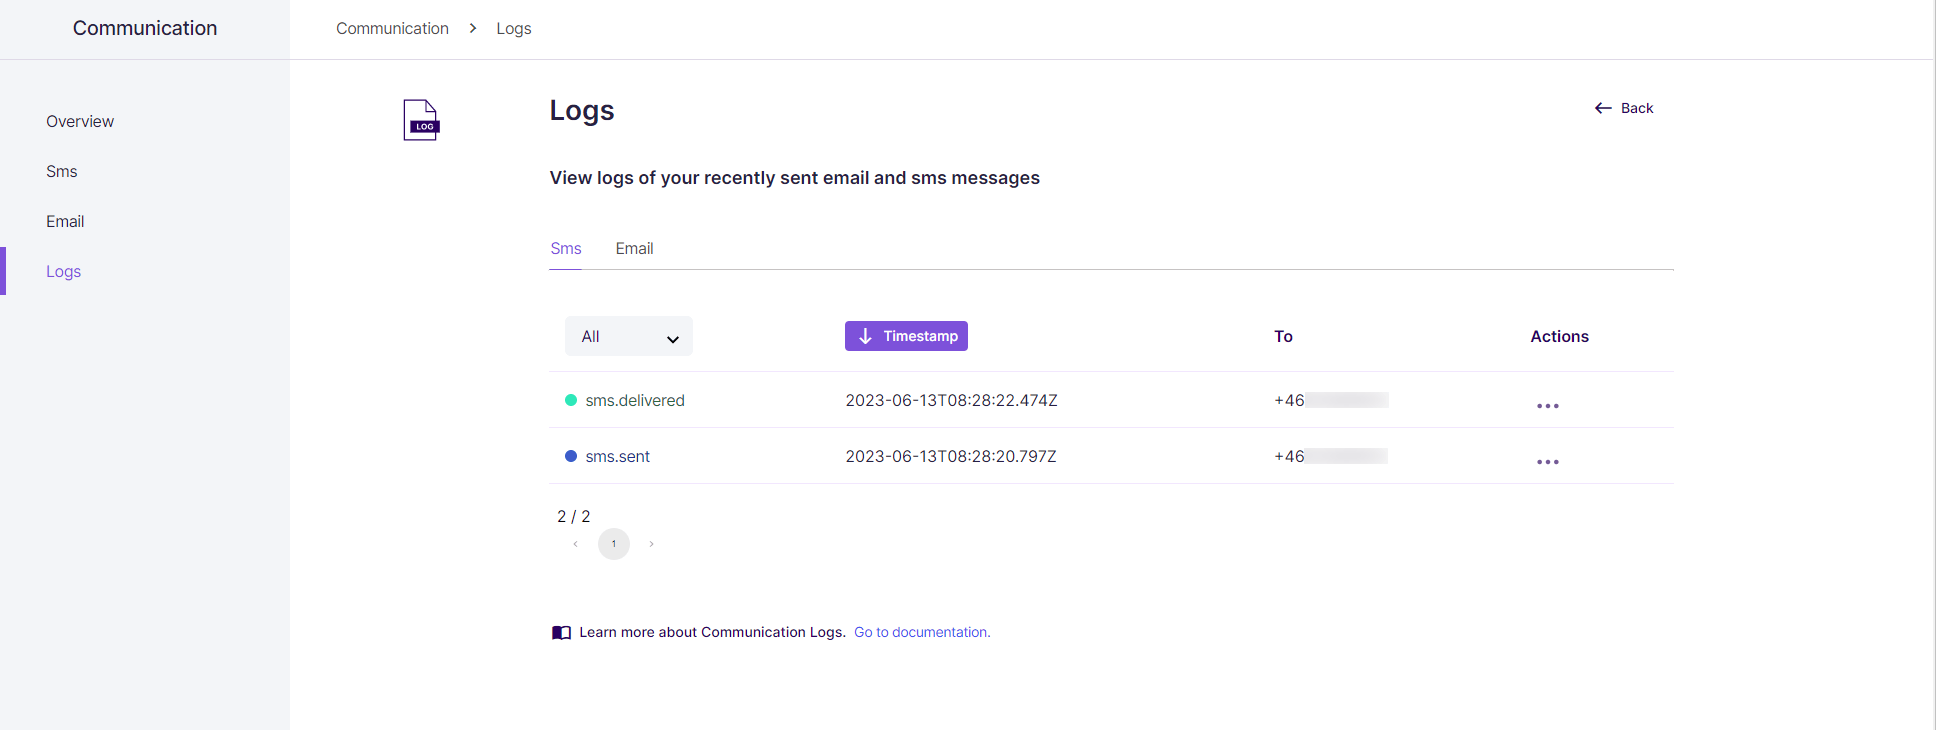
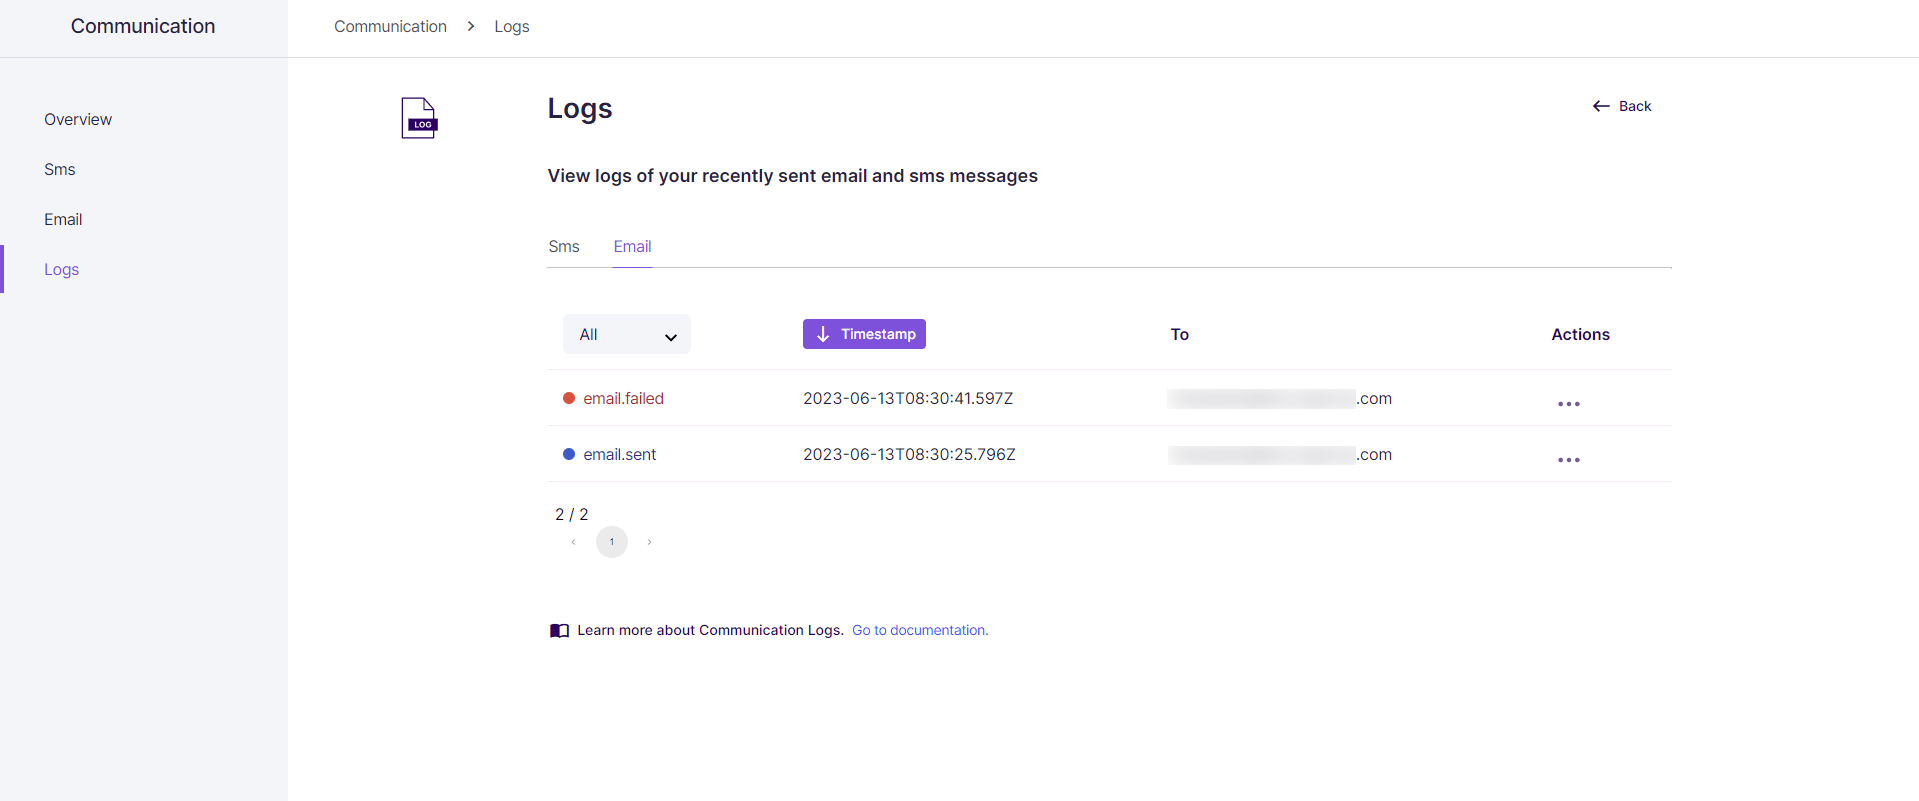
# Logs
On the Logs (opens new window) page, you can view logs of your recently sent emails and SMS messages.
When you have sent an SMS or email for that specific account, these messages will appear with their status on this page.
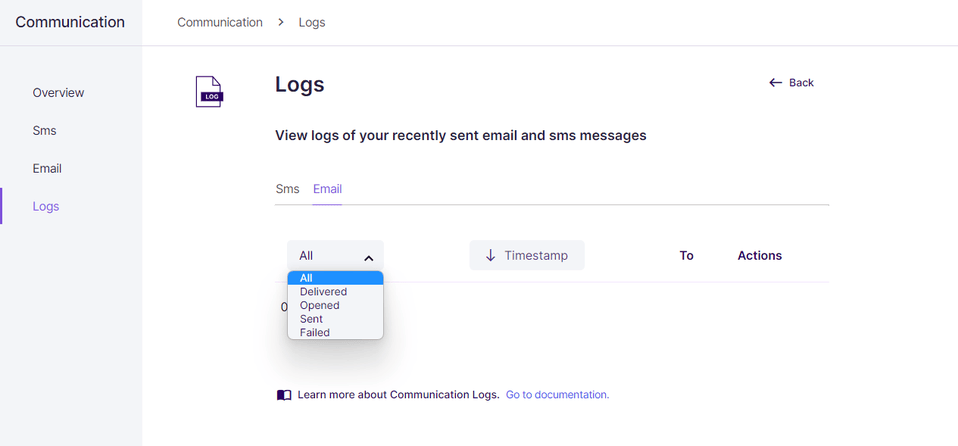
You can choose to view either SMS events or email events using the SMS and Email tabs.
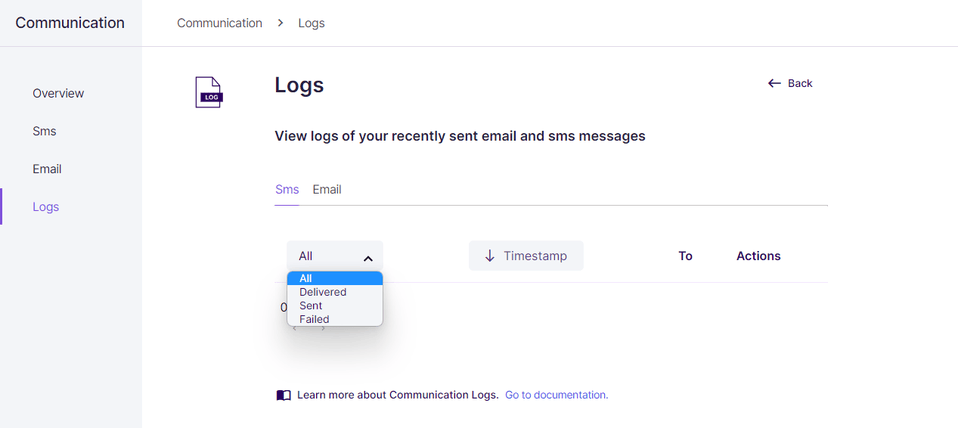
# Filter by event status
You can filter by the status of the event. To do this, make a selection using the first dropdown menu.
# SMS
The possible statuses are:
- All
- Delivered
- Sent
- Failed
The possible statuses are:
- All
- Delivered
- Opened
- Sent
- Failed
# Order by timestamp
You can order the events by their timestamp. To do this, click the Timestamp button to sort via ascending or descending order.

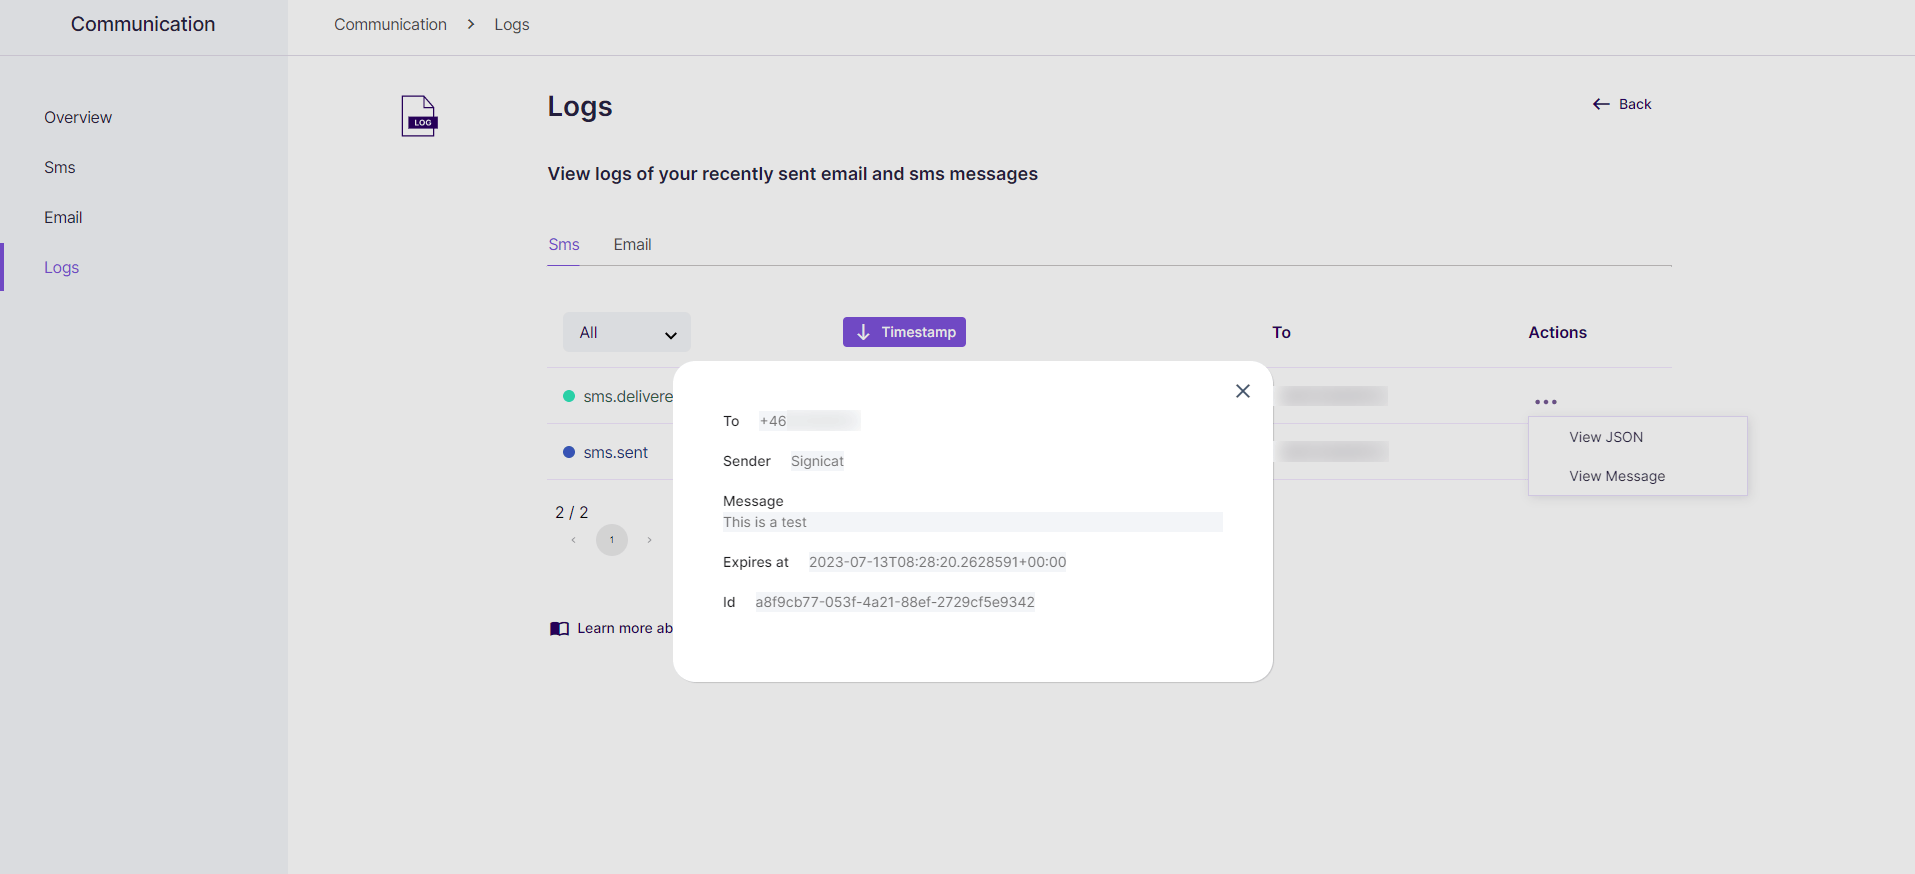
# View the raw JSON or message for an SMS event
You can open up the individual events to view the raw JSON and the message itself. To do this:
Navigate to the SMS tab. You can view all of your SMS events here.
Click the three dots under the Actions header, to the right of the event you want to see further details for.
To view the raw JSON, click View JSON from the dropdown menu.
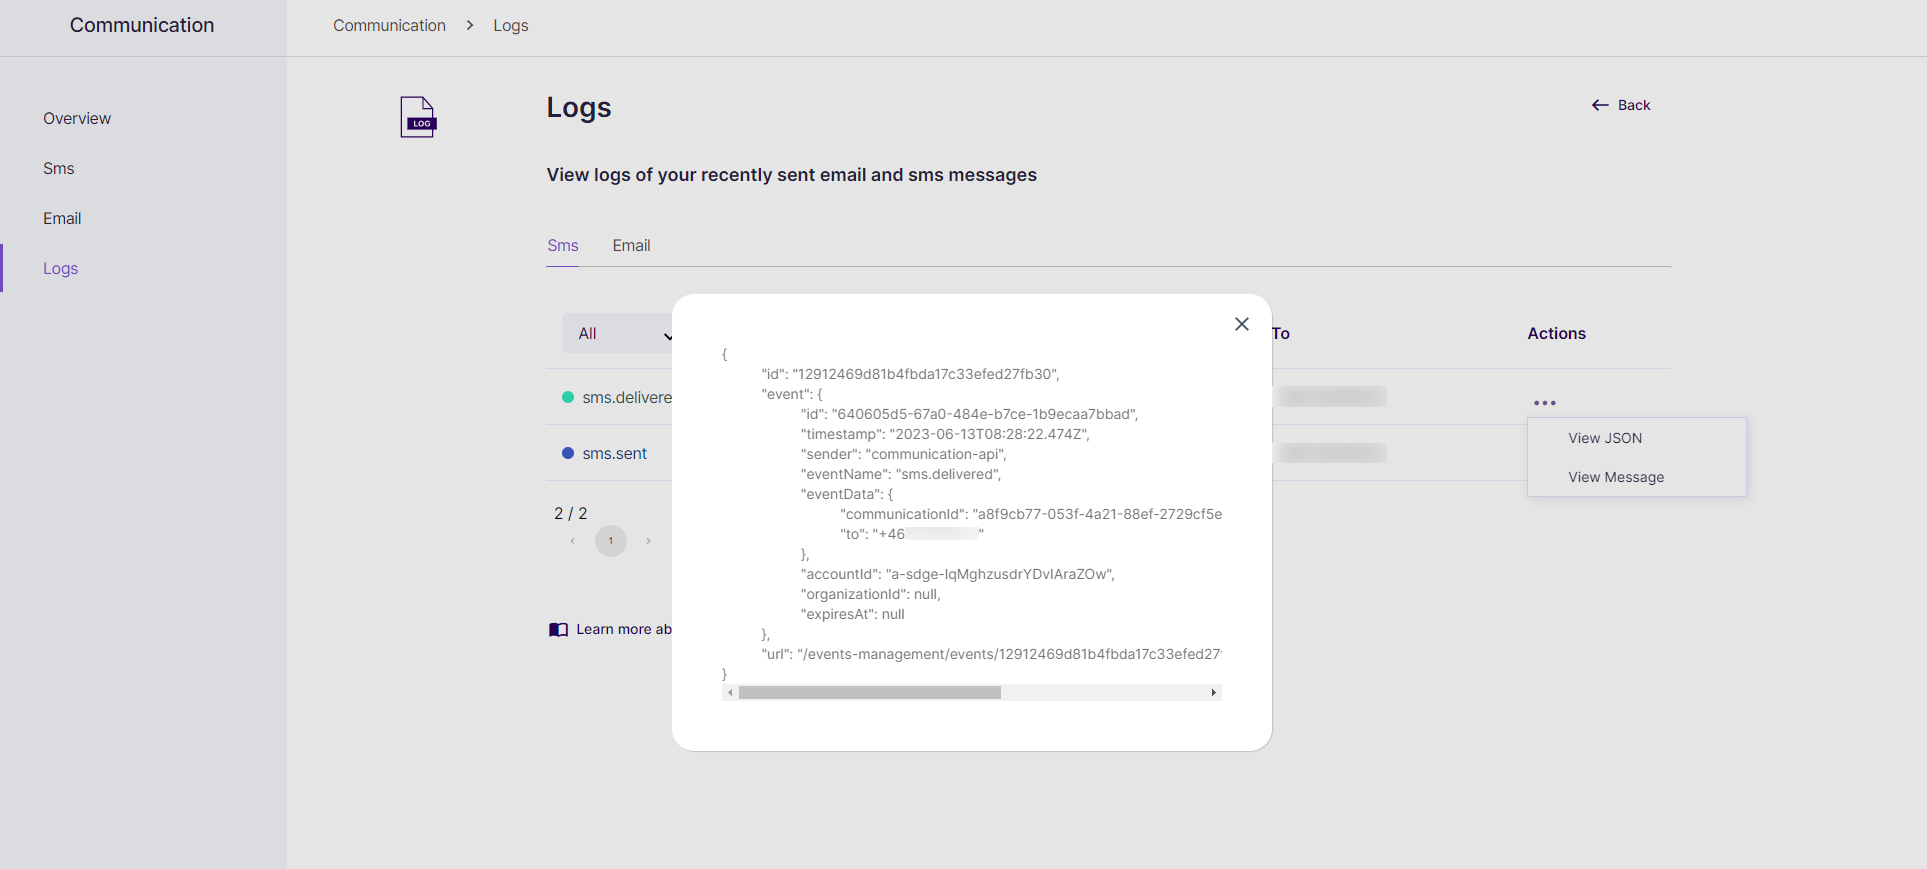
To view the message, click View message from the dropdown menu.
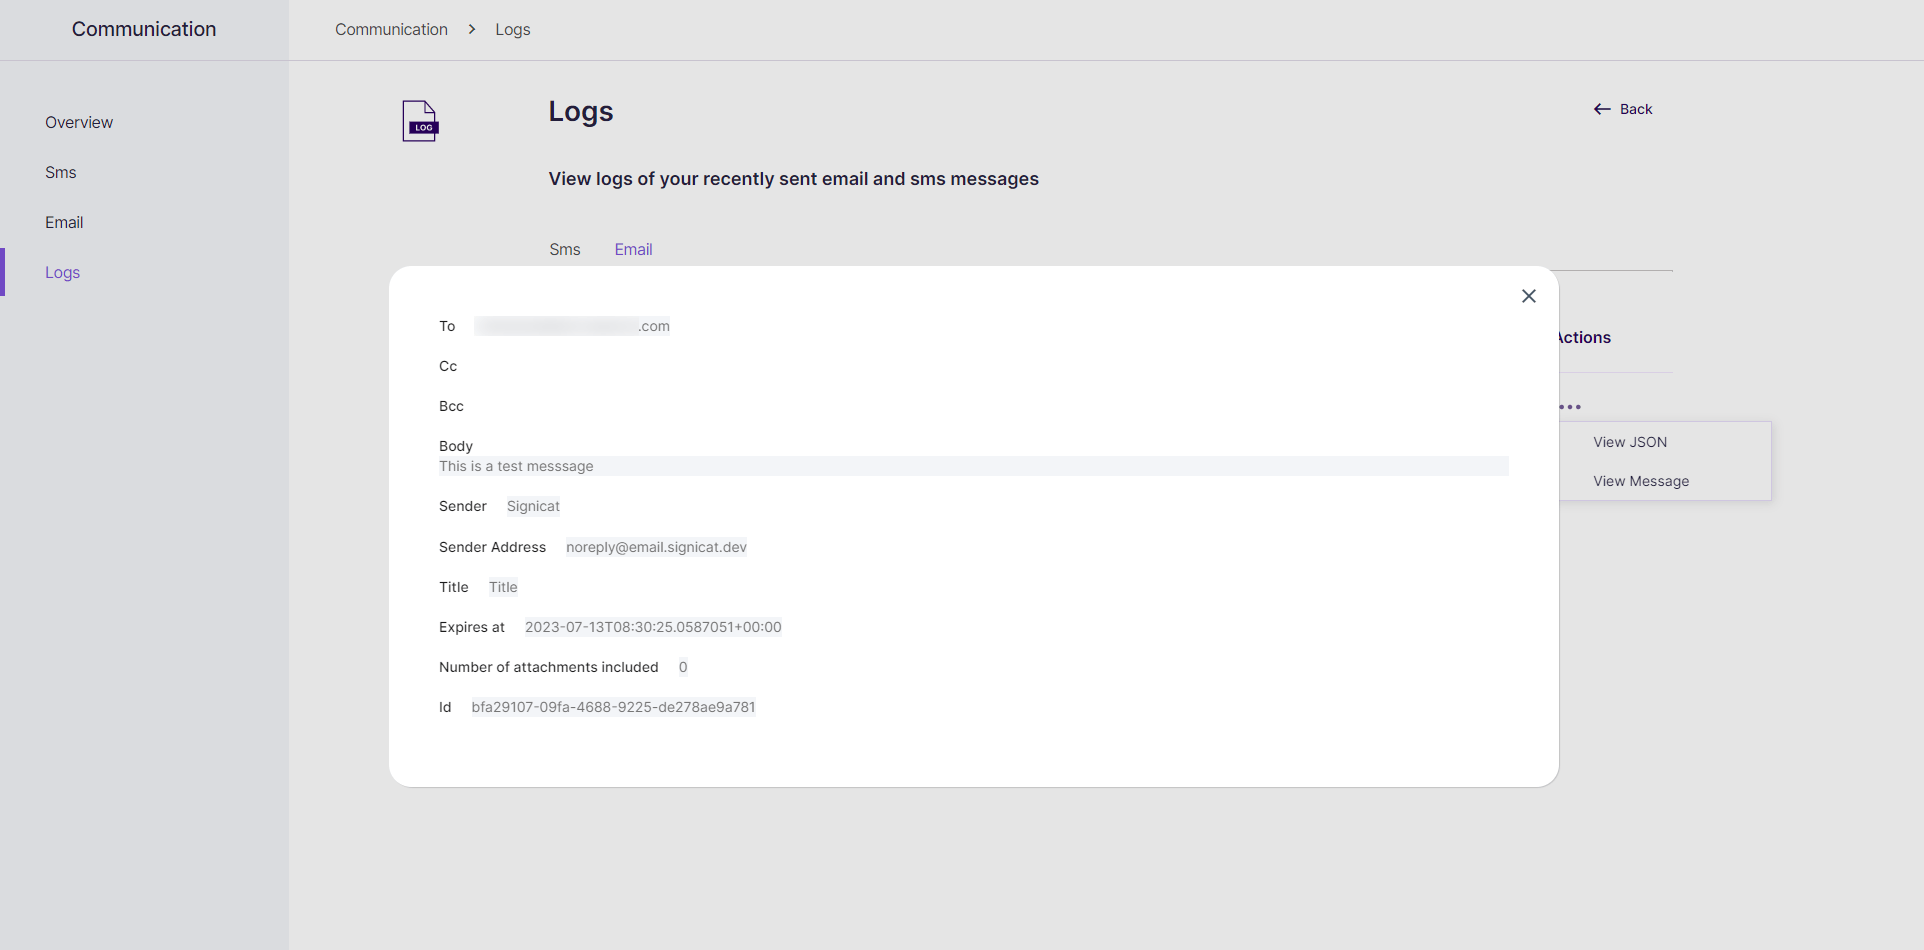
# View the raw JSON or message for an email event
You can open up the individual events to view the raw JSON and the message itself. To do this:
Navigate to the Email tab. You can view all of your email events here.
Click the three dots under the Actions header, to the right of the event you want to see further details for.
To view the raw JSON, click View JSON from the dropdown menu.
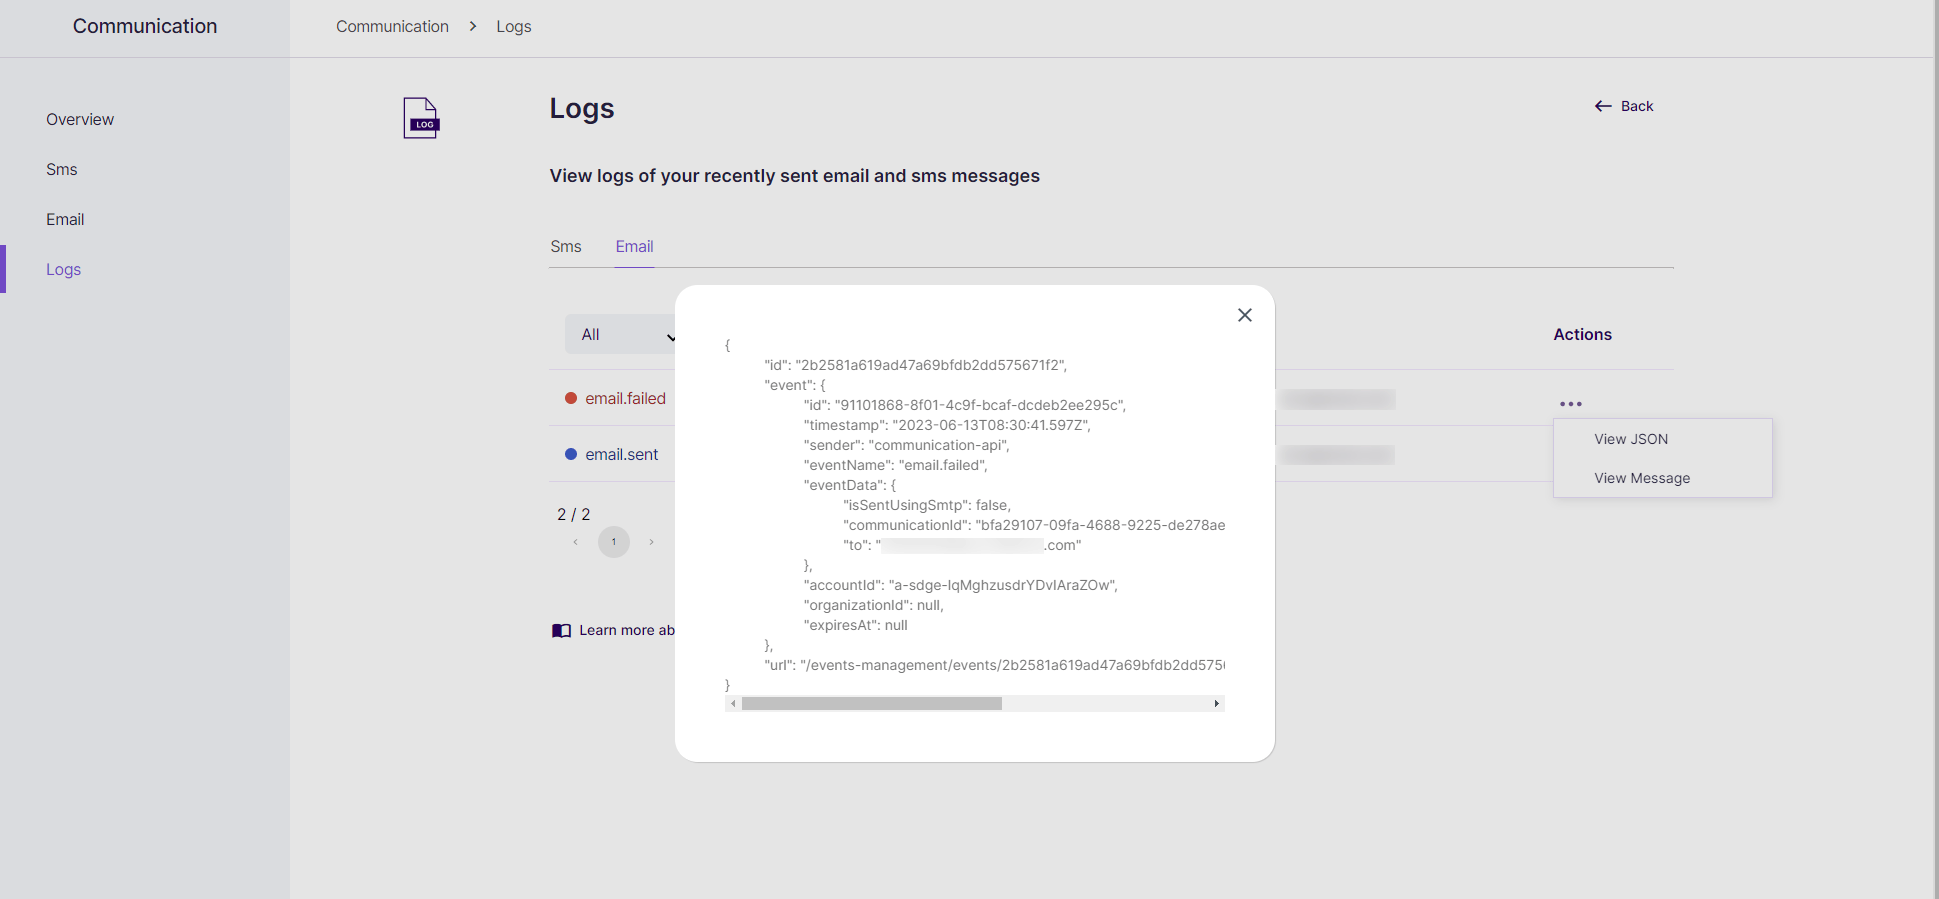
To view the message, click View message from the dropdown menu.