# Account theming
There are some customisation options available, which you can use to configure the visual appearance of the content presented to your end-users so that it matches your desired style. You can edit the colours used in the interface and add a custom logo. If you have created multiple accounts under the same organisation, it is possible to tailor the theme colours per account and even per domain.
Theming scope
These changes will not affect the Dashboard itself, just the screens that your end-users see.
# Open Themes settings
- Log in to the Signicat Dashboard.
- In the upper left corner, use the dropdown to select the name of the account you want to edit.
- On the Topics page select Theme.
- You are now in the account theming section where you will be presented with the default theme setting. You will now be able to tailor the theme for your selected account.
# Edit theme colours
- To begin creating your own theme colours, select Add new in the top right.
- In the Create new theme dialog, enter the theme name and a short description.
- You can toggle the option Use different themes for domains to have different themes used for each domain you have.
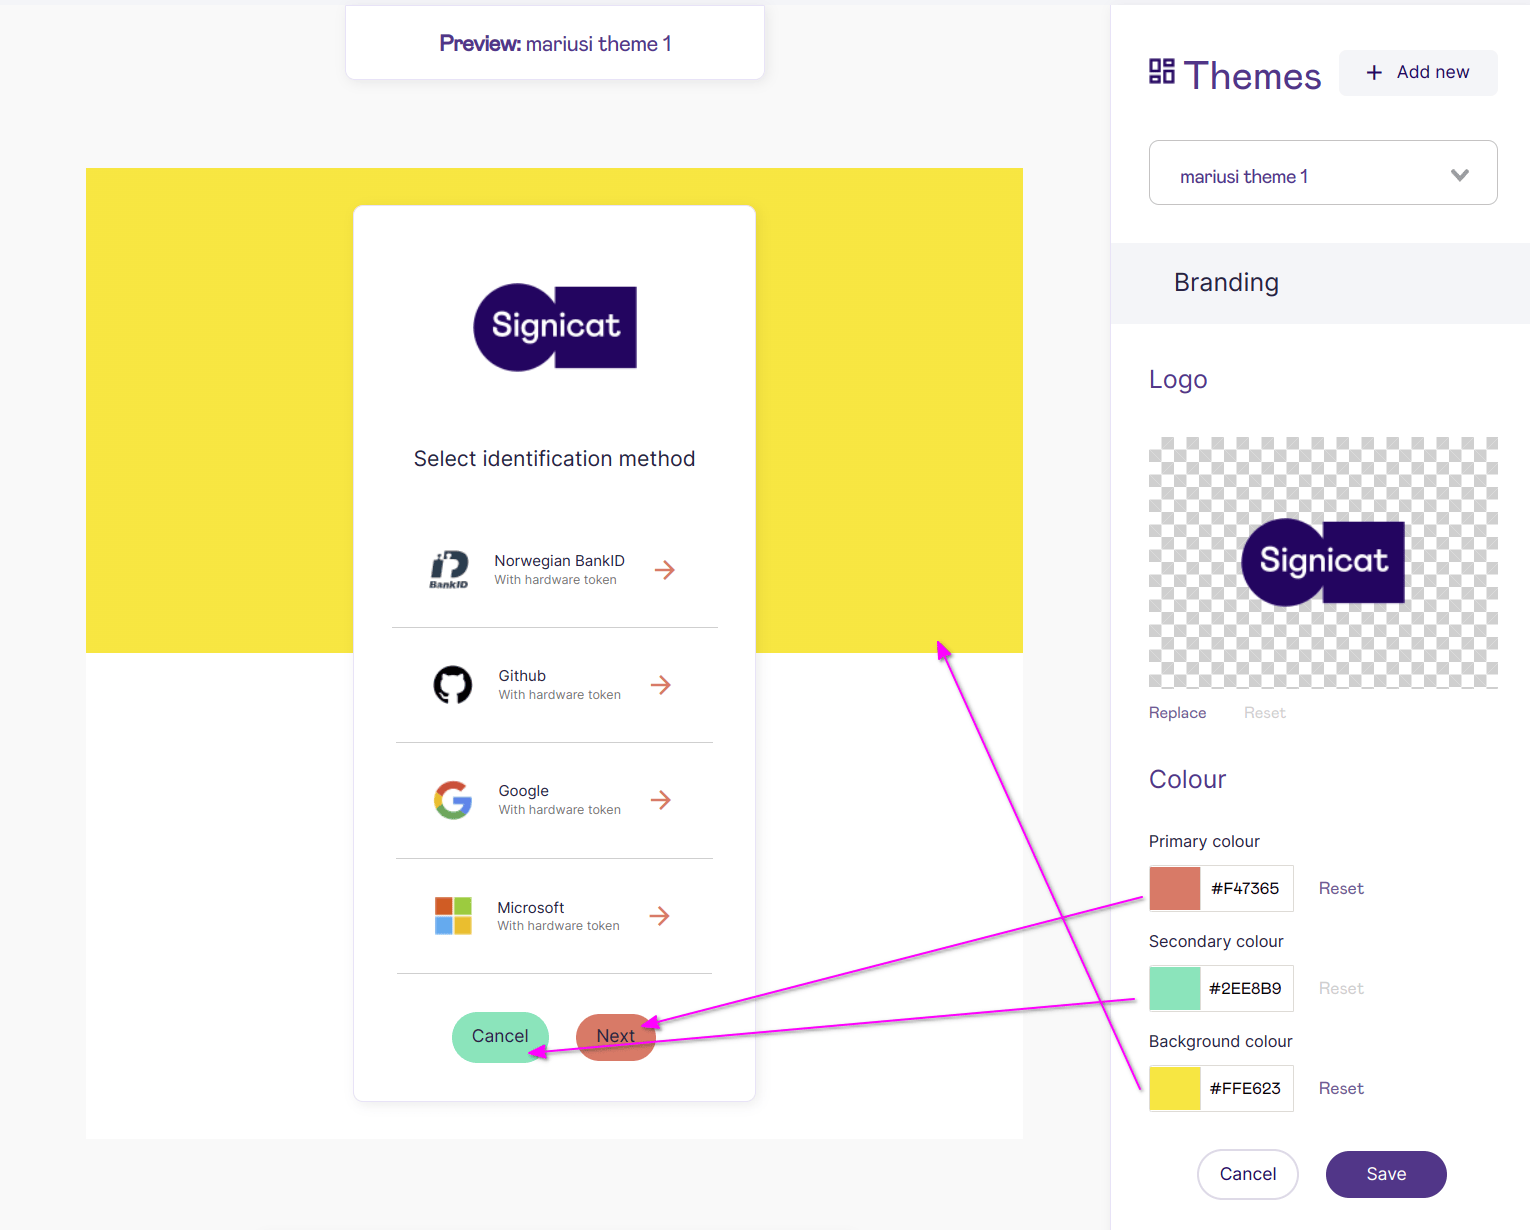
- Next, you must choose Edit theme to adjust the theme colours. You can also add a custom logo here.
- Select each colour sample to edit them. The three adjustable options are:
- Primary colour: the colour and text colour of the primary buttons (e.g. Log in, OK, Save).
- Secondary colour: the colour and text colour of the secondary buttons (e.g. Cancel, Back).
- Background colour: the colour of the top half of the background.
- Save the changes.
- Press Cancel to return to the main theme management page.
Important
Ensure you are compliant with WCAG. You must comply with Web Content Accessibility Guidelines (opens new window) (WCAG) regarding contrast between font colours and other elements.
# Apply a custom theme
Important
You must set the custom theme for Account first, then set the domain custom themes. If you set the account theme after the domain themes, it will overwrite the saved custom domain themes and your work will be lost.
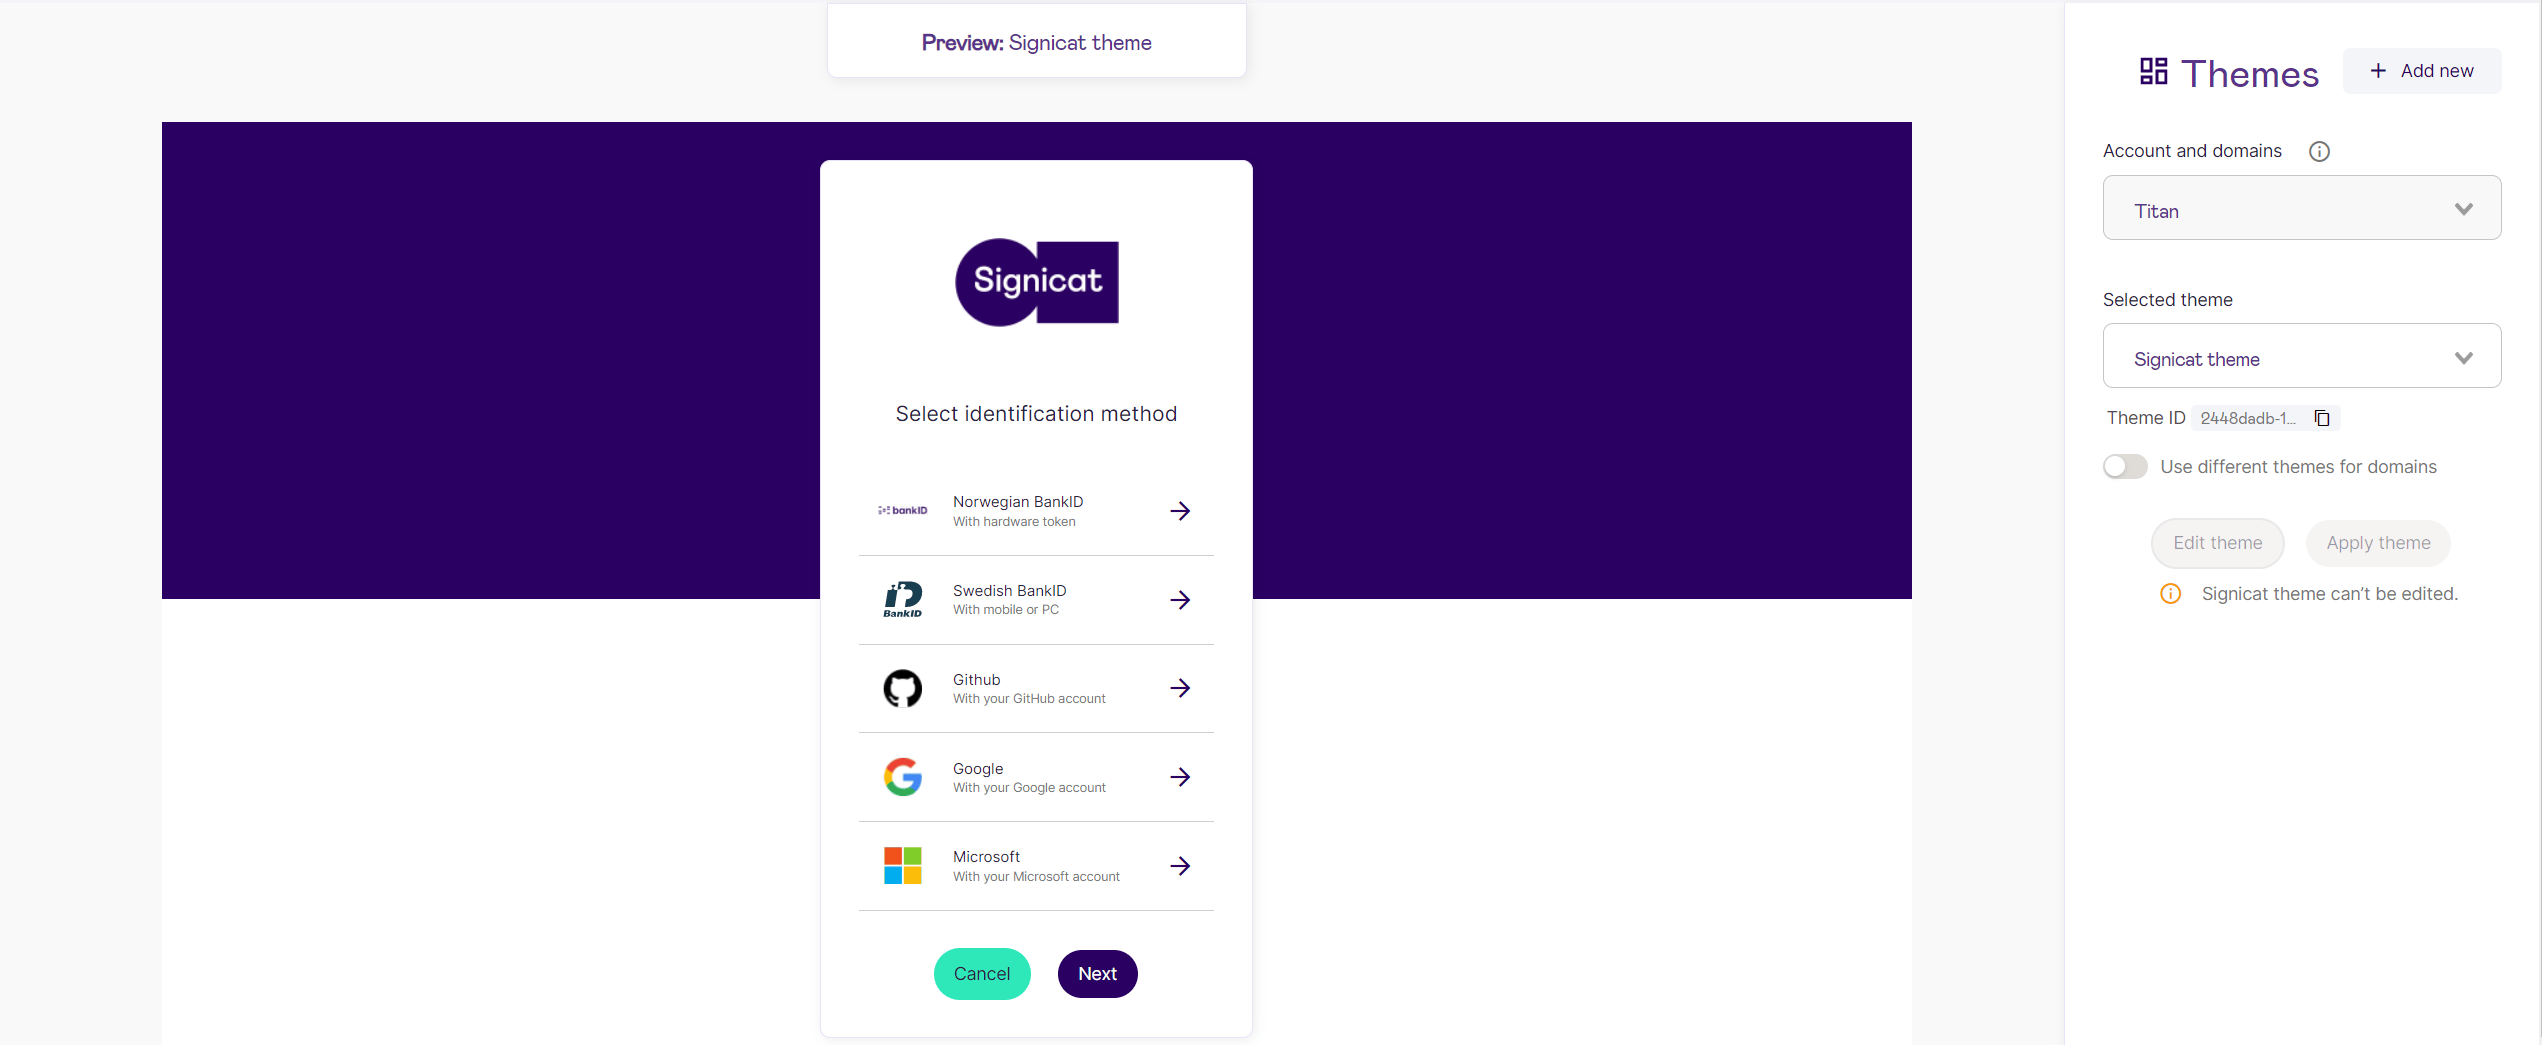
- Using the Account and domains dropdown on the left, you can choose whether to edit the overall Account theme or select a domain to adjust the colour theme for each individual domain.
- The Selected theme dropdown will list all your created custom themes.
- The Use multiple themes for this domain toggle will allow you to select more than one theme from the dropdown. Select each theme you want to use and select Add theme. It will then appear in the list below.
- When you are happy with your selection, press Apply multiple themes to proceed.
# Add a custom logo
- In the upper left corner, use the dropdown to select the name of the account you want to edit.
- On the Topics page select Theme.
- On the left, under Logo, select Replace to add your custom logo.
- Browse for your desired file or drag and drop your logo file on the highlighted area under Logo.
- Save the changes.
Please note
The maximum size for logo image files is 2 MB.
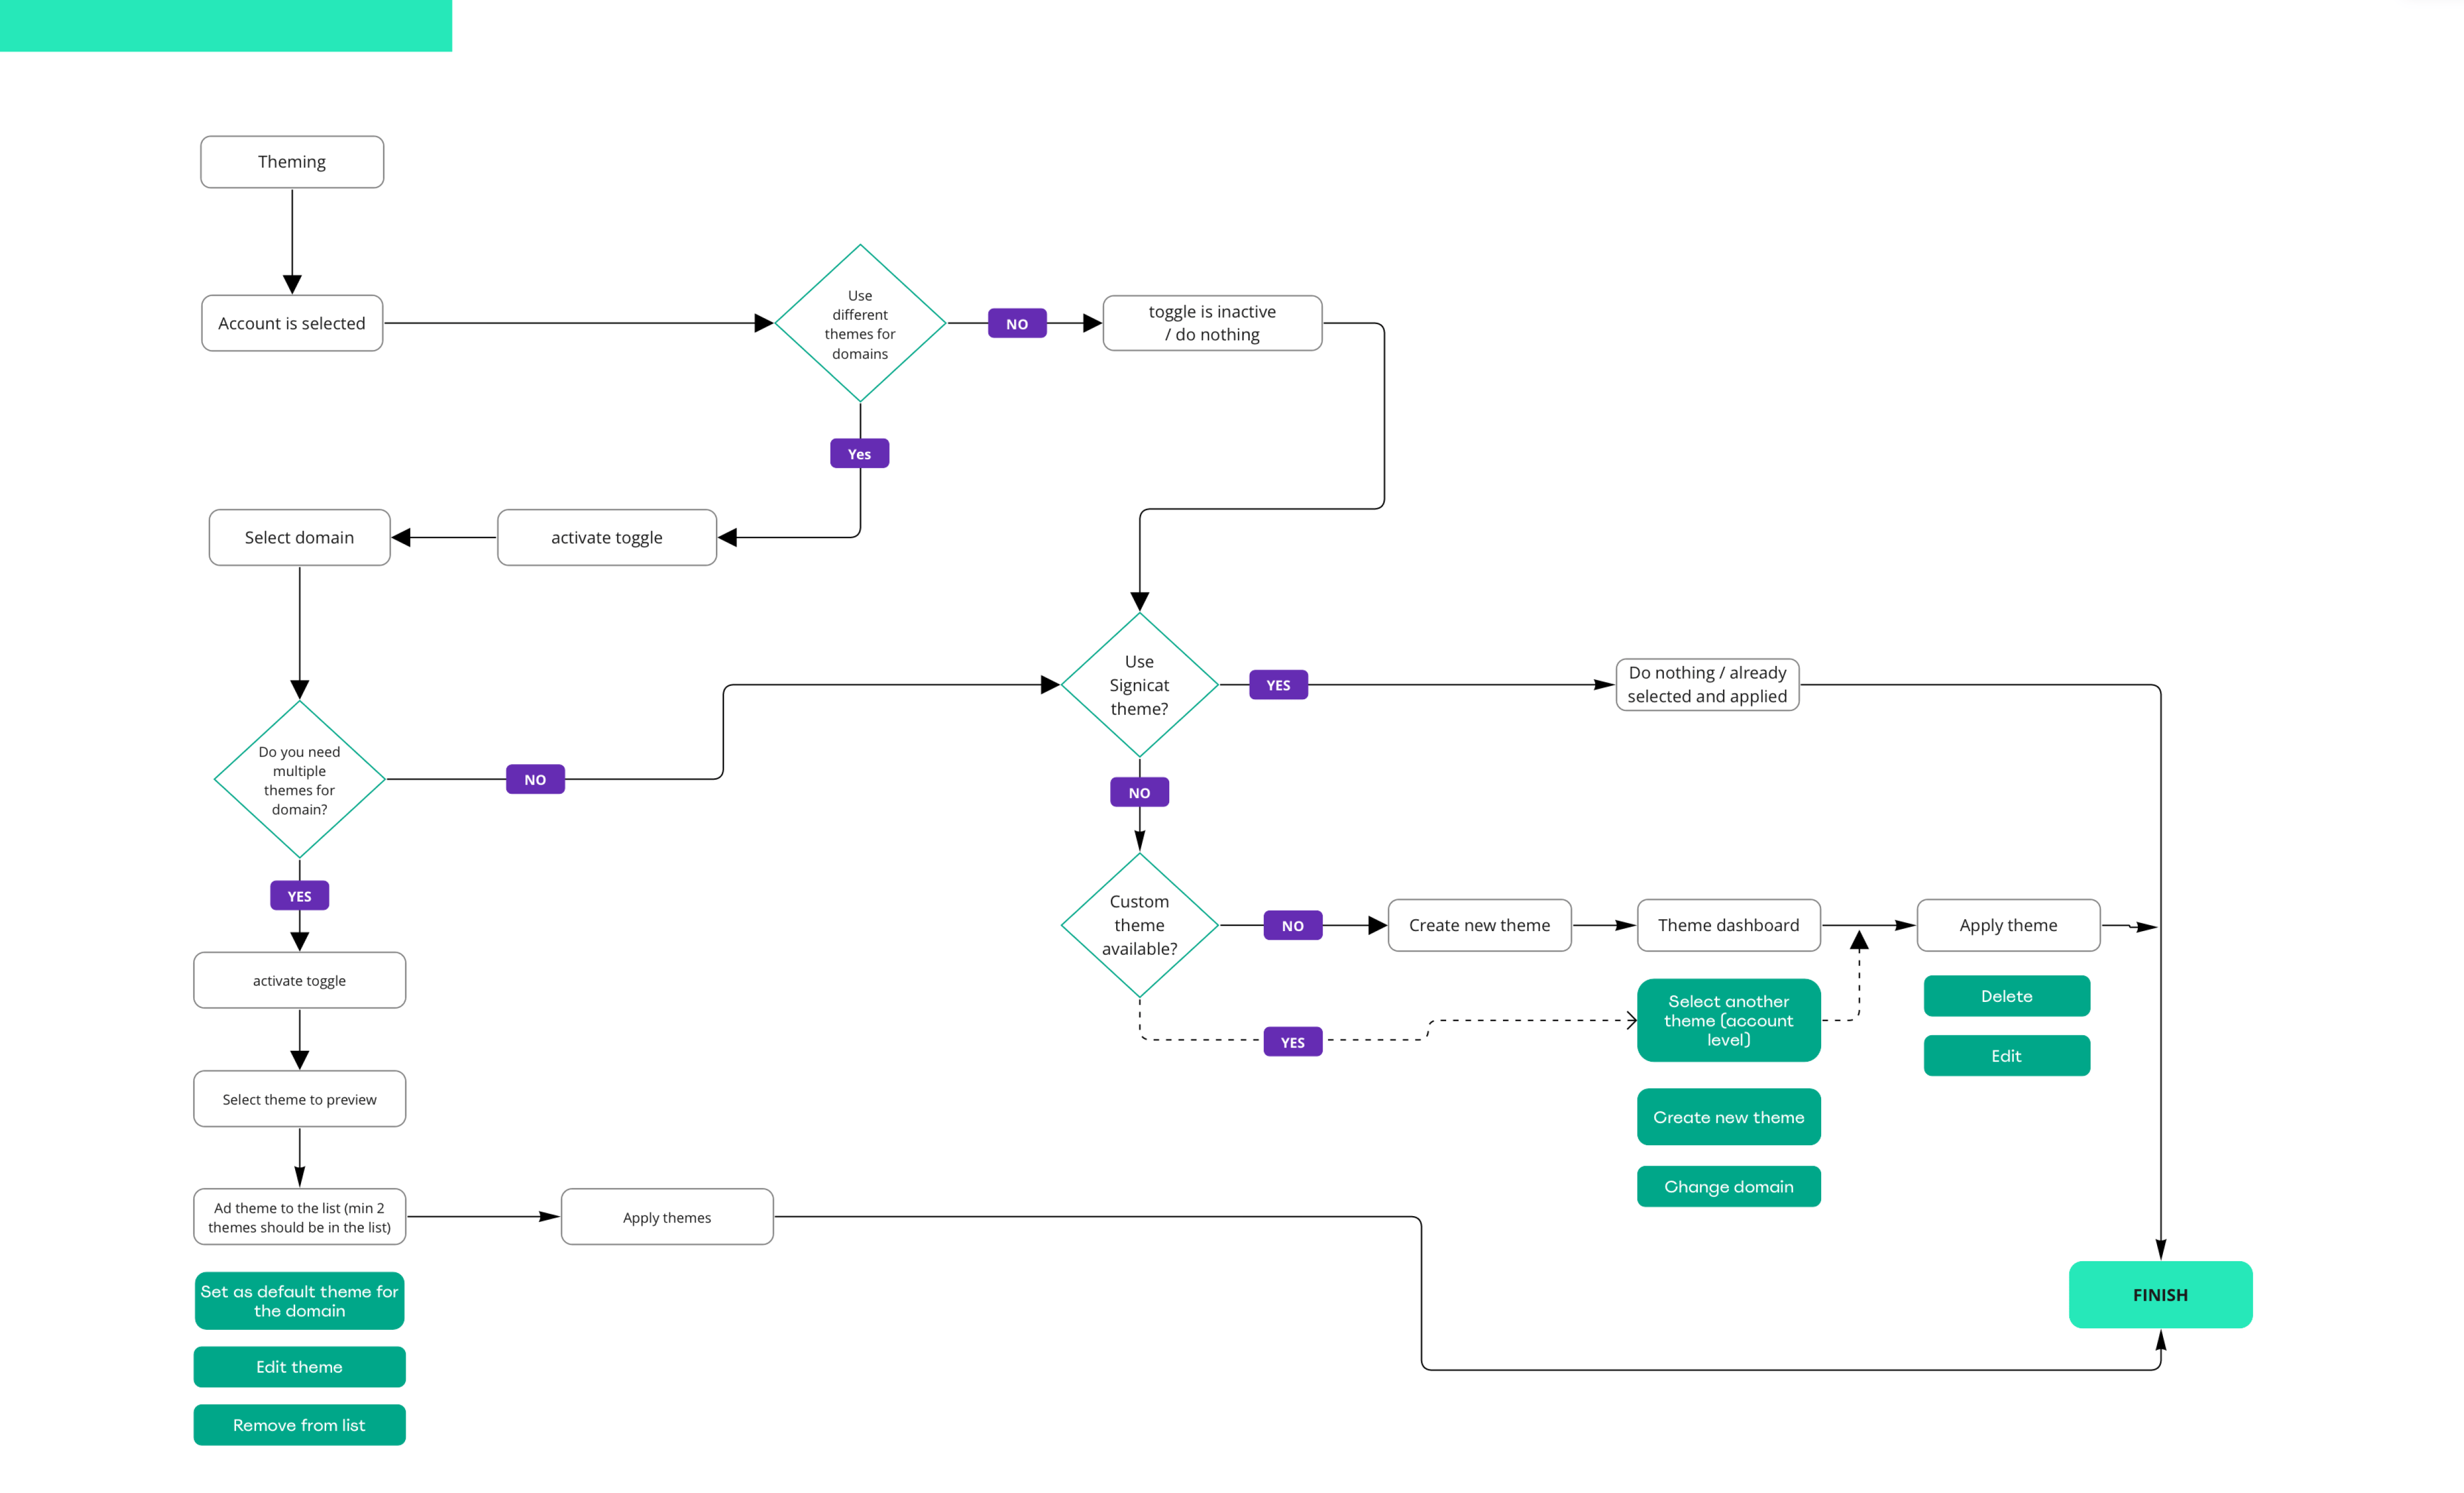
# Specify a theme per request
If you have multiple themes for a domain or account, you can specify which theme you want to use per request.
The way you do this depends on which authentication protocol you use.
# OpenID Connect
To specify a theme when using OpenID Connect, you must use the acr_values URL parameter.
Example: acr_values=theme:xfwfyv1340
In this example,xfwfyv1340 is the theme ID. You can find and copy the required theme ID from the Themes settings in the Dashboard (see screen example above).
See also the general acr_values description.
# Authentication REST API
To specify a theme when using the Authentication REST API, you must use the optional themeId field when creating authentication sessions.
Example: "themeId": "agkaa12"
See also the API reference documentation
# SAML 2.0
Information will follow soon.