Setup of Swedish BankID
Integration with BankID is done similarly to Signicat's other ID methods. This page describes the specifics for setting up BankID. For more general information on how to integrate with Signicat's protocols, see the Quick start guide.
Initial preparations
The setup descriptions below assume you have completed the following initial preparations:
- Sign up to the Signicat Dashboard.
- In the Signicat Dashboard, set up an organisation, an account and a domain.
We recommend that you test our services with your sandbox account before implementing them in production.
Add BankID in the Dashboard
You do not need any agreement to add BankID with a sandbox account. However, before you can start integrating in production, you need to configure BankID access with an onboarding manager. To get help with this, follow the steps in Sign agreements and order certificate or contact us.
To add BankID to the list of supported ID methods:
- In the Signicat Dashboard, go to eID Hub > ID Methods.
- Click Add new.
- Choose Swedish BankID in the list and click Save.
You can now continue with selecting a protocol and configuring the ID method.
Select protocol and configure
This section describes how you select and set up different BankID integrations. You can choose between the following protocols:
- OIDC
- SAML 2.0
- Authentication REST API: This API provides either a redirect or a headless flow. See the general documentation for a concept description of the available flows.
Choice of protocol depends on what you prefer and what you want to achieve. The Signicat Authentication REST API gives you a lot of flexibility and enables options such as headless flow in addition to redirect. Between the other two, we recommend using OIDC, since SAML 2.0 is much more complex to implement on your side and usually requires a federation agent already in place. OIDC is industry standard and you do not need to manage user sessions on your own (like with the Authentication REST API).
You can find more information about the different types in the general section, Authentication protocols.
- OpenID Connect
- SAML 2.0
- Authentication REST API
OIDC
This section details how to set up Swedish BankID with the OIDC protocol.
1. Add OIDC configuration
Before you start building the integration, you need to set up an OIDC client and create a client secret in the Dashboard. Follow the steps in the Quick start guide.
For an overview of available scopes for BankID (needed when you define the OIDC client), see the Scopes and claims for OIDC.
2. Control the BankID flow
Signicat provides different flow options for BankID (for example, QR flow). This section describes how to control those flow options when using the OIDC protocol.
Example authorization request
You can pre-select an ID method in your authorization request by including the name of the identity provider (idp) in the acr_values parameter. To pre-select Swedish BankID, include acr_values=idp:sbid in your authorization request.
Here is an example on an authorization URL:
https://<YOUR_SIGNICAT_DOMAIN>/auth/open/connect/authorize?
client_id=sandbox-example-client-123
&response_type=code
&scope=openid
&prompt=login
&acr_values=idp:sbid
&redirect_uri=https://myservice.example/redirect
The URL consist of a base URL https://<YOUR_SIGNICAT_DOMAIN>/auth/open/connect/authorize and the following parameters:
client_id: OIDC Client ID you created in the Dashboard.scope: OIDC scopes that determine the BankID flow.openidis a required parameter. For an overview of available scopes and claims for BankID, see the Scopes and claims for OIDC.redirect_uri: The URI where the end-user is redirected to at the end of the authentication flow. This must be the same as you defined in the OIDC configuration in the Dashboard.response_type: Based on the response flow you set for the OIDC Client (this is an advanced feature).
The acr_values and login_hintparameters are described in more detail below.
acr_values
You can use the acr_values parameter to adjust how the authentication flow behaves by using the following available parameters and corresponding values:
| Name | Values | Description |
|---|---|---|
sbid_app_redirect | myapp://redirect | Possibility to apply the app redirect URL that you have added to the allowlist in the Dashboard Configuration page. |
sbid_initial_flow | DETECT, APP_LAUNCH or REMOTE_FLOW | Controls which authentication flow should be presented first to the user: - DETECT automatically determines if the user is on a mobile or a desktop device, and presents APP_LAUNCH or REMOTE_FLOW respectively. This is the default behaviour.- APP_LAUNCH launches the BankID app locally. - REMOTE_FLOW presents the QR code flow. |
sbid_require_mrtd | true or false | Setting this parameter to true, will enforce the end-user to do an additional confirmation with either their Swedish ID-Card or their Swedish passport. This should be used in transactions where extra security might be warranted, for example high risk transactions. For this parameter to work, you must also add the sbid-extra scope in the request. This scope includes the sbidMrtd claim. Note: You must validate that the sbidMrtd value is returned as true to prevent any tampering with the sbid_require_mrtd parameter. For feature details, see the About page > MRTD. |
sbid_auth_type | NORMAL or PHONE | Controls which type of flow is started for Swedish BankID: - NORMALlaunches the regular Authentication flow (can be further specified by sbid_initial_flow) . - PHONE launches the Phone flow. Notes: : - For the Phone flow to work, you must also include sbid_phone_initiator and enable the Phone flow in the Dashboard configuration. - It must be a "trusted" parameter (see note below this table) |
sbid_phone_initiator | USERor OPERATOR | Defines the default selected radio button in the first screen of the Phone flow: - USER means the User radio button is selected as default. - OPERATOR means the Operator button is selected as default. Note: It must be a "trusted" parameter (see note below this table) |
sbid_intention_text | VGVzdCBpbnRlbnRpb24gdGV4dAo= | A text specifying the intention of the authentication. Notes: - Must be encoded in UTF8 Base64 format. - Max length of the Base64 encoded string: 1500 characters. For more details, see Define intention text. |
sbid_intention_text_format | simpleMarkdownV1 | Defines the format of the intention text to be simpleMarkdownV1. For more details, see Define intention text. |
You must send sbid_auth_type and sbid_phone_initiatoras "trusted" parameters. This means you must use signed authorisation requests (see code examples in the general eID Hub docs).
Examples
Remote flow with QR code and intention text:
acr_values=idp:sbid sbid_initial_flow:REMOTE_FLOW sbid_intention_text:VGVzdCBpbnRlbnRpb24gdGV4dAo=
Phone flow:
acr_values=idp:sbid sbid_auth_type:PHONE sbid_phone_initiator:OPERATOR
login_hint (prefill user information)
You can use the login_hint parameter to prefill information about the user, for example, so the transaction is locked down to a specific user.
ninPrefilling of user information only applies to the national identification number (nin) for Swedish BankID. You cannot prefill other user data.
| Name | Description |
|---|---|
nin | Prefills the national identity number. The prefilled value will lock down BankID to restrict the authentication to a person with that national identity number. |
Example
login_hint=nin:199002171234
This will prefill the national identity number of the end-user to the specified value.
See also
SAML 2.0
Documentation will follow later.
Authentication REST API
This page details how to set up authentication for Swedish BankID using Signicat's Authentication REST API, either with redirect or headless flow. Requests are sent from your backend server to Signicat's Authentication REST API.
The currently supported mechanisms for authentication with Swedish BankID are:
- QR code: Launches the QR code flow on a remote device.
- App launch: Launches the BankID app locally on the same device.
- MRTD check: Adds an extra security check to a normal authentication flow.
- Phone flow: Allows authentication via a telephone call.
The mechanisms are set up in the same way, except for some minor differences in field values, as described in the following sections.
If you want to read more about the basics of our eID Hub product before you start integrating with Swedish BankID, see the:
- Authentication REST API documentation for a conceptual description of the flows.
- API Reference for endpoint descriptions.
Redirect flow
This section details how to set up authentication for Swedish BankID using the redirect flow. The redirect flow allows you to pass a URL to your end-users which they will open in a browser.
Overview of the setup
This is an overview of what you need to do to set up a redirect flow:
Set up the API client
Before you can make a request to the Authentication REST API, you need to set up an API client to obtain client credentials. You use these client credentials in a request to obtain an access token. How to do this is described in the Accessing Signicat API products section. The access token needs to be passed in as an HTTP Bearer authentication header when sending the requests.
Create a session
Request
To create a session, send a POST request to https://api.signicat.com/auth/rest/sessions (for reference details, see the Create a new session endpoint description).
Request example: Remote flow (QR)
Here is an example request body for an authentication, using the remote flow (QR code).
{
    "allowedProviders": ["sbid"],
    "flow": "redirect",
    "additionalParameters": {
        "sbid_initial_flow": "REMOTE_FLOW",
        "sbid_intention_text": "VGVzdCBpbnRlbnRpb24gdGV4dAo="
    },
    "prefilledInput": {
        "nin": "1234567890"
    },
    "requestedAttributes": [
        "name",
        "firstName",
        "lastName",
        "dateOfBirth",
        "nin"
    ],
    "callbackUrls": {
        "success": "https://example.com/success",
        "abort": "https://example.com/abort",
        "error": "https://example.com/error"
    }
}
Upon sending this request, the BankID session will start.
If the authentication completes successfully, the final result will contain the attributes that were requested.
Request example: Remote flow (QR) with MRTD
Here is an example request body for an authentication, where the MRTD security check is added to the normal QR code flow. This reqest will result in an MRTD transaction.
When setting the additional parameter sbid_require_mrtd to true, remember to also add sbidMrtd in reqestedAttributes. If you do not set both parameters, the transaction will fail. You must also validate that the sbidMrtd value is returned as true to prevent any tampering with the sbid_require_mrtd parameter.
{
    "flow": "redirect",
    "allowedProviders": [
        "sbid"
    ],
    "additionalParameters": {
        "sbid_intial_flow": "QR",
        "sbid_require_mrtd": "true"
    },
    "requestedAttributes": [
        "name",
        "nin",
        "sbidMrtd"
    ],
    "callbackUrls": {
        "success": "https://signicat.com",
        "abort": "https://example.test/abort",
        "error": "https://example.test/error"
    }
}
If the authentication completes successfully, the final result will contain the attributes that were requested.
For a feature description of the MRTD check, see the About page.
Phone flow
Here is an example request body for an authentication with the Phone flow:
{
    "allowedProviders": ["sbid"],
    "flow": "redirect",
    "additionalParameters": {
        "sbid_auth_type": "PHONE",
        "sbid_phone_initiator": "OPERATOR"
    },
    "prefilledInput": {
        "nin": "1234567890"
    },
    "requestedAttributes": [
        "name",
        "firstName",
        "lastName",
        "dateOfBirth",
        "nin"
    ],
    "callbackUrls": {
        "success": "https://example.com/success",
        "abort": "https://example.com/abort",
        "error": "https://example.com/error"
    }
}
Field descriptions
To initialise an authentication with BankID, you can use the following fields in the initial request:
| Field | Required | Example value | Description |
|---|---|---|---|
allowedProviders | No | ["sbid"] | Specify ["sbid"] if you want to be sent directly to Swedish BankID. Don't send this field if you want to show a list of all the ID methods your account has connections for. |
flow | Yes | redirect | MUST have the value redirect. |
See below for a description of additionalParameters and the API Reference for the other fields.
Control the user flow (additionalParameters)
You use additionalParameters to control the redirect flow. This is not a required field.
| Name | Values | Description |
|---|---|---|
sbid_initial_flow | DETECT, APP_LAUNCH or REMOTE_FLOW | Controls which authentication flow should be presented first to the user: - DETECT automatically determines if the user is on a mobile or a desktop device, and presents APP_LAUNCH or REMOTE_FLOW respectively. This is the default behaviour.- APP_LAUNCH launches the BankID app locally.- REMOTE_FLOW presents the QR code flow. |
sbid_app_redirect | myapp://redirect | Possibility to apply the app redirect URL that you have added to the allowlist on the Dashboard configuration page. |
sbid_require_mrtd | true or false | Setting this parameter to true, will enforce the end-user to do an additional confirmation with either their Swedish ID-Card or their Swedish passport. This should be used in transactions where extra security might be warranted, for example high risk transactions. When this is set to true, you must also include sbidMrtd in the requestedAttribute. Note: You must validate that the sbidMrtd value is returned as true to prevent any tampering with the sbid_require_mrtd parameter. For feature details, see the About page page. |
sbid_auth_type | NORMAL or PHONE | Controls which type of flow is started for Swedish BankID: - NORMAL launches the regular Authentication flow (can be further specified by sbid_initial_flow) . - PHONE launches the Phone flow. Note: For the Phone flow to work, you must also include sbid_phone_initiator and enable the Phone flow in the Dashboard configuration. |
sbid_phone_initiator | USERor OPERATOR | Defines the default selected radio button in the first screen of the Phone flow: - USER means the User radio button is selected as default. - OPERATOR means the Operator radio button is selected as default. |
sbid_intention_text | VGVzdCBpbnRlbnRpb24gdGV4dAo= | A text specifying the intention of the authentication. Notes: - Must be encoded in UTF8 Base64 format. - Max length of the Base64 encoded string: 1500 characters. For more details, see Define intention text. |
sbid_intention_text_format | simpleMarkdownV1 | Defines the format of the intention text to simpleMarkdownV1. For more details, see Define intention text |
User information (requestedAttributes)
You can request the following attributes from users of Swedish BankID. These attributes are common for both the redirect and headless flows.
You add them in the requestedAttributes as shown in the request examples above.
| Attribute | sub-field | Example value in response | Description |
|---|---|---|---|
| name | Sven Svensson | The full name of the end-user | |
| firstName | Sven | The first name of the end-user. | |
| lastName | Svensson | The surname of the end-user. | |
| dateOfBirth | 1990-02-17 | The date of birth of the end-user (ISO 8601 format). | |
| idpId | 199002171234 | Personal identifier set by the identity provider. | |
| nin | value | 199002171234 | The national identity number (“fødselsnummer”) of the end-user. |
| type | PERSON | The type of national identity number. Always PERSON for Swedish BankID. | |
| issuingCountry | SE | The issuing country of the national identity. Always SE for Swedish BankID. | |
| sbidDeviceIp | 3.127.53.67 | The IP address of the end-user's device where the BankID app was run during the authentication. | |
| sbidCertificateNotBefore | 2022-10-18T22:00:00.000Z | The time from when the certificate is valid. | |
| sbidCertificateNotAfter | 2023-10-19T21:59:59.000Z | The time the certificate expires. | |
| sbidOcspResponderId | C=SE,O=Testbank A AB (publ),SERIALNUMBER=111111111111,CN=Testbank A Customer CA1 v1 for BankID Test OCSP Signing | The responder ID of the certificate used to sign the OCSP response (extracted from sbidOcspResponse). | |
| sbidOcspResponse | MIIHfgoBAKCCB3cwggdzBgkrBgEFBQcwAQ... | Base64 encoded OCSP response for end user's BankID certificate | |
| sbidXmlSignature | PD94bWwgdmVyc2lvbj0iMS4wIiBlbmNv... | Base64 encoded XML signature returned by BankID as proof of authentication | |
| sbidMrtd | true | Required in the MRTD check when the sbid_require_mrtd additional parameter is set to true. Note: You must validate that the sbidMrtd value is returned as true to prevent any tampering with the sbid_require_mrtd parameter. |
Prefill user information (prefilledInput)
You can use the prefilledInput parameter to prefill information about the user, for example, so the user does not have to fill in this information manually.
ninPrefilling of user information only applies to the national identification number (nin) for Swedish BankID. You cannot prefill other user data.
| Name | Required | Example value | Description |
|---|---|---|---|
nin | No | "prefilledInput": {"nin": "1234567890"} | Prefills the national identity number. If prefilled, only the user with that nin value will be able to authenticate. |
Response
Here is an example response after you have created a session:
{
    "id": "58126fb8-c5e2-...",
    "accountId": "a-sdge-...",
    "authenticationUrl": "https://<YOUR_SIGNICAT_DOMAIN>/broker/sp/external-service/login?messageId=21b064c3-28b...",
    "status": "CREATED",
    "callbackUrls": {
        "success": "https://example.com/success?sessionId=58126fb8-c5e2...",
        "abort": "https://example.com/abort?sessionId=58126fb8-c5e2...",
        "error": "https://example.com/error?sessionId=58126fb8-c5e2..."
    },
    "allowedProviders": [
        "sbid"
    ],
    "flow": "redirect",
    "requestedAttributes": [
        "name",
        "firstName",
        "lastName",
        "dateOfBirth",
        "nin"
    ],
    "sessionLifetime": 600
}
What you need to do with the response
You must redirect the end-user to the authenticationUrl found in the response. This is a unique URL which allows the user to perform the Swedish BankID authentication in context of the session you just created.
Get the session status
Request
No data specific for Swedish BankID needs to be provided in this request.
To get the status of a session, send a GET request to https://api.signicat.com/auth/rest/sessions/{id}. You can find the id value in the response that was returned when you created the session. For more information about the "Get session status" endpoint, see the API Reference description.
Response
The response will contain a status field, which you must use to see what the current status of the session is. Below you can see an example response for a successfully completed session:
{
    "id": "58126fb8-c5e2-...",
    "accountId": "a-sdge-...",
    "authenticationUrl": "https://<YOUR_SIGNICAT_DOMAIN>/broker/sp/external-service/login?messageId=21b064c3-28b...",
    "status": "SUCCESS",
    "provider": "sbid",
    "subject": {
        "id": "opuc4kyFUWPkfdmfYTzjS89u6ZCWLHWLZfPR5hpBW24=",
        "idpId": "199010270537",
        "firstName": "Sven",
        "lastName": "Svensson",
        "nin": {
            "value": "199010270537",
            "issuingCountry": "SE",
            "type": "PERSON"
        }
    },
    "callbackUrls": {
        "success": "https://example.com/success?sessionId=58126fb8-c5e2...",
        "abort": "https://example.com/abort?sessionId=58126fb8-c5e2...",
        "error": "https://example.com/error?sessionId=58126fb8-c5e2..."
    },
    "allowedProviders": [
        "sbid"
    ],
    "flow": "redirect",
    "requestedAttributes": [
        "name",
        "firstName",
        "lastName",
        "dateOfBirth",
        "nin"
    ],
    "sessionLifetime": 600
}
Status overview
| Status | Description |
|---|---|
WAITING_FOR_USER | The user has not started to authenticate yet. |
SUCCESS | The authentication is successful. Authentication result is present in the response. |
ABORT | The session was cancelled by the end-user. |
ERROR | The BankID session was not completed in time. |
What you need to do with the response
If the returned status is SUCCESS, you will find information about the authenticated user in the subject object.
You will also see what provider was actually used by checking the provider field. This can be useful if you allowed more than one provider when you created the session.
Headless flow
This section details how to set up headless authentication for Swedish BankID. This means that you can provide your own user interface within your app or website.
Overview of the headless setup
This is an overview of what you need to do to set up a headless authentication:
- Set up the API client
- Create a session
- Get the session status
- Cancel a session (optional)
- How to complete a headless flow with QR or app launch
Set up the API client (headless)
Before you can make a request to the Authentication REST API, you need to set up an API client to obtain client credentials. You use these client credentials in a request to obtain an access token. How to do this is described in the Accessing Signicat API products section. The access token needs to be passed in as an HTTP Bearer authentication header when sending the requests.
Create a session (headless)
Request
You can use the https://api.signicat.com/auth/rest URL and send the request to the /sessions endpoint, including the accountId parameter. The full request URL should look like this:
https://api.signicat.com/auth/rest/sessions?signicat-accountId={accountId}
You can find the accountId in the Signicat Dashboard.
For reference details, see the Create a new session endpoint description.
Request example: QR code flow
Here is an example request body for a headless authentication, using the QR code flow. This example also applies to the App Launch flow (just replace QR with APP_LAUNCH). If the authentication completes successfully, the final result will contain the attributes that were requested.
{
    "allowedProviders": ["sbid"],
    "flow": "headless",
    "additionalParameters": {
        "sbid_flow": "QR",
        "sbid_end_user_ip": "123.123.123.123",
        "sbid_intention_text": "VGVzdCBpbnRlbnRpb24gdGV4dAo="
    },
    "prefilledInput": {
        "nin": "1234567890"
    },
    "requestedAttributes": [
        "name",
        "firstName",
        "lastName",
        "dateOfBirth",
        "nin"
    ]
}
Request example: Phone flow
Here is an example request body for headless authentication, using the Phone flow:
{
    "allowedProviders": ["sbid"],
    "flow": "headless",
    "additionalParameters": {
        "sbid_auth_type": "PHONE",
        "sbid_phone_initiator": "OPERATOR"
    },
    "requestedAttributes": [
        "name",
        "firstName",
        "lastName",
        "nin",
        "dateOfBirth",
        "sbidAge",
        "sbidOcspResponse",
        "sbidXmlSignature",
        "sbidOcspResponderId",
        "sbidVerificationTime",
        "sbidVerificationSignature"
    ],
    "prefilledInput": {
        "nin": "196809179176"
    }
}
Field descriptions
To initialise a headless authentication with BankID, you must specify the following required fields in the initial request:
| Field | Required | Example value | Description |
|---|---|---|---|
allowedProviders | Yes | ["sbid"] | MUST have the value ["sbid"]. |
flow | Yes | headless | MUST have the value headless. |
Control the user flow (additionalParameters)
You use additionalParameters to control the headless flow:
| Field | Required | Example value | Description |
|---|---|---|---|
sbid_flow | Yes | QR | Legal values: - QR for the QR code flow- APP_LAUNCH for the BankID app launch flow Note: Regardless of whether QR or APP_LAUNCH is specified here, the API responses will contain the necessary data to conduct an app launch flow. However, to get the necessary data for a QR flow, the value MUST be given as QR. |
sbid_require_mrtd | No | true or false | Adds the MRTD check to a normal authentication. When this is set to true, you must also include sbidMrtd in the requestedAttribute. Note: You must validate that the sbidMrtd value is returned as true to prevent any tampering with the sbid_require_mrtd parameter. For feature details, see the About page page. |
sbid_auth_type | No | NORMAL or PHONE | Controls which type of flow is started for Swedish BankID: - NORMALlaunches the regular Authentication flow (can be further specified by sbid_flow) . - PHONE launches the Phone flow. Notes: - For the Phone flow to work, you must also include sbid_phone_initiator and enable the Phone flow in the Dashboard configuration. - You must send nin as prefilled. |
sbid_phone_initiator | No | USERor OPERATOR | Defines the default selected radio button in the first screen of the Phone flow: - USER means the User radio button is selected as default. - OPERATOR means the Operator button is selected as default. |
sbid_end_user_ip | Yes | 123.123.123.123 | IP address representing the user-agent/device of the end-user as seen by your service. This could be gathered from the requests you receive from the end user's user-agent/device. This must be in a valid IPv4 or IPv6 format. |
sbid_intention_text | No | VGVzdCBpbnRlbnRpb24gdGV4dAo= | A text specifying the intention of the authentication. Notes: - Must be encoded in UTF8 Base64 format. - Max length of the Base64 encoded string: 1500 characters. For more details, see Define intention text. |
sbid_intention_text_format | No | simpleMarkdownV1 | Defines the format of the intention text to be simpleMarkdownV1. For more details, see Define intention text. |
User information (requestedAttributes)
You can request the following attributes from users of Swedish BankID. These attributes are common for both the redirect and headless flows.
You add them in the requestedAttributes as shown in the request examples above.
| Attribute | sub-field | Example value in response | Description |
|---|---|---|---|
| name | Sven Svensson | The full name of the end-user | |
| firstName | Sven | The first name of the end-user. | |
| lastName | Svensson | The surname of the end-user. | |
| dateOfBirth | 1990-02-17 | The date of birth of the end-user (ISO 8601 format). | |
| idpId | 199002171234 | Personal identifier set by the identity provider. | |
| nin | value | 199002171234 | The national identity number (“fødselsnummer”) of the end-user. |
| type | PERSON | The type of national identity number. Always PERSON for Swedish BankID. | |
| issuingCountry | SE | The issuing country of the national identity. Always SE for Swedish BankID. | |
| sbidDeviceIp | 3.127.53.67 | The IP address of the end-user's device where the BankID app was run during the authentication. | |
| sbidCertificateNotBefore | 2022-10-18T22:00:00.000Z | The time from when the certificate is valid. | |
| sbidCertificateNotAfter | 2023-10-19T21:59:59.000Z | The time the certificate expires. | |
| sbidOcspResponderId | C=SE,O=Testbank A AB (publ),SERIALNUMBER=111111111111,CN=Testbank A Customer CA1 v1 for BankID Test OCSP Signing | The responder ID of the certificate used to sign the OCSP response (extracted from sbidOcspResponse). | |
| sbidOcspResponse | MIIHfgoBAKCCB3cwggdzBgkrBgEFBQcwAQ... | Base64 encoded OCSP response for end user's BankID certificate | |
| sbidXmlSignature | PD94bWwgdmVyc2lvbj0iMS4wIiBlbmNv... | Base64 encoded XML signature returned by BankID as proof of authentication | |
| sbidMrtd | true | Required in the MRTD check when the sbid_require_mrtd additional parameter is set to true. Note: You must validate that the sbidMrtd value is returned as true to prevent any tampering with the sbid_require_mrtd parameter. |
Prefill user information (prefilledInput)
You can use the prefilledInput parameter to prefill information about the user, for example, so the transaction is locked down to a specific user.
ninPrefilling of user information only applies to the national identification number (nin) for Swedish BankID. You cannot prefill other user data.
| Name | Required | Example value | Description |
|---|---|---|---|
nin | Sometimes | "prefilledInput": {"nin": "1234567890"} | Prefills the national identity number. If prefilled, only the user with that nin value will be able to authenticate. For the PHONE flow this field is required, otherwise it is not required. |
Response
Here is an example response for the session creation:
{
    "id": "3d07c219-...",
    ...
    "idpData": {
        "autoStartToken": "db65b172-c9a4-43e3-82bf-0db09d7f922e",
        "qrData": "bankid.c157aec7-e179-424..."
    }
}
Field descriptions
The response to the session creation will contain an idpData field, which in turn contains the necessary data that you need in your frontend.
| Field | Example value | Description |
|---|---|---|
autoStartToken | db65b172-c9a4-43e3-82bf-0db09d7f922e | Must be used when building the URL for launching the BankID app on the same device. - iOS: https://app.bankid.com/?autostarttoken=<autoStartToken>&redirect=<urlToYourAppOrWebPage>- Android (modern): https://app.bankid.com/?autostarttoken=<autoStartToken>&redirect=null- Android 4 and 5: bankid:///?autostarttoken=<autoStartToken>&redirect=null |
qrData | bankid.c157aec7-e179-424d-bee7-d54c9ece06fa.0.5b6b54c5a8939fa152da2a9689bf50c14233ada0c79a67a2a52b1f8ba579ff35 | Initial data to display in a QR code. The QR code must be updated with the qrData you receive as a result of every request to get the session status. Only available if you started the session with "sbid_flow": "QR" |
What you need to do with the response
Based on the type of flow you are using, do the following:
- QR: Display a QR code to the end-user with the
idpData.qrDataas content. For more details, see the separate QR code flow section below. - APP_LAUNCH: Display a launch button for triggering the app launch URL. For more details, see the description of
autoStartTokenin the table above and the separate APP_LAUNCH flow section below.
Errors
| HTTP Status Code | Error code | Description |
|---|---|---|
| 400 | idp:sbid:already-in-progress | A request for the given NIN (National Identity Number) is already in progress. Both sessions are cancelled. |
| 400 | idp:sbid:invalid-parameter | You have sent an invalid parameter to BankID’s infrastructure, for example an invalid end-user IP address (see sbid_end_user_ip in the additionalParameters table above). |
| 500 | idp:sbid:rp-service-error | Failed to create a transaction towards BankID’s infrastructure. |
| 500 | idp:server-problem | Internal server error occurred while creating the session. |
Get the session status (headless)
Request
No data specific for Swedish BankID needs to be provided in this request.
You send the request to /sessions/{id}?signicat-accountId={accountId}. You can find the id value in the response that was returned when you created the session. You can find the accountId in the Signicat Dashboard. For more information about the "Get session status" endpoint, see the API Reference description.
Response
Content of idpData
The response will contain an idpData field, which contains necessary input data for your frontend.
If you are using the QR flow, you must update your QR code with the data received in the qrData field.
| Field | Example value | Description |
|---|---|---|
qrData | bankid.c157aec7-e179-424d-bee7-d54c9ece06fa.0.5b6b54c5a8939fa152da2a9689bf50c14233ada0c79a67a2a52b1f8ba579ff35 | Updated data to display in a QR code. Only available if you started the session with "sbid_flow": "QR" and you received status WAITING_FOR_USER. |
sbidStatus | OUTSTANDING_TRANSACTION | Can be used to get more detailed status information, which can be used to make decisions. See possible values in the Status table below. |
Status
In the response you will get a top level status in the status field. For some of these statuses you will find a more detailed status in idpData.sbidStatus.
To prevent your integration from breaking if we add more statuses to idpData.sbidStatus and error.code, please handle unexpected values as follows:
- Unknown
idpData.sbidStatuswith top level statusWAITING_FOR_USER: Treat asOUTSTANDING_TRANSACTION - Unknown
error.codewith top level statusERROR: Treat as an unknown error
Here are some response examples with different statuses (see the Status table below for descriptions of the different statuses):
Example response: WAITING_FOR_USER
{
	"id": "4c88a3e2-b10e-4148-914d-f3f93f1ad76f",
	"status": "WAITING_FOR_USER",
    "idpData": {
        "sbidStatus": "OUTSTANDING_TRANSACTION",
        "qrData": "bankid.c157aec7-e179-424d-bee7-d54c9ece06fa.0.5b...",
    },
    ...
}
Example response: ABORT
{
	"id": "4c88a3e2-b10e-4148-914d-f3f93f1ad76f",
	"status": "ABORT",
    ...
}
Example response: ERROR
{
	"id": "4c88a3e2-b10e-4148-914d-f3f93f1ad76f",
	"status": "ERROR",
    "error": {
        "code": "idp:sbid:timeout",
        ...
    },
    ...
}
Status overview
| Status | idpData.sbidStatus | error.code | Description |
|---|---|---|---|
WAITING_FOR_USER | OUTSTANDING_TRANSACTION | The user has not started to authenticate yet. End-user guidance: Instruct the user on what they need to do (e.g. scan QR code or click a button to launch the app). BankID recommends the RFA13 or RFA1 user messages, but these do not take the QR code into consideration. | |
NO_CLIENT | The BankID app has not been started yet. For all practical purposes this can be treated the same way as OUTSTANDING_TRANSACTION. | ||
STARTED | No BankID found on device yet. This may take a few seconds. BankID recommends you to continue polling if you get this status. For mobile device you can in practice choose to stop polling if you get this status more than a few times in a row. End-user guidance: Instruct the user that they need to wait. BankID recommends the RFA14 or RFA15 user messages. In practice though, it might not make sense to show such long messages which in the majority of cases will only be shown until the next poll. | ||
USER_SIGN | The user has started to authenticate. End-user guidance: Instruct the user to complete the authentication in their app. BankID recommends RFA9, but this is a bit misleading for fingerprint. | ||
SUCCESS | The authentication is successful. Authentication result is present in the response. | ||
ABORT | The session was cancelled by the end-user. | ||
CANCELLED | The session was cancelled by you or the end-user. | ||
ERROR | idp:sbid:timeout | The BankID session was not completed in time. | |
idp:sbid:cert-error | The end-user certificate could not be trusted (invalid security code, revoked or invalid certificate). | ||
idp:sbid:start-failed | The BankID app was not started within a certain time limit. | ||
idp:sbid:rp-service-error | An error occurred when contacting the BankID service. | ||
idp:sbid:cancelled | The session was cancelled since someone started a parallel session for the user (security feature by BankID). | ||
idp:sbid:unknown-error | Unknown error occurred. |
What you need to do with the response
Depending on the top level status you receive in the response, you need to handle the response a bit differently:
- For
WAITING_FOR_USERstatus you want to read theidpData.sbidStatusand handle the response accordingly. See information in the Status table above on what to do. - For
SUCCESSstatus you will find the authentication result in thesubjectfield. - For
ABORTstatus you can assume that the end-user intentionally cancelled the transaction. - For
ERRORstatus you can check theerror.codefield to see what kind of error occurred. - For
CANCELLEDstatus you or the end-user has cancelled the transaction.
If you get statuses that are not listed here, see Backwards compatibility in the start of this section.
Cancel a session (optional)
You can stop an ongoing authentication session by using the Cancel flow endpoint.
This is useful if you want to:
- Provide a way for your end-users to cancel the transaction, both at Signicat and Swedish BankID (via a link/button). It is especially useful if you lock the transaction to a particular national identity number.
- Cancel an ongoing transaction for a particular national identity number before starting a new transaction for the same person.
A successful cancellation returns 200 OK of type CANCELLED.
Example response
{
  "id": "3d07c219-0a88-45be-9cfc-91e9d095a1e9",
  "accountId": "string",
  "status": "CANCELLED",
  "provider": "sbid",
  ...
}
Errors
| HTTP Status Code | error.code | Description |
|---|---|---|
| 500 | idp:server-problem | Internal server error occurred while cancelling the session. |
How to complete a headless flow
The following sections describe how you can set up a complete headless flow for QR code and APP_LAUNCH, using the above information.
QR code flow
For the QR code flow, you must display an “animated” QR code to the end-user. Animating the QR code is done by updating the content of the displayed QR code for every status call. This is a mandatory security feature of Swedish BankID.
The process is as follows:
- Create a new session with
sbid_flowset toQR. - Take the
idpData.qrDatafrom the initial response and display as a QR code to the end-user. - Poll for status every 1 to 3 seconds. If you receive top level status
WAITING_FOR_USER:- If
idpData.sbidStatusisOUTSTANDING_TRANSACTIONorNO_CLIENT, you must update the displayed QR code with the content of theidpData.qrDatareturned in the status responses. - For other values of
idpData.sbidStatus, see the description in the Status table above for information on what to show. Continue polling until the value forstatusis eitherSUCCESS,ABORT, orERROR, at which point the session is finalized.
- If
APP_LAUNCH flow
The APP_LAUNCH flow is for launching the Swedish BankID app on a mobile device or a desktop computer. You can only launch the app on the same device as you are displaying the launch button.
The process is as follows:
- Create a new session with
sbid_flowset toAPP_LAUNCH. - Take the
autoStartTokenfrom the initial response and build a launch URL as described in the Status table above. Display a launch button/link with that URL. - Poll for status every 1 to 3 seconds. If you receive the top level status
WAITING_FOR_USER:- If
idpData.sbidStatusisOUTSTANDING_TRANSACTIONorNO_CLIENTyou should still display the launch button and keep polling. - For other values of
idpData.sbidStatus, see the description in the the Status table above for information on what to show. Continue polling until the value forstatusis eitherSUCCESS,ABORT, orERROR, at which point the session is finalized.
- If
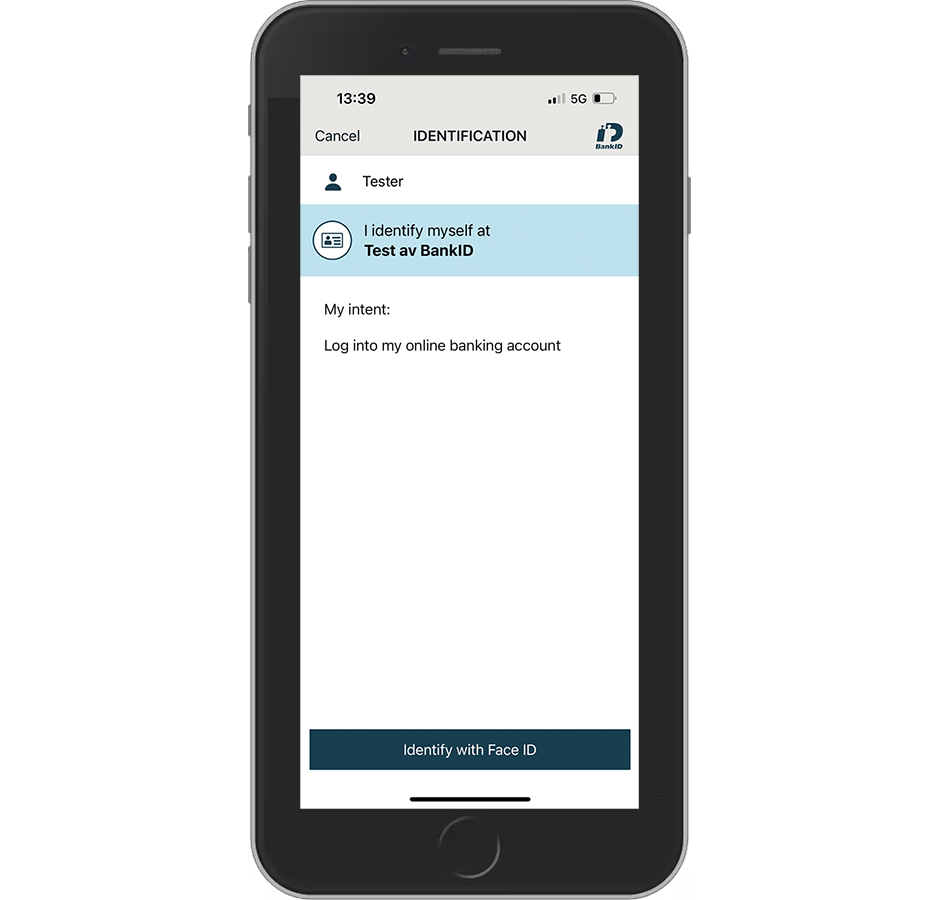
Define intention text
You may add an intention text on the IDENTIFICATION screen of the BankID app to underline the purpose of the authentication for the end-user.
Your intention text will always be prefixed with "My intent", as shown in the following example, where the intention text is set to Log into my online banking account:
Front matching
You may also add security related information (see a screen example in the next section).
Swedish BankID does not allow using this text space for other than intention of the identification and security-related information.
You can define the intention text in two ways:
Add intention text in the Dashboard
- Open the Swedish BankID configuration page in the Dashboard.
- Add your intention text in the Intention text input field.
If the intention text is long and needs a scrollbar, the end-user must scroll to the bottom before they can proceed.
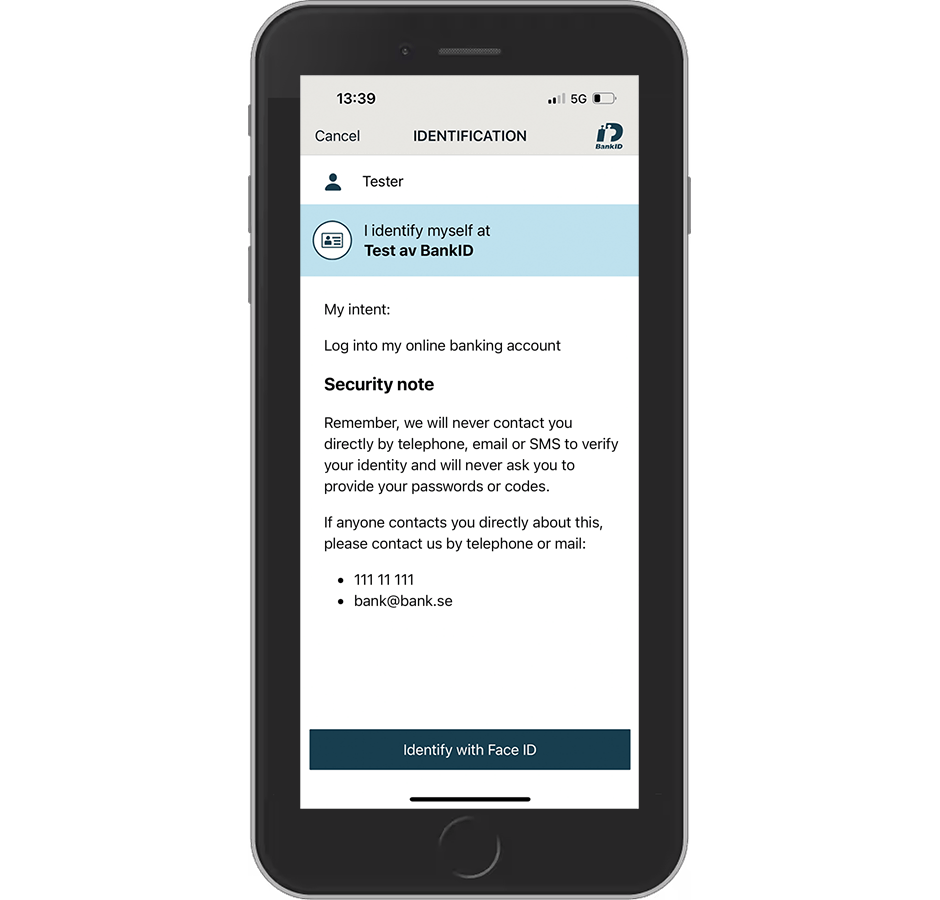
- Optionally, you may add formatting to the text in simple markdown format (simpleMarkdownV1). This allows you to add headings, bullets and more (for details, see Swedish BankID's guide). Here is an example text in markdown format:
Log into my online banking account

### Security note
Remember, we will never contact you directly by telephone, email or SMS to verify your identity and will never ask you to provide your passwords or codes.

If anyone contacts you directly about this, please contact us by telephone or mail:
+ 111 11 111
+ bank@bank.se
This would look as follows:
Front matching
- If the intention text contains formatting, choose simpleMarkdownV1 from the Intention text format drop-down menu.
Add intention text using prefilling
You may also add intention text per transaction by using prefilling of the two additional parameters, sbid_intention_text and sbid_intention_text_format.
- You cannot mix prefilled and configured (in the Dashboard) values. Prefilling will override the intention text you have defined in the Dashboard (see the above section).
- The additional parameters must be trusted. The Authentication REST API makes this easy, since it always provides trusted parameters. For OIDC, you must use signed authorisation requests (see the general eID Hub documentation on how to do this).
To add the intention text in your integration code:
- Create your intention text. You may format the intention text using simple markdown format (see the above example).
- Encode the text into UTF-8 Base64 format. The maximum length of the the Base64 encoded string is 1500 characters.
- Include the Base64 encoded intention text into your request. For protocol specific setup and examples, see the separate Authentication REST API and OIDC sections.
- You can verify that the text looks as expected by testing a transaction in the sandbox environment.
Theming
You can set your own theme with logo and colours in the Dashboard. For more details, see Account theming.