# eHerkenning/eIDAS
Identity Broker and eHerkenning Broker
If you do not have the Signicat Identity Broker, you will need to follow the steps for direct connections to the eHerkenning Broker.
Learn more about eHerkenning/eIDAS in the Knowledgebase.
# Getting started
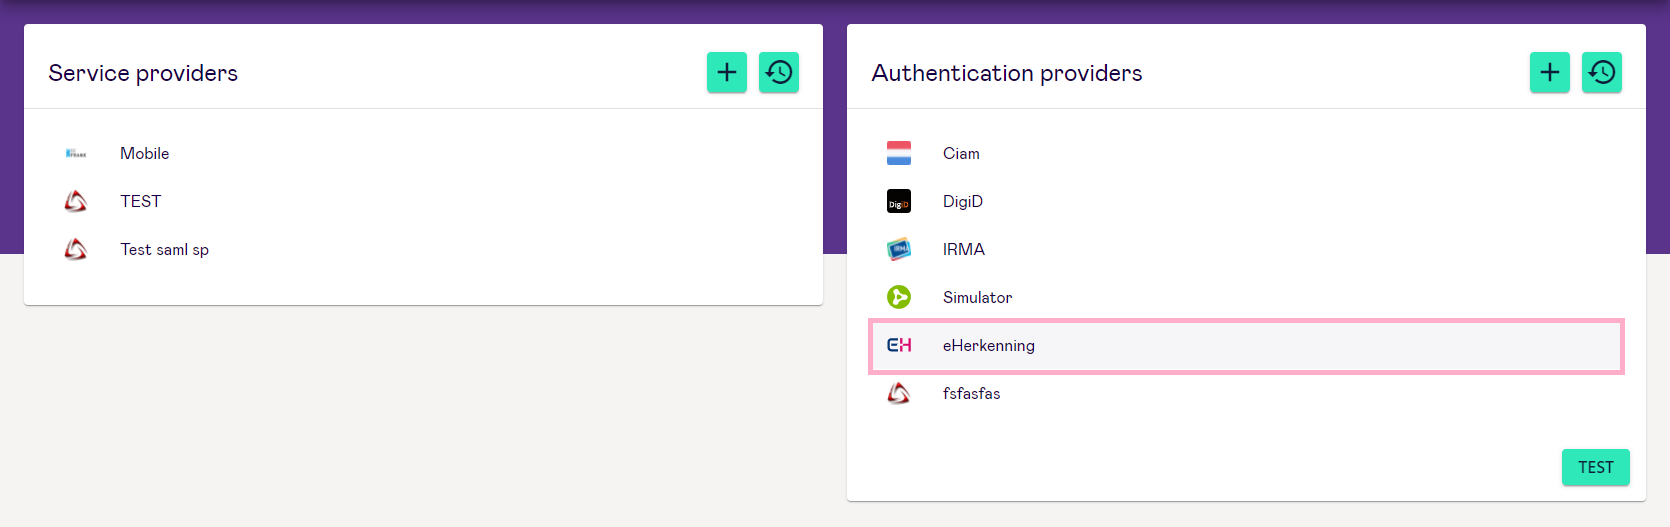
The Identity Broker dashboard shows all previously configured service and authentication providers. To add eHerkenning to the list, please contact Technical Support and they will add it for you.
In order for Signicat to connect to the eHerkenning Broker, you must provide us with these details:
- Your sales contract
- Self-Declaration (Zelfverklaring)
# Self-Declaration
The first step is to sign and send the Self-Declaration to us. To do this:
- Sign the Self-Declaration where you indicate to agree to the demands and agreements in the eHerkenning federation (opens new window) (in Dutch).
- Send this signed self-declaration to Technical Support.
- Perform this step for each service that you want to publish in the eHerkenning and/or eIDAS service catalogue.
# Certificate information
The Signicat Identity Broker must be configured with two certificates, one for pre-production and one for production. The certificates are used to cryptographically sign the messages between the Signicat Identity Broker and the eHerkenning/eIDAS network.
How to get the certificates
Check out the page Certificates in Identity Broker for a clear outline of the steps involved.
# eHerkenning settings
Once Technical Support adds eHerkenning to the list of authentication providers on your dashboard, you can now select it to activate it.
Adjust the settings as necessary and Save the connection.
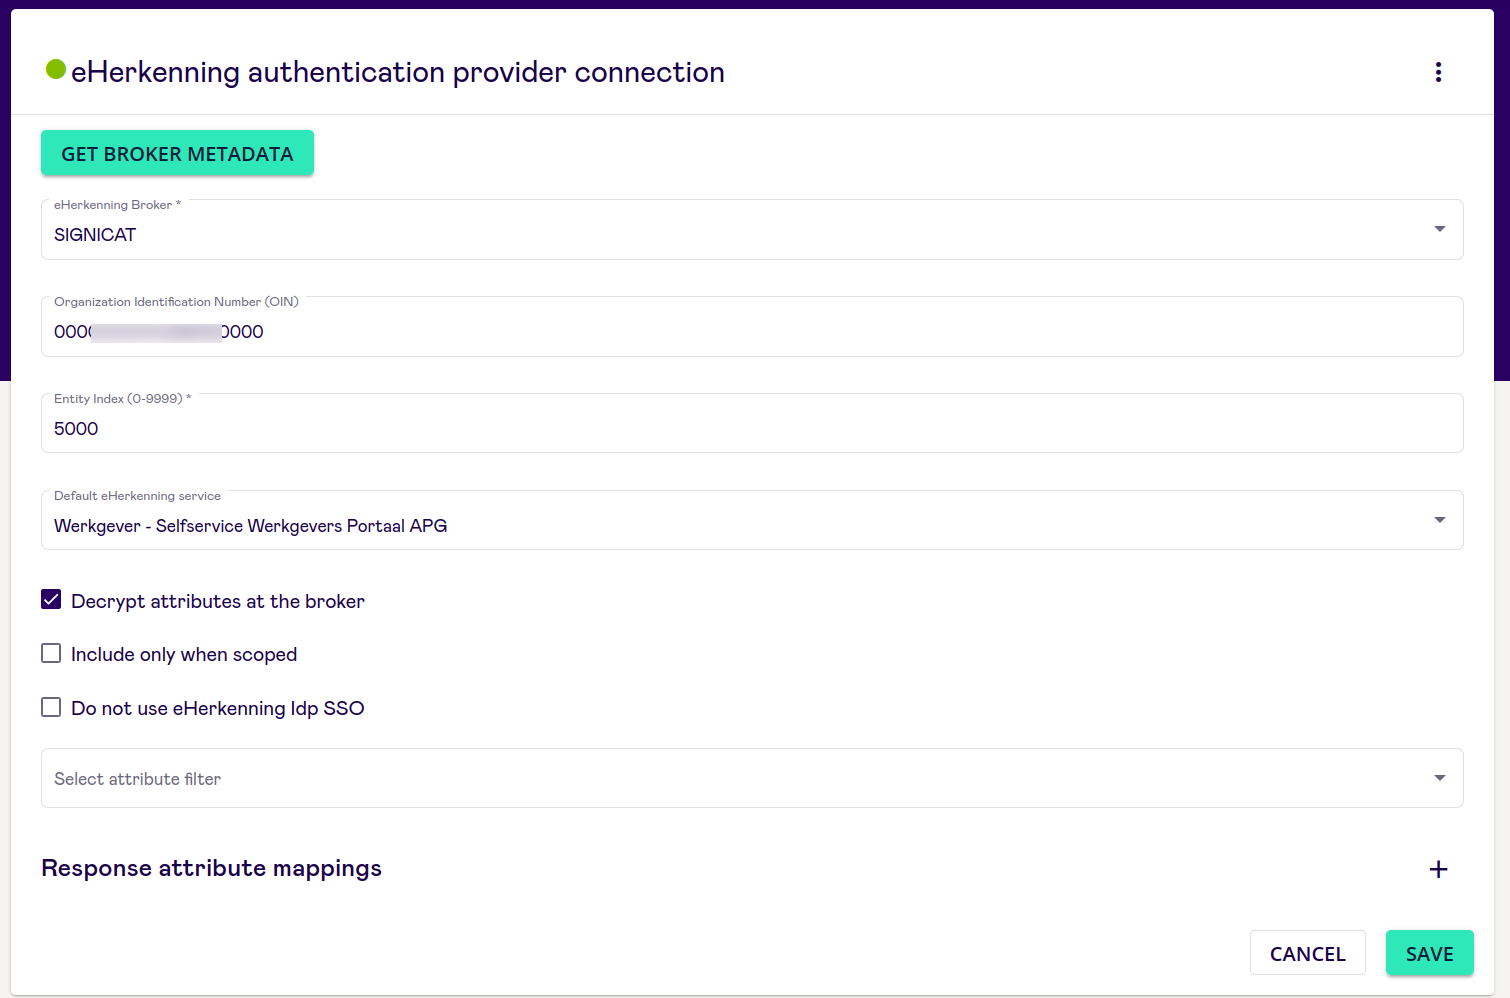
Below, you find more details about the settings:
- Organisation Identification Number (OIN): This will be automatically filled based on your certificate.
- Entity index: The connection index; Often 9001 for the test environment and 1 for the production environment.
- Default eHerkenning service: Once you have defined eHerkenning services, you are able to set the default eHerkenning service in this field. It is possible to set the default eHerkenning service, you will log in to this service if you do not specify any eHerkenning service in the Login Request
- Decrypt attributes at the broker checkbox: Check this checkbox if you want the Signicat Identity broker to do the decryption of the values for you.
- Include only when scoped checkbox: This indicates that the Authentication provider will not be visible on the Authentication Provider selection screen, but can only be reached by using IdP scoping.
- Do not use eHerkenning Idp SSO: Check this checkbox to always require that the user logs in. Also, the logout flow will redirect the user to your website instead of the eHerkenning IdP page, if you have configured the relevant logout URLs.
- Select attribute filter: Attribute filters allow you to filter out certain attributes to make the response more concise for further processing in your software.
- Response attribute mapping: Optional. Response attribute mapping allows you to choose the name of the attribute and thus use a standardised name that you receive in the response from the different authentication methods that are activated.
Discover Broker features
See Broker Features for more information.
# Broker Metadata
Once you save the configuration, press the Get Broker Metadata button and email the metadata in .xml format to Technical Support.
# Integrating eHerkenning through Signicat
When eHerkenning has been successfully added to the dashboard as an Authentication Provider choice, click Test to proceed.
You will then see the following screen:
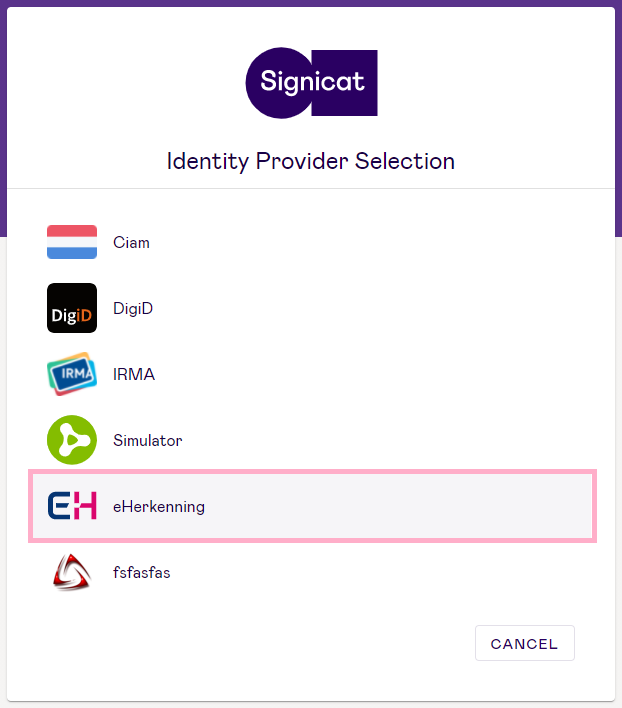
Note: If you use only eHerkenning as an Identity Provider and no others, this step will be skipped.
Select eHerkenning to be redirected to the eHerkenning login screen.
Service catalogue
Find out how to create and add the eHerkenning Service Catalogue.
# Communication
Once you have an eHerkenning connection, it is important to tell your customers about the new set-up in good time, so that they are ready for the change. They need to know that the way they log in is changing, and that they will need to have an eHerkenning login. Good internal and external communication is therefore essential.
eHerkenning and eIDAS communication guides
For more information, read the eHerkenning and eIDAS communication guides.
# Trial information
If you would like to see how eHerkenning/eIDAS works, you can request Signicat's free trial (opens new window).