Authentication Vault
You can save the data obtained during end-user authentication in the Signicat Authentication Vault.
The Authentication Vault allows you to store logs and personal data automatically after your end-users authenticate with an eID. The data is stored securely inside Signicat Digital Evidence Management (DEM) where you can manage and retrieve it using the DEM API.
This page explains how to configure the Authentication Vault and manage your records in the Signicat Dashboard.
How it works
In a typical authentication flow, you:
- Connect to an eID with an authentication protocol.
- Direct the end-user to the authentication server where they verify their identity online and share their data.
- Redirect the end-user back to your service.
- Send a request to retrieve the end-user's personal data.
In the scenario above, your application sends/receives a series of requests/responses to/from Signicat eID Hub servers. Typically, the data is only persisted temporarily for the scope of an authentication session.
The Authentication Vault allows you to store the response from Signicat eID Hub automatically in the DEM database. That way you can always access it later. The data is saved as records that you can retrieve with the DEM API.
You can configure the Authentication Vault to control the following:
- Obfuscating the national identity number.
- Applying Qualified timestamps.
- Limiting storage only to specific eIDs.
- Deciding how long the records should live in the DEM database.
The Authentication Vault allows you to store records obtained from connections with the following protocols:
- OpenID Connect (OIDC)
- Authentication REST API (only redirect flow)
Note that no data is stored when using SAML 2.0.
Prerequisites
To use the Authentication Vault, make sure you've completed the initial setup steps:
- Sign up to the Signicat Dashboard.
- In the Signicat Dashboard, set up an organisation, an account and a domain.
We advise that you create a sandbox account to test our solutions before implementing them in a production account.
To use the Authentication Vault in a production account, you must first purchase it together with the DEM product. When you are ready to do this, contact us by creating a support ticket in the Signicat Dashboard.
Permissions
The Authentication Vault stores data using the sensitive record type, as records contain personal user information.
To view, edit and create records from the Authentication Vault, make sure that your User and/or API client have the following permissions in the Dashboard > Access Management > Permissions:
- DemSensitiveViewer: Access to read sensitive records in DEM.
- DemSensitiveWriter: Access to read and write sensitive records in DEM.
- DemSensitiveEditor: Access to read, write and update sensitive records in DEM.
Additionally, you can add more permissions to manage the DEM records as explained in the DEM documentation.
Configuration
To enable and configure the Authentication Vault in your account, do the following:
- In the Signicat Dashboard, navigate to Products > eID Hub.
- In the left sidebar menu, expand Advanced, then select Authentication Vault.

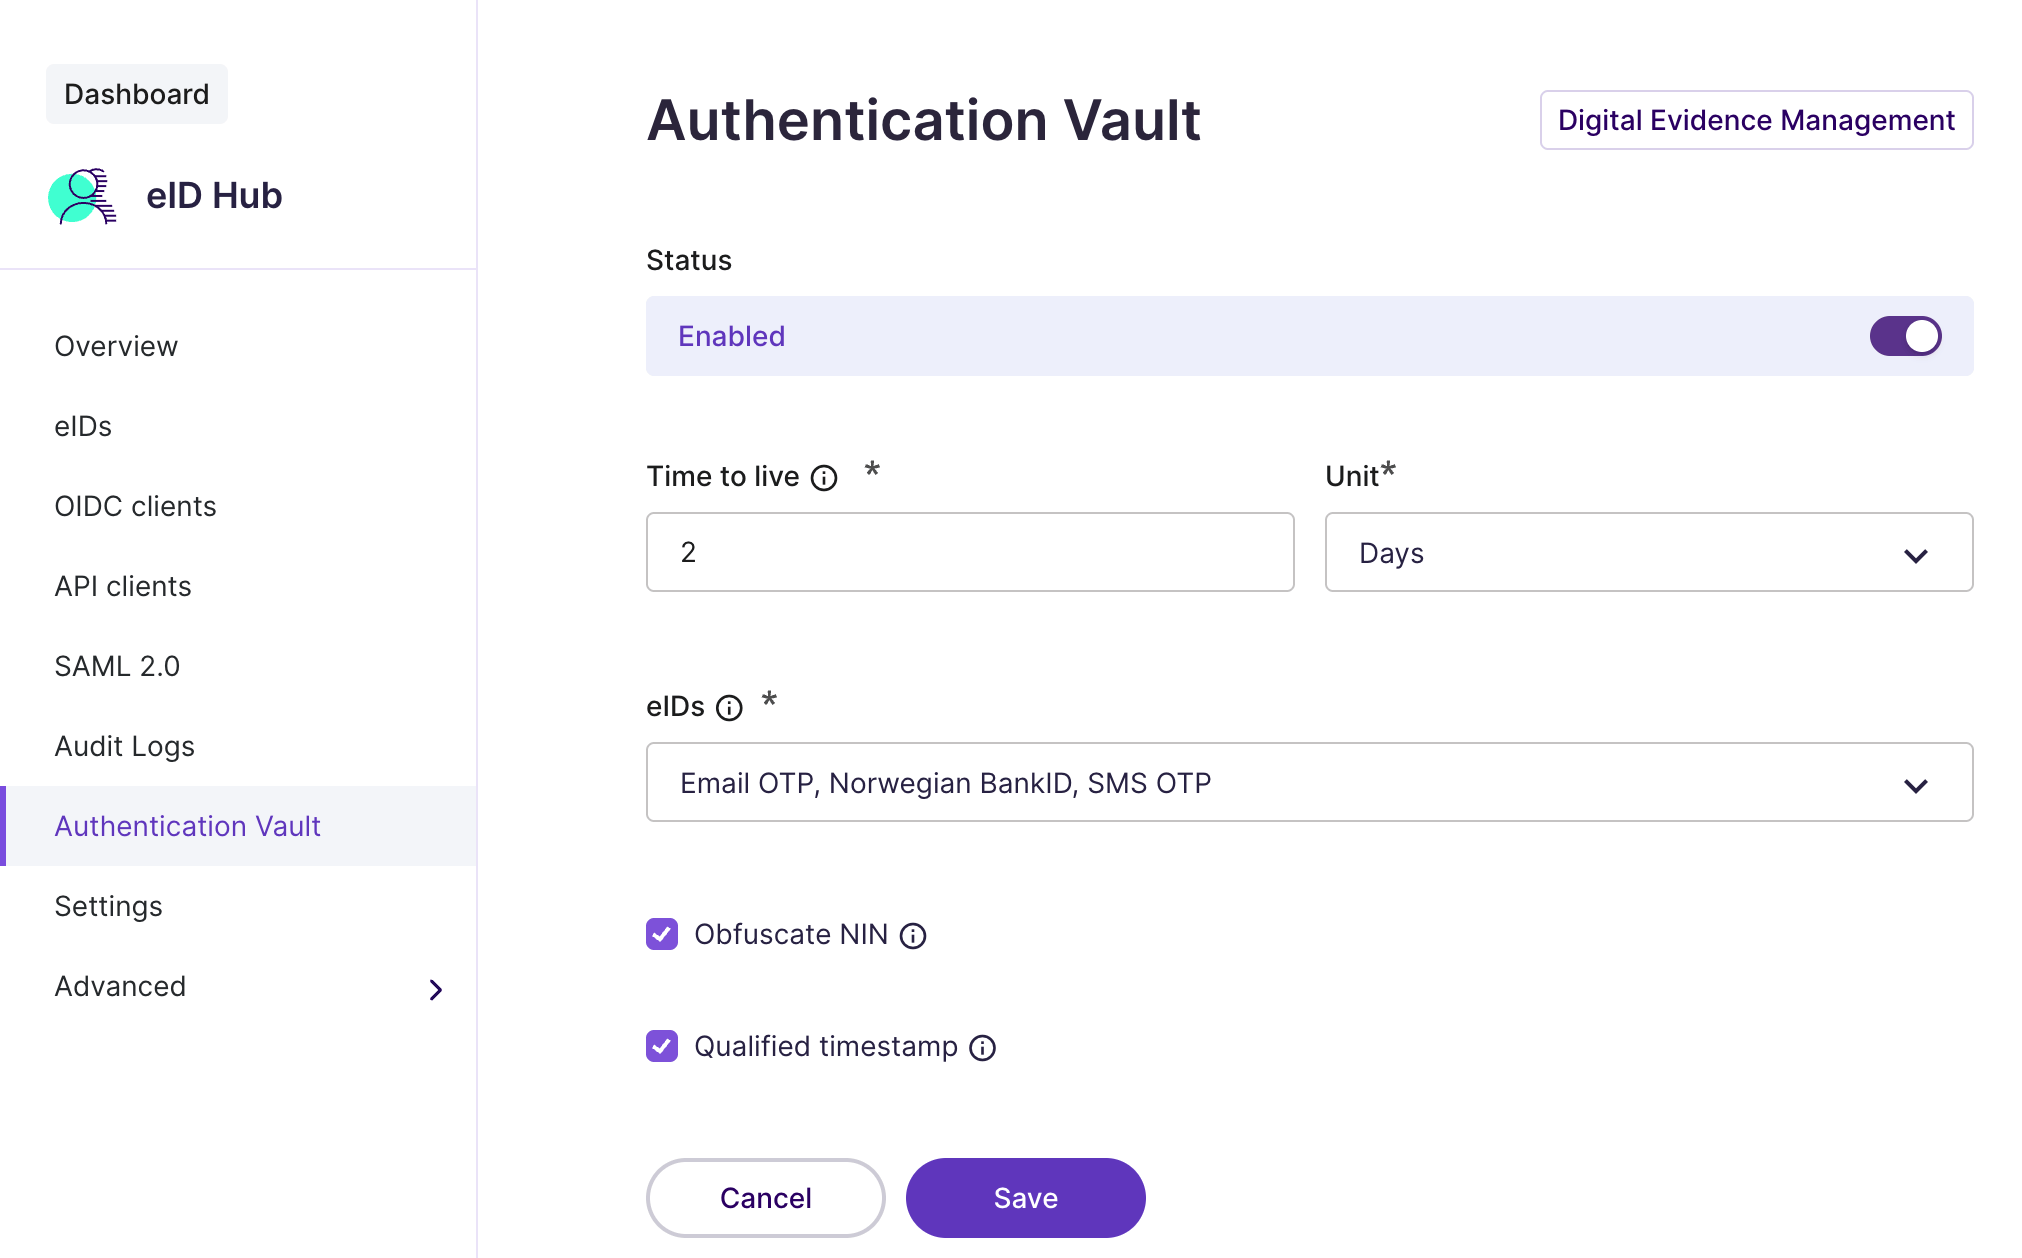
Authentication Vault in the Signicat Dashboard
In the Authentication Vault configuration page, set the following attributes:
Click Save to save the configuration and activate the Authentication Vault in your account.
After saving, try a test authentication flow to see what the authentication records look like in DEM, as explained in the next section.
Note that the configuration in the Authentication Vault page applies only to the Authentication Vault product. These settings do not affect the global configuration of Digital Evidence Management (DEM) in your account.
Authentication records
After you activate the Authentication Vault in your account, you can manage the data from end-user authentication in the Dashboard.
To view your records in DEM in the Dashboard, navigate to Products > Digital Evidence Management.
Example
Imagine that one of your end-users has just authenticated with your application using Norwegian BankID.
In this example, we use a test user:
and the following Authentication Vault configuration:
- Time to live (TTL)/Unit: 2 Days
- Selected authentication providers: Norwegian BankID
- Obfuscate NIN:
- Qualified timestamp:
After mocking an authentication using the test user with Norwegian BankID, you should see the record appear in the Products > Digital Evidence Management page. Select the record and expand the raw data (JSON).
Example raw data from DEM
{
  "id": "<RECORD_ID>",
  "metadata": {
    "searchAttribute": "b1a1f071-8273-e04c-82db-eb03d14d1228"
  },
  "systemMetadata": {
    "type": "SENSITIVE",
    "expiryDate": "2024-06-23T00:00:00Z",
    "createdDate": "2024-06-21T00:00:00Z",
    "createdDateTime": "2024-06-21T07:35:01Z",
    "createdBy": "<CLIENT_ID>",
    "auditLevel": "QUALIFIED"
  },
  "coreData": {
    "response": {
      "subject": "cpPchEZj4bUtjH6ZKXVmVD8COVKHzei7s9LPT2MCTM4=",
      "subjectType": "PERSISTENT",
      "issuer": "https://auth.current.bankid.no/auth/realms/current",
      "idp": "nbid",
      "loa": "high",
      "transactionId": "b1a1f071-8273-e04c-82db-eb03d14d1228",
      "attributes": [
        {
          "name": "nbidTid",
          "datatype": "string",
          "value": "2c3c8a87-0770-4f4a-972f-55420af38167"
        }
      ],
      "standardAttributes": {
        "name": {
          "fullName": "Gustavo Silva",
          "firstName": "Gustavo",
          "lastName": "Silva"
        },
        "nin": {
          "value": "***",
          "issuingCountry": "NO",
          "type": "BIRTH"
        },
        "dateOfBirth": "1908-09-29"
      }
    }
  },
  "timestampData": {
    "timestamp": "MIIJCzADAgEAMIIJAgYJKo...q9cpN2WSu5e/",
    "timestampValid": true
  },
  "relations": [
    {
      "relationID": "<RECORD_ID>",
      "type": "SENSITIVE",
      "_links": {
        "self": {
          "href": "https://api.signicat.com/dem/records/<RECORD_ID>"
        }
      }
    }
  ],
  "_links": {
    "self": {
      "href": "https://api.signicat.com/dem/records/<RECORD_ID>"
    }
  }
}
Note the following relevant fields:
Managing and retrieving records
You can manage your DEM records in the Signicat Dashboard and with the DEM API.
Using the Dashboard
To view and manage records in the Signicat Dashboard:
- Navigate to Products > Digital Evidence Management.
- Select a record.
- Now, you can view the data and manage the record:
- To view the raw data in full, select Expand lines.
- To download the record in PDF format, select Get report (PDF).
- To delete the record, select Delete. Then, confirm the action in the pop-up box.
Expiry dateWhen a record reaches the expiry date, it is deleted automatically and cannot be restored.
Using the DEM API
You can retrieve records from DEM using the DEM API. Learn more about connecting to the API and accessing records in the DEM API guide.
Useful links
You can read more about Digital Evidence Management in the documentation: